September 15, 2016

Build an Arduino Robotic Arm

If you love robotics this project is for you! Lifehacker have put together a fantastic set of instructions detailing how and why you should build your own robotic arm. Not only is building your own robotic arm super cool, but it is also fairly comprehensive in teaching you about lots of Arduino basics. Indeed, once you have built your robotic arm you will have learnt about controlling servos, bread boarding, Arduino coding and more. 

Robotic Arm

Depending on your interests you can modify your robotic arm so that you can control it using an IR remote control, over the internet or even using your Nintendo Wii remote! If building your own robotic arm sounds like something you would like to do check out the following link.

If you are looking to get started making your own robotic arm, why not check out our own ProtoShield for Arduino. The ProtoShield is an excellent tool to turn your temporary, breadboarded project into something more permanent. Proto Shields fit directly onto an Arduino board and have a large general purpose area in the middle where you can solder on your own parts to create a durable, long lasting project! The ProtoShield is a high quality, corrosion resistant gold plated PCB and represents great value at only $3! To find out more about our fantastic ProtoShield’s check out the product page.

Planning on building your own robotic arm? Let us know in the comments section below or on Facebook and Twitter.

September 14, 2016

Arduino Bike Computer

Most bike riders will have some sort of “bike computer” which tracks how far and fast they have been riding. Very few bike riders, however, would have a good idea of how their bike computer works! If you fall into this category, or just like the idea of making your own bike computer, this project is for you. The Arduino powered bike computer uses a reed switch mounted on the frame of the bike which is triggered every time a magnet on the spoke of your bike passes it, the Arduino counts how many rotations have occurred and calculates the distance you have travelled and displays it on an LCD. This is a really great project, it is easy enough to complete in a few hours, but challenging and useful enough to keep you interested! If you want to find out more about this project, check out the instructions written by electroguyz.  

Bike Computer

If you are looking for a rapid-use LCD for your Arduino bike computer why not check out the Freetronics LCD & Keypad shield. The shield contains a bright 16x2 character LCD and five buttons that can be read from only one analog input pin:

LCD Shield

Did I mention that you can play games on your LCD Shield? Check it out! Disclaimer: Freetronics advices that all customer avoid playing games on their Arduino bike computer whilst riding!


To find out more or to order checkout the product
page.

What did you think of this project? Let us know in the comments section below or on Facebook and Twitter.  

September 13, 2016

(Even More) New Stock!

Last week we announced that we had just received a shipment containing lots of new Freetronics stock.  We are very excited to let you know that we have just received another shipment with even more new stock! Items back in stock include our EtherMega4-Channel Relay Driver Module, Watchdog Timer Module, Accelerometer Module, Logic Level Converter Module, EtherTen and out PoE 28V Power RegulatorThere has never been a better time to start a new project! If you are struggling to think of project ideas have a browse through our blog.

EtherMegaRelay428V PoEEtherTen


Already working on  a project you want us to feature in this blog? Know someone who has been anxiously waiting for one of these products to come back in stock? Let us know in the comments section below or on Facebook and Twitter.

September 12, 2016

Monash University Robot Building Competition Video!

To follow up on last week's Robot Build Competition recap, Jon has produced a fantastic video highlighting the event. You can check it out below: 

2WD Robot Chassis
If participating in, or reading about this awesome robotics competition has inspired you to start creating your own robots why not check out the 2WD Robot Chassis Kit. This kit can provide a solid base for you to begin building whatever sort of robot you like! The lazer cut chassis includes mounting holes so that you can attach your own parts and design your robot to be exactly how you like it! To find out more or to order visit the product page

Inspired to build your own robot? Let us know in the comments section below or on
Facebook and Twitter.

September 11, 2016

Skill Sunday: Graphing Data From Arduino

This week on Skill Sunday we are going to be learning about how to visualise data captured using Arduino. As fantastic as the Arduino IDE can be, it doesn’t provide an easy way to graph data that you receive from sensor inputs on your Arduino projects. Wouldn’t it be awesome to be able to visualise in real time how the light levels inside your house have changed over time? Or be able to track fluctuations in temperature or humidity? Instructables member CrtSuznik has put together a neat set of instructions which outline how you can send data from your Arduino into Excel and visualise it. To find out more check out the following link.

Data Visualisation

Looking for a sensor so that you can begin capturing and visualising data? Why not check out the Freetronics Humidity and Temperature Sensor Module?

Humidity Sensor

The module only requires three wires: GND, power and data. This means that it is very easy to get started recording temperature and humidity data! The find out more visit the product page.  

Think that this was a useful skill to learn about? Have an idea for next weeks Skill Sunday? Let us know in the comments section below or on Facebook and Twitter.

September 09, 2016

Build Your Own Sumo-Bot

If you felt inspired to make your own robot after reading about the Monash University Robotics Competition, this project is for you! Instructables member tsunx has written a fantastic tutorial which outlines how you can can build your own Sum-Bot which can be programmed from your smartphone, sense enemy robots and follow a line.

SumoBot

This is a great project to develop your electronics construction skills and learn more about Arduino programing.  The project includes full schematics, design files and code examples so there is nothing to prevent you from getting started! To find out more checkout the following link or the video below. 

If you are looking for a bluetooth module to work on this project why not check out the Freetronics Bluetooth Shield?

Bluetooth Shield

Our Bluetooth Shield plugs right in to your Arduino and lets you send and receive data and commands from your sketches. You don't even need to do anything fancy in your sketches, because the Bluetooth link acts as a serial port: you just pair it with your computer, then you can simply use "Serial.read()" and "Serial.write()" as normal! The bluetooth shield can operate as a Bluetooth master or slave and is packed full of useful features. To find out more check out the Freetronics Bluetooth Shield product page.

What did you think of this project? Let us know in the comments section below or on Facebook and Twitter.  

September 08, 2016

DIY Arduino Catapult

Have you ever wanted to make your own catapult? Maybe you love the satisfaction of being able to send projectiles flying on your command, or maybe you genuinely have enemies you need to obliterate with your catapult! Regardless of your motivations, this is a fantastic and fun project. Instructables member cej12 has shared a detailed guide on how he created his own catapult.

Catapult

The catapult is controlled using an Arduino Uno which tells a number of servos how and when to set and launch your projectile. This is a great project to learn the basics of Arduino. You can find more details at the following link or check out the catapalt in action below: 


If you are looking for an Arduino to control your catapult why not check out our “Eleven” Arduino Compatible Board.

Eleven

The Eleven is just like an Arduino Uno (and 100% compatible), however the Freetronics team have made a number of improvements to the Arduino Uno design such as adding in a prototyping area, using a micro-USB connector and many more. These improvements mean that the Eleven is as easy to use as possible and is of the highest quality! To find out more about the fantastic Freetronics Eleven check out the following link. The Eleven has just come back into stock so order soon to avoid missing out!

Planning on building your catapult? Let us know in the comments section below or on Facebook and Twitter.  

September 07, 2016

Small Scale IoT Arduino Security System

Did you know it is possible to run an entire home monitoring and security system using only an Arduino?  Aaron Kow has done exactly this. However, rather than setting up his entire house, he has made a dollhouse sized model to demonstrate just how effective an Arduino can be to control and monitor your home.  

Small Scale Model

You can access data and control your demonstration smart home from any internet connected phone or computer. Aaron has come up with a very comprehensive guide for anyone who wants to emulate his project which you can find at the following link.

System Design

Undertaking a project like this could be a great way to develop your skills and confidence before you start working on a system for your entire house! Check out the video below to see the project in action!


If you plan on building your own dollhouse sized automation and security system you will most likely be needing a temperature and humidity sensor. Why not check out the Freetronics Humidity and Temperature Sensor Module? The module only requires three wires: GND, power and data. This means that it is very easy to get started recording temperature and humidity data! To find out more visit the product page.  

Humidity Sensor

Know someone who should start working on this project? Let them know in the comments section below or on Facebook and Twitter.

September 06, 2016

Joystick Controlled Labyrinth

Does your “labyrinth” game sit unused collecting dust on shelf? Is it too good to throw away even though you never use it? Why not bring your “labyrinth” into the 21st century! With this fascinating project from instructables member tripletray you can control your labyrinth using your Nintendo Wii controller and an Arduino (you can read more about using a Wii Controller with your Arduino here).

Labyrinth

At a basic level the Arduino reads inputs from a game controller which are converted into movement of the labyrinth plane using some servos. Not only does this project allow you to control your labyrinth using your Wii Controller, but it also includes a solenoid which automatically reloads to the ball to the starting position in the event of a (likely) unsuccessful run.  You can find full code examples and read about this project at the following link.

H-Bridge

If you are looking for a convenient way to interface your servo motors with an Arduino why not checkout our H-Bridge motor driver shield. A H-Bridge allows you to easily control the direction of your motors from within your code. Our own Dual Channel H-Bridge Motor Driver Shield allows you to drive two DC motors or a stepper motor. The Dual Channel H-Bridge Motor Driver Shield features PWM control, selectable current limits and a prototyping area to add your own parts. To find out more check out the Dual Channel H-Bridge Motor Driver Shield page.

To keep up to date with the latest news, projects and product announcements follow us on Facebook and Twitter.

September 05, 2016

Monash University Robot Building Competition

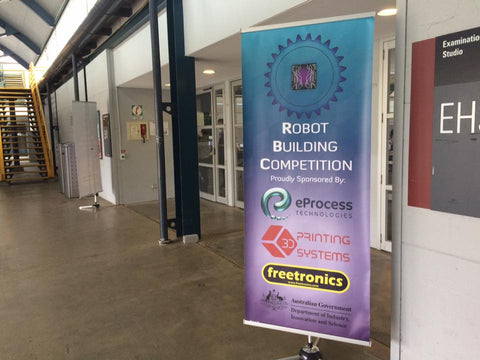
Freetronics was very proud to sponsor the 2016 Robot Building Competition at Monash University.

RBC 2016

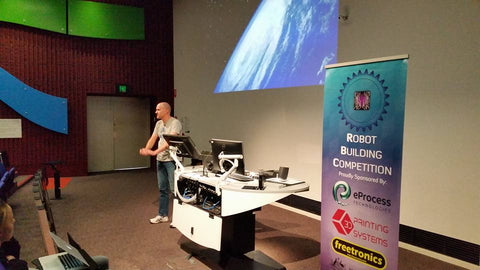
The competition, organised by the Society of Monash Electrical Engineers in collaboration with a number of other student clubs gave first and second year engineering students a unique opportunity to put what they have learnt during their studies to use in a practical setting. Prior to the competition weekend a number of tutorials were run which helped to develop competitors skills with Arduino and 3D printing, both of which were essential for the final competition. Additionally, our very own Jonathan Oxer was able to run a presentation for the students to provide them with a unique insight into real world projects in the electronics industry. 

Jon Oxer presentation

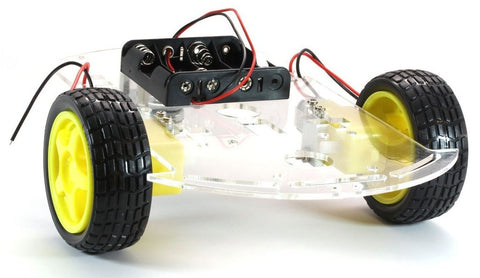
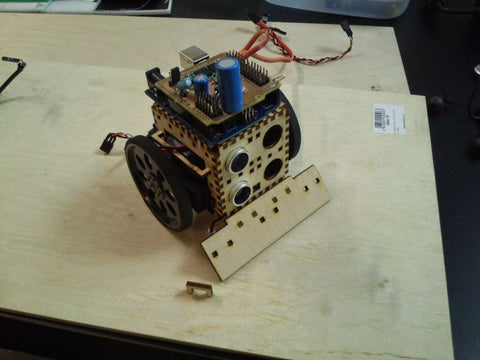
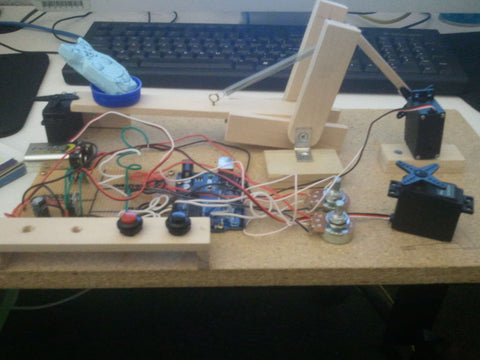
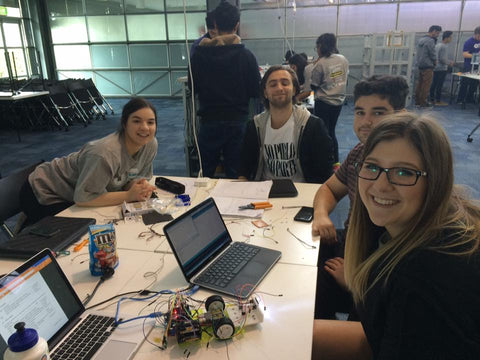
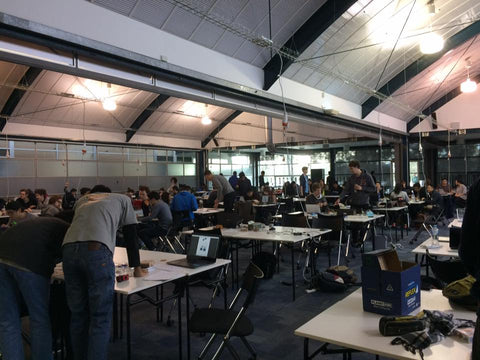
Once the competition weekend arrived, more than 150 competitors and volunteers descended on the Monash University electrical engineering labs and begun constructing and coding their robots. Working in teams of 4-6, the challenge was to build a robot which would follow a white line, stop at a number of randomly ordered coloured gates along the path, sense the colour of the gate and then transmit the corresponding code which which opened the gate. After passing through all of the gates the robot had to stop on a line of the same colour as the final gate. For first year engineering students who had never used an Arduino before this was quite a challenging task!

The competition

Teams hard at work

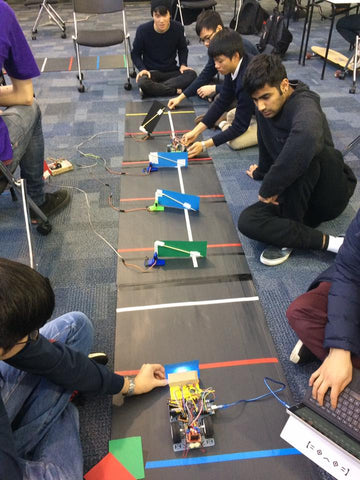
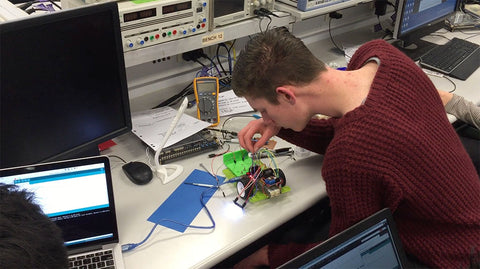
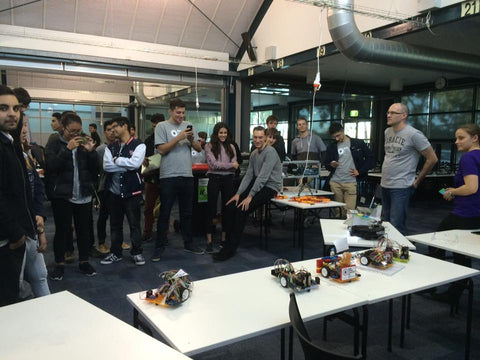
At the end of the first day not a single team had come close to completing the challenge. However, with time quickly passing on the second day and the competition heats edging ever closer, teams slowly started testing and refining their designs. There were a number of substantial challenges that teams faced along the way including trying to calibrate colour sensors despite the ever changing ambient light! As 1pm arrived with teams still frantically performing final modifications, it was time for the competition to begin.

RBC 2016

With many teams struggling to even come close to completing the challenge, by the end of the day it was very clear that there was only a handful of teams still vying for first place. It was decided that a grand final would separate the few remaining teams. So, after many test runs, disappointing failures and spectacular successes, the competition came to an end. It was time to present the prizes to the winning teams. Not only did the top four teams take home plenty of Freetronics loot, but the best looking robot also took out the “Freetronics Best Bling Award”.

Final Winners

Thanks to the Society of Monash Electrical Engineers for organising such a fantastic event. It was awesome to see so many enthusiastic and passionate students developing their skills and having heaps of fun along the way. Here at Freetronics we can’t wait for the Robot Building Competition 2017!

Competition hall

If you want to keep up to date with all things Freetronics, like us on Facebook and follow us on Twitter.