July 03, 2014

Build an Android-controlled Tank Robot with Arduino

Although the thought of such a project may seem complex, when you break it down into small parts it is quite easy. This is exactly what Instructables user Angelo ASCAS has done with his Arduino-powered tank robot. By using a large chassis and tank track system there's plenty of room for expansion as well, including an IP camera that broadcasts live images back to a PC and larger batteries for extended run time.

The remote control is via a custom Android app however it's just sending serial commands over a Bluetooth link so you can either create your own Android App or a hardware-based solution with another Arduino. The results of this project are excellent and shown in the following video:

To find out how this was made, check out the project Instructable page. And for more, we're on facebookGoogle+, and twitter - so follow us for news and product updates as well.

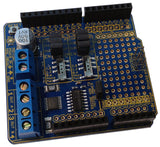
 If you're looking into starting with Arduino and robotics, such as controlling a stepper motor (or DC motors) from your Arduino or compatible, check out our new HBRIDGE: DC/stepper motor shield. Based around the powerful Allegro A4954 H-bridge driver IC you can control two DC motors with complete ease, or one bipolar stepper motor. With connections for external power management, a complete beginners' guide and documentation - motor control couldn't be any easier. For more information and to order, visit the HBRIDGE: page.

July 03, 2014

Launching model rockets with an Arduino-powered controller

Model rocketry is an incredibly fun hobby, and can find much synergy with the world of Arduino and electronics. One example of this is by Chris Hall who has created a model rocket launcher based around the Arduino platform, and made it much more interesting than a simple "go" button.

His launch device includes a key switch for safety, a nifty countdown timer with sound effects and the delay can easily be adjusted with a knob. Finally along with the 3D-printed rockets, Chris printed the enclosure for the launch unit - which is demonstrated below:

And for some fun, we can see the rockets being launched in the following video:

You can find the Arduino sketches, schematics and 3D design files for the enclosure in the project's Instructable page. And for more, we're on facebookGoogle+, and twitter - so follow us for news and product updates as well.

If you're looking for an Arduino Uno-compatible board for various projects, choose what tens of thousands of others have done and use our Freetronics Eleven - the Arduino-Uno compatible with low-profile USB socket, onboard prototyping space and easy to view LEDs: 

July 02, 2014

Building your own LED Cube with Arduino

If you have plenty of spare time, steady hands and lots of LEDs it's always fun to make your own LED cube, and a neat example of this has been demonstrated by Instructables member laurenk. This version relies on some intense LED multiplexing, and the instructions are quite helpful both explaining how to use a jig to keep the LEDs straight and the use of an enclosure to mount the cube and hide the rest of the electronics. A quick demonstration is shown in the following video:

Furthermore the sketch uses a series of binary numbers to address each LED, and with some though many types of effects can be created. So to get started, check out the project Instructable page. And for more, we're on facebook, twitter and Google+, so follow us for news and product updates as well.

If you're interested in making not only an LED cube - but an RGB LED cube - check out our CUBE4: RGB LED cube kit:


It's easy to construct and use, and with an onboard Arduino-compatible board the cube can be used to display all sorts of data or create visual effects. It's easily controlled via simple text commands via the USB port - or write your own Arduino sketch. It's incredibly customisable and there's so much more. For more information and to order, visit the CUBE4 page.

July 02, 2014

Reverse engineering wireless weather sensor RF data

There's a plethora of wireless weather sensors and stations on the market, and each of them usually has a nice display which shows basic data but doesn't allow for any analysis over time. Thus there is often a need to find a way to capture and work with the data. This is possible with the Arduino platform with some time and a little research using the methods described by the Ray's Hobby website.

They first explain how to receive signals using a 433 MHz receiver shield, and then take you even further into analysing the signal from the sensors as well as the raw waveform. With this data you can generally decode the data and determine what the values are in order to write your own decoding software. This is a great tutorial due to the variation in sensor types and lack of open documentation.

So to get started, check out the tutorial website. And for more, we're on facebook, twitter and Google+, so follow us for news and product updates as well.

If you're looking to work with your own RF wireless hardware, but don't want to make your own receiver circuit - check out our range of  315/433 MHz receiver shields:

Apart from being idea for working with the various low-cost data links on the market, the shield can also be used to capture wireless weather station data, as described in the book "Practical Arduino". For more information and ideas, check out the product page.

July 01, 2014

Build your own mini Arcade Game cabinet with Raspberry Pi

Thanks to the power of the Raspberry Pi mixed with an enthusiastic gaming community, it's possible to play all sorts of emulated video games on the Pi. However there's nothing like smashing out a few sessions of Galaga or Wonder Boy with full-sized controls - so a solution to his has been created by Ryan Bates with his "Porta Pi".

His system uses easily available arcade control buttons and a joystick back to the Pi, which is mounted inside a neat laser-cut enclosure with a small colour LCD. As you can see from the video below it's compact and also quite authentic:

Any Raspberry Pi enthusiast who is handy with some tools will be able to recreate this, and for more information check out the detailed videos on the project Instructable page. And for more, we're on facebooktwitter and Google+, so follow us for news and product updates as well.

If you'd rather have a smaller video display for your Raspberry Pi - consider our128x128 pixel OLED Module. With a diagonal size of 1.5" and 16,384 colours to select from, so almost anything is possible. With the extra OLED shield fitting is a breeze. Furthermore there's a microSD card socket, and removable tabs on each side which can hold LEDs and buttons:


And using the module is made simple - we have tutorials and drivers for both the Arduino and Raspberry Pi platforms - great for experimenters or those who use both systems. Furthermore, check out the forum where members are already creating modified drivers to rapidly increase the display speed. For more information including our Quickstart guides - and of course to order - visit the OLED Module product page.

July 01, 2014

Create huge RGB LED displays with Arduino

When you have a few metres of RGB LED strips it's possible for your imagination to take off and want to create all sorts of displays. This is certainly possible with the Arduino platform and the following project by Darrenlloyd Gent is a great example. His display uses ten rows of thirty RGB LEDs to act as a large display.

It can display text, graphics stored on a memory card, animations, data from the Internet and much more. This project could be used as the framework for a much larger display - only limited by the speed and memory available in your particular board. For a great project rundown, check out the following video:

Very well done - and you can learn more plus examine all the code and notes from the project website. And for more, we're on facebookGoogle+, and twitter - so follow us for news and product updates as well.

If you're looking to recreate this project and need an Arduino Mega board, microSD card socket and Ethernet - check out our EtherMega:

Quite simply the EtherMega is the fully-loaded Arduino-compatible board on the market today. Apart from being completely Arduino Mega2560-compatible, it includes full Ethernet interface, a microSD card socket, full USB interface, optional Power-over-Ethernet support and still has a circuit prototyping area with extra I2C interface pins. So if your project is breaking the limits, upgrade to the EtherMega today.

June 30, 2014

Build a handheld "Snake" game with Arduino

After bringing his portable Arduino-based Tetris game to life, Nick Lim returns with a version that plays another classic game - Snake. Relive the fun of possibly your first Nokia GSM handset but on a larger scale (just).

The hardware is based on a small Arduino-compatible board and two bicolour LED matrices driven by MAX7219 display driver ICs - and the Tetris game can also run on this hardware. A quick demo of Snake is shown in the following video:

For complete details on making your own version, check out Nick's Instructable page. And for more, we're on facebookGoogle+, and twitter - so follow us for news and product updates as well.

Need a small Arduino-compatible for use with your own projects? Then check out out our LeoStick. It's the Arduino Leonardo-compatible board that's cheaper and smaller than the original:

 Apart from being one of the smallest Arduino-compatibles on the market with USB, it also has an onboard RGB LED and piezo which can be used a knock sensor and various tune and sound effects. Plus you can add extra circuitry with the matching protostick! For more information and to order, click here.


June 30, 2014

Two-player Tetris with the Raspberry Pi

If there's one thing better than a good game of Tetris, it's sharing the fun with another player. Years ago it was possible with two Nintendo Game Boys and the link cable, but now you can reproduce it yourself with two identical Raspberry Pi setups and some excellent software by Michal Sienkiewicz and the "Tetris Duel Team".

They've documented how to wire up original NES hand controllers to a Raspberry Pi, and this wil suffice for single-player mode. However a pair the described hardware can be linked together via GPIO pins to create the dual-player version as shown in the video below:

For the coding enthsuiasts - the game was written in bare ARM assembler, and you can download the binaries and instructions to play yourself from the project github page. And for more, we're on facebookGoogle+, and twitter - so follow us for news and product updates as well.

Every day we find more uses for our PiBreak board - the great way to mount circuitry to your Raspberry Pi. It provides labelled breakout pins for all GPIOs, a large prototyping area with solder pads, and power rails for easy power connection:

Furthermore the PiBreak also includes mounting hardware to firmly attach it to your Raspberry Pi using a nut, bolt, and spacer - and is compatible with all revisions of both model A and B Raspberry Pi computers. For more information about our new PiBreak board, our Getting Started guide, and to order - visit the product page.

June 27, 2014

Add RFID access to your door with Arduino

Keyless entry to the home or other space is always convenient and secure, provided you can control the RFID cards or tags required. If so, an interesteing hack of an electronic deadbolt system has been documented by Instructables member jeepdude48507 which shows how easy it is to use RFID with Arduino to create usable solutions.

By using a commercially-available electric deadlock most of the work is done, you just need to install the RFID and Arduino hardware, which can then tap into the deadbolt's motor control and thus activate it when required. You can register over two dozen RFID cards to allow for many people, and with a little effort add a real-time clock IC and SD card in order to log the access (and attempts) for later perusal.

Home automation is possible, as shown by this project. To learn how, check out the project Instructable. If you're interested in home automation, check out our sister site Superhouse.tv. And for more, we're on facebook, twitter and Google+, so follow us for news and product updates as well. 

If you're looking for a fast way to interface RFID readers with your Arduino or compatible board on a larger scale, check out our new DLOCK RFID Door Lock Shield. It's a fantastic and simple method of interfacing a variety of RFID readers and an electric door strike to your Arduino-compatible board. The design is based on the circuit described in the "RFID Access Control System" project in the book "Practical Arduino", and the shield arrives in assembled form to save time and effort:

With the DLOCK shield you can easily interface common RFID readers such as ID12, ID20, RDM630, RDM880 and HF MultiTag readers. Furthermore there's status LEDs, power jumpers for door strike power and plenty of space for extra on-shield circuitry. For more information and to order, please visit the DLOCK page.

June 27, 2014

Get retro-computers connected to the Internet with a Raspberry Pi

A few of us here are fans of retro-computers (that us, 8-bit machines from the 1970s and 80s) and we're amazed at the following technique described by Chris Osborrn which uses a Raspberry Pi to help get these clasic machines connected to the Internet.

The first hurdle is finding a machine with a serial port that would have connected to a dial-up modem to run and some useful software, for example a telnet client, BBS software etc. The next step is get get an RS232 or matching serial to USB cable, whose type will depend on your original computer.

Once you've completed that part the next is easy - get a Raspberry Pi and the TCPSSER software installed onto it. Chris explains this and then shows how the RPi can emulate a dial-up modem with full AT commands to the old computer.

Then it can simply "dial up" but instead of ATDphonenumber you simply use ATDhostname:port. For more on this method and some other retro-goodness, check out Chris's interesting website. While on this topic, consider the following video with Lon Seidman who demonstrates this process working by running a BBS on an Applie II system:

Certainly something different for the upcoming weekend. And for more, we're on facebookGoogle+, and twitter - so follow us for news and product updates as well.

If you're looking for a more permanent way to mount circuitry to your Raspberry Pi, check out our PiBreak - the prototyping board for the Raspberry Pi. It provides labelled breakout pins for all GPIOs, a large prototyping area with solder pads, and power rails for easy power connection:

Furthermore the PiBreak also includes mounting hardware to firmly attach it to your Raspberry Pi using a nut, bolt, and spacer - and is compatible with all revisions of both model A and B Raspberry Pi computers. For more information about our new PiBreak board, our Getting Started guide, and to order - visit the product page