July 10, 2014

Create huge interactive Arduino-powered 3 x 3 game boards

Making your own "Simon" or Tic-tac-toe games is a fun way of learning about Arduino and playing some games with the result, however the prototype-style games often don't last for more than a few hours. The next step in the process is to create a more permanent version with an enclosure, and this has been taken to the next level by Robert Polzer.

His creation is a huge 3 x 3 illuminated button matrix, that also contains an audio playback module for speech and game notifications. The electonics are quite simple, and the LEDs and buttons are connected in a method that don't require any external control ICs. It may seem like a lot of work however the results are excellent, as shown in the video below:

For more details including the Arduino sketch and circuit schematic, visit Robert's github page. And for more, we're on twitter and Google+, so follow us for news and product updates as well.

If you're looking to make your own colourful LED-based project, consider our Freetronics RGBLED: full colour module. It includes a bright RGB LED on the top of the board and a WS2801 constant-current, addressable, multi-channel LED driver on the back. This smart module can be daisy-chained, so you can connect a number of these together in a string and drive each of the module colours individually from your microcontroller. For more information and to order, visit the product page.

July 10, 2014

Add realistic engine sounds to RC vehicles with Arduino

Enthisiasts of the world of scale modelling will go to great lengths to ensure the accuracy of their models, both in look and operation. However for remote-controlled vehicles the missing element can often be the actual sound of the real thing. This was Nick Ward's problem and by creating an Arduino-powered solution his model vehicles now have an extra dimension of realism.

By using a simple PCM audio sample, the Arduino can play back the sound with a speed based on a signal received from the RC electronics, and further examples are demonstrated that are more interactive and realistic. These are explained in some detail through the following interesting video:

For more informatio, sketches and so on - visit Nick's github page. And for more, we're on facebookGoogle+, and twitter - so follow us for news and product updates as well.

Need a small Arduino-compatible for use with your own projects? Then check out out our LeoStick. It's the Arduino Leonardo-compatible board that's cheaper and smaller than the original:

 Apart from being one of the smallest Arduino-compatibles on the market with USB, it also has an onboard RGB LED and piezo which can be used a knock sensor and various tune and sound effects. Plus you can add extra circuitry with the matching protostick! For more information and to order, click here.

July 09, 2014

Build an Arduino 4WD with inexpensive PVC pipes

Making your own robots and remote-controlled cars is a lot of fun, however in some areas the cost of a decent chassis can put the project out of reach. To solve this problem, Instructables member tominjose has used inexpensive PVC piping as the chassis for his 4WD with great success.

Each motor fits comfortable within the pipe diameter, and the design of the structure also allows much of the wiring to be hidden from the elements. The four motors are controlled with external driver ICs, and the addition of a Bluetooth slave receiver module allows remote control of the robot from an Android device using a free app. A neat demonstration is provided in the following video:

A great project with a lot of potential - and you can find the instructions and sketch in the Instructable page. And for more, we're on facebook, twitter and Google+, so follow us for news and product updates as well.

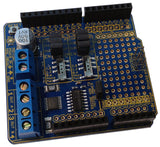
 If you're looking into starting with Arduino and motor control  - check out our new HBRIDGE: DC/stepper motor shield. Based around the powerful Allegro A4954 H-bridge driver IC you can control two DC motors with complete ease, or one bipolar stepper motor. With connections for external power management, a complete beginners' guide and documentation - motor control couldn't be any easier. For more information and to order, visit the HBRIDGE: page.

July 09, 2014

Excellent 3D-printed case for the Freetronics EtherMega

Now and again we come across various custom-made enclosures for our products, and recently we've discovered a new 3D-printed version on Thingiverse by member Sam People. They've used the popular new K8200 3D printer set to a layer height of 0.3mm to generate a neat enclosure for the EtherMega. Like any open-source design it's still a work in progress, however the examples provided are quite promising, for example:

Kudos to the creator for providing the files, of which you can download from Thingiverse. And for more, we're on facebook, twitter and Google+, so follow us for news and product updates as well.

So what is an EtherMega anyway? Quite simply the most fully-loaded Arduino-compatible board on the market today. Apart from being completely Arduino Mega2560-compatible, it includes full Ethernet interface, a microSD card socket, full USB interface, optional Power-over-Ethernet support and still has a circuit prototyping area with extra I2C interface pins. So if your project is breaking the limits, upgrade to the EtherMega today.

July 08, 2014

Saving audio to SD card with an Arduino Mega

Although you may not have thought this was possible with an Arduino alone, an Arduino Mega can in fact record analogue audio to a memory card in real time. This process has been researched and demonstated by Richard Patterson who enables a Mega to capture 8-bit mono audio with a sampling rate of 9.4kHz.

Some external circuitry is required to attenuate the incoming signal, and the Arduino sketch is an interesting learning exercise in timer interrups and analogue-to-digital conversion. Furthermore the audio can be saved in numeric values to be analysed with other software if required.

Overall this is an interesting exercise and well worth studying if you're interested in pushing the limits of your Arduino - so visit Richard's Instructable to get started. And for more, we're on facebookGoogle+, and twitter - so follow us for news and product updates as well.

If you're looking to recreate this project and need an Arduino Mega board, microSD card socket and more - check out our EtherMega:

Quite simply the EtherMega is the fully-loaded Arduino-compatible board on the market today. Apart from being completely Arduino Mega2560-compatible, it includes full Ethernet interface, a microSD card socket, full USB interface, optional Power-over-Ethernet support and still has a circuit prototyping area with extra I2C interface pins. So if your project is breaking the limits, upgrade to the EtherMega today.

July 08, 2014

Build an Arduino-powered Jar Chandelier

If you have a bunch of jars laying about, or looking for an avant-garde form of lighting then consider the following project by Instructables member funelab. They've fitted RGB LEDs inside jars with a simple mount, all of which are controlled via an Arduino-compatible circuit.

The system can be battery operated for convenience, however a licensed electrician could help with wiring the controller to the main circuit. Once completed you can use your imagination to create vairous lighting effects, or create an interactive display based on data from a temperature, light or sound sensor. In the meanwhile, a montage of creation and operation is shown in the following video:

For a detailed explanation of the chandelier, visit the project's Instructable page. And for more, we're on facebookGoogle+, and twitter - so follow us for news and product updates as well.

If you're interested in experimenting with RGB LEDs as demonstrated above, we're offering large and bright 8mm diameter RGB LEDs:

They're in the common-anode format and look great when lit up. Ideal for colour-mixing and creating displays of all sorts. For more information and to order, visit the product page

July 07, 2014

Adding an Arduino-controlled tachometer to a Ford Fiesta

In some markets Ford is including new ways of end users to receive real-time data feeds from the vehicle's data bus and use it for their own devices. One example of this is demonstrated by Pete Mills who harnesses the RPM data of his Ford Fiesta Ecoboost and built a visually-appealing tachometer that interfaces via Bluetooth.

Making your own display gives you options only limited by your imagination, and in this case Pete used a ring of RGB LEDs to display the current engine speed and also the previous history back a few moments with a decaying display of maximum RPM. This is demonstrated well in the following video:

Furthermore the use of a 3D-printed enclosure concludes what is a great project. Kudos to Ford for introducing the ability for the end user to work with the car's information without any "hacking", and to Pete for his interesting project. You can learn much more through his project website. And for more, we're on facebookGoogle+, and twitter - so follow us for news and product updates as well.

Need a small Arduino-compatible for use with your own projects? Then check out out our LeoStick. It's the Arduino Leonardo-compatible board that's cheaper and smaller than the original:

 Apart from being one of the smallest Arduino-compatibles on the market with USB, it also has an onboard RGB LED and piezo which can be used a knock sensor and various tune and sound effects. Plus you can add extra circuitry with the matching protostick! For more information and to order, click here.


July 07, 2014

Mr Hobbyelectronics reviews the Freetronics TEMP Temperature Sensor Module

Now and again we see our products "out in the wild", and another example has been reviewed by a popular video blogger My Hobbyelectronics - who checks our our TEMP: digital temperature sensor module.

In his video Nick shows just how easy it is to add accurate temperature-sensing to your Arduino or compatible board, and you can literally have it working in under five minutes. Check out the following video to see what we mean:

Kudos to Nick for another interesting video. For this and other interesting videos related to the Arduino, Raspberry Pi and technology world - subscribe to Mr Hobbyelectonics' YouTube channel. And for more, we're on facebooktwitter and Google+, so follow us for news and product updates as well.

Have you used a Freetronics product and shown the world? If so - we'd love to hear about it - please email support at freetronics.com or show off in the Project Showcase!

July 04, 2014

The Arduino-powered Skittles and M&M's Sorting Machine

And now for something that seems incredibly complex but is quite the opposite - a device that can sort Skittles or M&Ms into separate colours. Thanks to the availability of inexpensive colour sensors, this device can control the flow of candy as they approach - determine the colour, then move a servo-controlled chute to the appropriate colour's cup.

The work behind the project is mostly the 3D-printer parts and assembly, however the electronics are quite simple and could be gathered for less than a hundred dollars. It made a great educational project and I'm sure lives to this day to amuse and feed onlookers. Here's the sorter in full operation:

For an very-well documented explanation of the device, visit the sorter's website. And for more, we're on facebooktwitter and Google+, so follow us for news and product updates as well.

If you're looking to learn how to use an Arduino to sense and control certain environments, you can't go past "Arduino Workshop -  A Hands-On Introduction with 65 Projects” by John Boxall.

Arduino Workshop takes the reader from having zero knowledge about the Arduino platform, electronics and programming and leaves them with the know-how and instructions on everything from blinking an LED, to robotics, wireless data, cellular communications, motor control, sensors, Internet connected systems and more. For more information including a sample chapter and table of contents, visit the book page.

July 04, 2014

Add voice-recognition control to your Arduino with an Android device and Bluetooth

Adding voice-recognition to an project is generally out of reach of most development boards unless an external voice-processor IC is used - whose cost will often outweight the usefulness of the final project. However a new method has been described by prolific Instructables member Angelo Casimiro who uses inexpensive Bluetooth link modules and a regular Android phone.

The process is quite simple - the particular free Android app converts certain voice commands to serial text which is transmitted via Bluetooth. This can then be received by the matching receiver connected to the Arduino and then acted upon depending on the instructions in the Arduino sketch. So all the heavy lifting is done by the Android device, which can be acquired for a very small cost. Angelo gives us a quick demonstration in the following video:

A very clever and inexpensive method of voice control. You can find all the details including the sketch and app link from the project Instructable page. And for more, we're on facebookGoogle+, and twitter - so follow us for news and product updates as well.

If you need to add external hardware or devices to your next Arduino project, you'll need a protoshield to mount the external circuitry. In doing so, consider our range of ProtoShields. From the tiny LeoStick to the Mega we have a wide range to suit your application.