June 26, 2014

Test your reaction time with the Arduino Light Game

For those interested in playing quiz games, or testing their reaction times with others (perhaps in combination with a few drinks) then the project by Efstathios Lymperidis and
Thodoris Bais will be a lot of fun. Their system allows for four users, each of which have a coloured button matching an LED. When one of the LEDs illuminates the time between that and the user pressing their button is measured and calculated into a score.

Apart from the gaming element the project is an interesting example of dual-Arduino projects, in that one board is the master along with the button controls - and the other Arduino runs the TFT screen for score display, with the two Arduinos communicating over the I2C bus. A quick demonstration of the game is shown in the following video:

For all the details, schematics and sketch visit the project home page. And for more, we're on facebookGoogle+, and twitter - so follow us for news and product updates as well. 

 Have you been reading about Arduino and would like to understand more so you can work with projects like the example above, but not sure where to start? Then order one of our Experimenter's Kit for Arduino: 

The package includes a wide variety of parts, sensors and modules including: a servo motor, lights, buttons, switches, sound, sensors, breadboard, wires and more. Furthermore a Freetronics Eleven Arduino-compatible board is included to make this an extensive hobby experimenter, inventor and starter kit. 

However we don't leave you alone to figure it all out, included is a great project and instruction booklet, plus access to a supporting web page and software examples. In other words - this is everything you need to get started for a fun range of electronics and Arduino related projects! So to get started or for more information and to order, check out the product page.

June 26, 2014

Determine your Raspberry Pi's IP address with audio

Those of you who use Raspberry Pi computers in a display-free headless mode will know that you need to know the IP address of the RPi on the network before you can tap int with your SSH client. There are methods of probing the network to find out the IP address, however a fascinating solution has been documented by the folks from Interlock Hackerspace in Rochester, New York.

Their method uses a combination of software including a script to run on the Pi at startup to determine its IP address, then pass this to text-to-speech software. And by leaving a pair of inexpensive earphones plugged into the audio socket, you can simply listen for the IP soon after the Pi has booted up. Genius.

To learn how it's done, check out the interesting Interlock website. And for more, we're on facebook, twitter and Google+, so follow us for news and product updates as well.

If you'd rather have a compact video display for your Raspberry Pi - consider our 128x128 pixel OLED Module. With a diagonal size of 1.5" and 16,384 colours to select from, so almost anything is possible. With the extra OLED shield fitting is a breeze. Furthermore there's a microSD card socket, and removable tabs on each side which can hold LEDs and buttons:


And using the module is made simple - we have tutorials and drivers for both the Arduino and Raspberry Pi platforms - great for experimenters or those who use both systems. Furthermore, check out the forum where members are already creating modified drivers to rapidly increase the display speed. For more information including our Quickstart guides - and of course to order - visit the OLED Module product page

June 26, 2014

Controlling AC power outlets with lasers

There are many forms of remote control methods, including infra-red, RF wireless data, thowing a tennis ball at a switch and so on - but the following project is the first time we've seen it done with lasers. Yes - Instructables member XicoMBD has described a method that uses an Arduino compatible circuit to measure the values from a light sensor - and when there's a large chnage in the value (from having a laser pointed at the sensor), the state of a relay is changed and thus a remote control with a difference is born.

It's a novel and potentially dangerous method but different all the same. To minimise the mains-related wiring the creator has hacked into an outlet with circuitry to control the mains-rated relay (from a wireless RF outlet) however an Arduino can also control a relay directly with the appropriate circuitry. For a fun demonstration of the system check out the following video:

For complete details about the project, visit the Instructable page. And  for more, we're on facebook, twitter and Google+, so follow us for news and product updates as well.

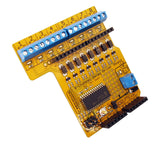
If you're looking for a simple way to control many relays from your Arduino, without using up all your digital I/O pins - check out our Relay8:  driver shield:

So what is the RELAY8:? It's an Arduino shield that allows you to drive up to 8 relays from your Arduino using just 2 I/O pins with this shield. It communicates with your board using I2C, so you can even stack several shields together to drive 16, 24, or more outputs! Includes back-EMF protection and works with a wide range of relays. Perfect for home automation projects! For more information and to order, click here

June 25, 2014

Using the Raspberry Pi's hardware random number generator

Generating random numbers can always be useful, for gaming or more serious cryptographic uses  - and doing so with a Raspberry Pi is quite easy thanks to the inbuilt hardware-based random number generator inside the "system on a chip". Until recently this has been unheard of, but now using this has been documented very well by Walter Anderson in his latest tutorial, which explains not only how to install the required software but also how to generate the numbers in C++ and follows with some demonstrations.

For an interesting counterpoint, we found the following post which was not that positive about true randomness. Nevertheless you can learn how this is done through Walter's interesting website. And for more, we're on facebookGoogle+, and twitter - so follow us for news and product updates as well.

If you're looking for a more permanent way to mount circuitry to your Raspberry Pi, check out our PiBreak - the prototyping board for the Raspberry Pi. It provides labelled breakout pins for all GPIOs, a large prototyping area with solder pads, and power rails for easy power connection:

Furthermore the PiBreak also includes mounting hardware to firmly attach it to your Raspberry Pi using a nut, bolt, and spacer - and is compatible with all revisions of both model A and B Raspberry Pi computers. For more information about our new PiBreak board, our Getting Started guide, and to order - visit the product page

June 25, 2014

Build an Arduino-powered Rubik's Cube solving machine

Once again an Arduino enthuiast has demonstrated what can be done with not much hardware and some though - in this case a device that can solve a Rubik's cube. Created by Instructables member matt2uy, the system is over two parts. First, a PC running some python code is used to enter the state of the cube, and also determines the sequence of events required to solve the cube.

This software then sends instructions to an Arduino which then controls the servos to physically rotate the cube. And the cost of the device is quite minimal, most of the frame is created from wooden ice cream sticks - as shown in the following video:

For complete instructions, check out the project Instructable page. And for more, we're on facebookGoogle+, and twitter - so follow us for news and product updates as well.

If you're looking for an Arduino Uno-compatible board for various projects, choose what tens of thousands of others have done and use our Freetronics Eleven - the Arduino-Uno compatible with low-profile USB socket, onboard prototyping space and easy to view LEDs: 

June 25, 2014

More automated LEGO trains with Arduino

Once again YouTube member Almightarjen has demonstrated some fascinating LEGO train automation, this time with loading and unloading containers from a freight train. Although such a system may seem out of reach, when you plan the operations required it just boils down to reading various sensors and controlling various devices at the right time - something an Arduino can be controlled to do without much effort. The results are shown in the following video:

More of the background behind LEGO train automation can be found in the following video:

And what most likely is the final video can be viewed as well. For more interesting videos check out the YouTube channel. And for more, we're on facebooktwitter and Google+, so follow us for news and product updates as well.

If you're looking to learn how to use an Arduino to sense and control certain environments, you can't go past "Arduino Workshop -  A Hands-On Introduction with 65 Projects” by John Boxall.

Arduino Workshop takes the reader from having zero knowledge about the Arduino platform, electronics and programming and leaves them with the know-how and instructions on everything from blinking an LED, to robotics, wireless data, cellular communications, motor control, sensors, Internet connected systems and more. For more information including a sample chapter and table of contents, visit the book page.

June 24, 2014

Build a vertical polargraph with Arduino and Raspberry Pi

As an interesting twist on the concept of an X-Y plotter, Brandon Green has created a device that can move a pen across the X- and Y-axis of a whiteboard mounted vertically. This allows a great reduction in hardware, all that's needed is two stepper motors and some cord to take care of the physical drawing.

The system is controlled by an Arduino for the hardware section, and the software on the Raspberry Pi takes care of creating the motor control data which is sent back to the Arduino. This is an interesting example of inter-platform synergy and also a lot of fun. All sorts of pattern and images can be created, for example:

For all the details about the polargraph and to make your own, visit Brandon's Google Code page. And for more, we're on facebookGoogle+, and twitter - so follow us for news and product updates as well. 

Have you been reading about Arduino and would like to understand more so you can work with projects like the example above, but not sure where to start? Then order one of our Experimenter's Kit for Arduino: 

The package includes a wide variety of parts, sensors and modules including: a servo motor, lights, buttons, switches, sound, sensors, breadboard, wires and more. Furthermore a Freetronics Eleven Arduino-compatible board is included to make this an extensive hobby experimenter, inventor and starter kit. 

However we don't leave you alone to figure it all out, included is a great project and instruction booklet, plus access to a supporting web page and software examples. In other words - this is everything you need to get started for a fun range of electronics and Arduino related projects! So to get started or for more information and to order, check out the product page.


June 24, 2014

Put a monster under the bed for fun and practical joking

If you're a practical joker or just like to have fun with children of all ages then the following project by the Instructables team will fit the bill. They've created an Arduino-powered "monster" which responds to changes in light levels to determine when to make itself know in a scary manner. It uses an inexpensive sound record/playback module for sound effects, and a neat enclosure with LED eyes helps with the effects.


By using the light sensor and possibly a motion sensor the monster could make various noises until the person nearby turns on the room light or moves about, possibly frustrating or scaring them even more. The system is demsonstrated in the following video:

Funny stuff, and you can find all the details over at Instructables. And for more, we're on facebook, twitter and Google+, so follow us for news and product updates as well.

If you're looking to detect changes in light levels, don't fool about with irregular light-dependent resistors. Instead use our LIGHT: light sensor module with the TEMT6000 light sensor which gives consistent and repeatable readings even between different units. Simple to use and versatile for many applications. For more information and to order, click here.


June 23, 2014

Sending data from Arduino Uno or compatible boards directly to PCs

Although some Arduino boards such as the Leonardo (and compatibles such as our LeoStick) can emulate a USB keyboard for quick data transmission back to a PC, this hasn't been the case for Uno and compatible boards with the ATmega328P microcontroller. However with an Arduino library by Philip Lindsay and a demonstration by Ray Burnette it's easy to have your Arduino Uno or compatible send data back to a PC.

Ray's example shows how to log six digital and six analogue Arduino pins at the same time, and sends the data back to Microsoft Excel for display and analysis. At first thought this process seems complex, but nothing could be further from the truth as both the required external circutry and Arduno demosntration sketch are provided.

So to get started, check out Ray's project page. And for more, we're on facebookGoogle+, and twitter - so follow us for news and product updates as well.

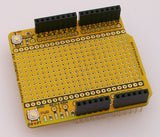
If you need to add external hardware or devices to your next Arduino project, you'll need a protoshield to mount the external circuitry. In doing so, consider our range of ProtoShields. From the tiny LeoStick to the Mega we have a wide range to suit your application. 

June 23, 2014

Adding colourful effects to shelving units with Arduino

For those who want more out of their kitchen shelves, or fancy a different method of lighting rooms when having a party - then the solution is to embed some RGB LEDs in the appropriate furniture. This has been demosntrated by Gael Reinaudi who shows how easy it is to install and control LEDs to generate some colourful an interesting patterns and effects. The code is quite minimal and the results are spectacular, for example:

For more day-to-day uses the changing colours could be used to indicate ambient temperature and humidity by reading data from a sensor, or match the patterns of the sun. For detailed instructions on how to repeat this yourself, check out Gael's Instructable page. And for more, we're on facebook, twitter and Google+, so follow us for news and product updates as well.


If you're looking to make more creative designs with LEDs, consider the Freetronics RGBLED: full colour module. It includes a bright RGB LED on the top of the board and a WS2801 constant-current, addressable, multi-channel LED driver on the back. This smart module can be daisy-chained, so you can connect a number of these together in a string and drive each of the module colours individually from your microcontroller. For more information and to order, visit the product page.