January 27, 2015

Monitoring RSS Feeds with Arduino

The Internet opens up a whole new world of information that can be consumed, used to inform us and much more - however sometimes you may have a need to be alerted about changes in certain published data. One method of disseminating such information is with RSS feeds (Really Simple Syndication) - a stream of text that can easily be parsed.

An Ethernet-enabled Arduino or compatible board is perfect for parsing RSS feeds and this has been demonstrated by Eric Brouwer whose device checks the RSS feed from a local power distrubutor to alert of upcoming rolling blackouts. The system parses the feed for the name of an alert, and thn illuminates the matching indicator on a neat enclosure as shown below.

Even if you're not interested in the information being displayed, this project is an excellent example of parsing RSS feeds with an Arduino and taking action based on the data. To get started, visit Eric's Instructable page. And for more, we're on facebook, twitter and Google+, so follow us for news and product updates as well.

When putting together your next Internet-enabled Arduino project - save time, space and money with the Freetronics EtherTen. Apart from being fully Arduino Uno-compatible, it has onboard Ethernet, microSD socket, full USB interface (so you don't need a costly FTDI cable just to upload a sketch!) and supports optional Power-over-Ethernet.

January 27, 2015

Make an Arduino-powered BCD Clock

The Arduino platform is an excellent base for any clock project, thanks to the ease of programming and availability of accurate real-time clock ICs. One different example of such a clock has been documented by reddit user ExSim who has made an interesting twise on the binary clock - a BCD clock.

BCD - Binary-Coded Decimal - uses binary to describe each digit of the clock display, and as you can see below is neatly illuminated LEDs in matching bezels. There's a button to set the hours, minutes, and another to reset the seconds to zero making it easy to set the time accurately.

For details on how to make your own version, and discussion about the clock itself - visit reddit. And for more, we're on facebooktwitter and Google+, so follow us for news and product updates as well.

The most important part of any clock or timer-based project is the inclusion of an accurate real-time clock IC. Here at Freetronics we have the Maxim DS3232 real-time clock IC module:

Apart from keeping accurate time for years due to the temperature-controlled oscillator and having a tiny coin-cell for backup, it is very simple to connect to your Arduino project. A driver library allows your program to easily set or read the time and date. Perfect for clock projects, dataloggers or anything that needs to know the date and time. Furthermore it contains a digital thermometer and 236 bytes of non-volatile memory to store user settings and other data. For more information, check out the module page here.

January 23, 2015

Build a Raspberry Pi-controlled "Stewart Platform"

As part of a project to explore robotic body language, Radames Ajna is working on a device to move a mobil phone with as many degrees of freedom as possible. Instead of using a robotic arm, Radames instead has devised a "Stewart Platform". This is a device which has a platform that can be moved across six degrees of freedom.

In this project six servos are position in such a way with a rod to the platform to allow for the required movements, and the system is controlled by a Raspberry Pi. Check out the following video for a demonstration of the platform in motion:

That's a great example of Raspberrry Pi hardware control. You can learn more about the project including platform theory and design from the project's Instructables page. And for more, we're on facebookGoogle+, and twitter - so follow us for news and product updates as well.

If you need to add external circuitry to your Pi, one option is to use our PiBreak board.It provides labelled breakout pins for all GPIOs, a large prototyping area with solder pads, and power rails for easy power connection:

Furthermore the PiBreak also includes mounting hardware to firmly attach it to your Raspberry Pi using a nut, bolt, and spacer - and is compatible with all revisions of both model A and B Raspberry Pi computers. For more information about our PiBreak board, our Getting Started guide, and to order - visit the product page.


January 23, 2015

"Autohome" - a web-based GUI for Arduino-powered Home Automation

The Arduino platform lends itself well to getting into the world of home automation (check our SuperHouse.tv) and many enthusiasts have created their own systems. However one home system by Arduino forum member OhmMega is of interest due to the controls and possibilities.

This system can act as an intelligent thermostat control, taking temperature and himidity reading from various sensors - and controls a furnace and HVAC to keep the users' climate in check. Furthermore lighting and other devices can be controlled without much effort. The system has a web-based interface and also a mobile page for use with a smartphone.

An external server is used, based on php/MySQL with a client-server http communication protocol, and takes care of communication between the end user and Arduino-based hardware which acts as a clint with its own login to the server. All this adds up to a great system that's ripe for modification.

For more details and discussion, visit the Arduino forum. And for more news and information, follow us on facebook, twitter and Google+ as well. 

If you're working with Arduino, Ethernet and home automation - check out the Freetronics EtherMega:

Quite simply the EtherMega is the fully-loaded Arduino-compatible board on the market today. Apart from being completely Arduino Mega2560-compatible, it includes full Ethernet interface, a microSD card socket, full USB interface, optional Power-over-Ethernet support and still has a circuit prototyping area with extra I2C interface pins. So if your project is breaking the limits, upgrade to the EtherMega today. 

January 23, 2015

Use Arduino to automate model dragway timing

Scale model cars are a bundle of fun, and part of this is creating your own miniature dragway to relive the fun and excitement of the real thing is a great option. To make this even more realistic, you can use an Arduino and som external hardware to provide an authentic countdown light stand and also time the cars as the progress down the strip - and thus determine the winner. A system to do just that has been published by Arduino forum member AFXRacer.

As the system is a scale build, the Arduino can also calculate the real speed or a scale equivalent and also trigger various effects for lighting the track and a winner notificaiton system. A quick demonstration is shown in the following video:

For more discussion, project details and sketch downloads - log in to the Arduino forum. And for more, we're on facebookGoogle+, and twitter - so follow us for news and product updates as well.

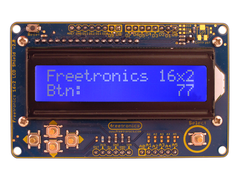
Looking for a rapid-use LCD for your Arduino or compatible development boards such as the Freescale example above? Save time and move forward with the Freetronics LCD & Keypad shield which contains a bright 16x2 character LCD and five buttons that can be read from only one analogue input pin:

January 21, 2015

Make a huge wooden Nixie tube clock with Arduino

Although they haven't been manufactured since the early 1990s, Nixie tubes have become popular again thanks to the warm glow and desire to mix older display technology with newer control systems. And doing so is easy with the Arduino platform, as demonstrated by Andrea Biffi.

Andrea has made a stunning Nixie tube clock, with some interesting design decisions that simplify connection to the Nixies which allows for easy tube replacement and also a neat magnified look. In essence the tubes are held in the centre of a wooden circular cutout, and jumper wires run to the pins instead of using cumbersome sockets. 

The control is a custom PCB however this can be easily replicated with an Arduino or compatible, a real-time clock and some external nixie driver circuitry (such as 74141 shift registers). 

The fina result is a clock that is not only accurate and wouldn't look out of place in any modern living room. For complete details, check out Andrea's project pageAnd for more, we're on facebooktwitter and Google+, so follow us for news and product updates as well.

The most important part of any clock or timer-based project is the inclusion of an accurate real-time clock IC. Here at Freetronics we have the Maxim DS3232 real-time clock IC module:

Apart from keeping accurate time for years due to the temperature-controlled oscillator and having a tiny coin-cell for backup, it is very simple to connect to your Arduino project. A driver library allows your program to easily set or read the time and date. Perfect for clock projects, dataloggers or anything that needs to know the date and time. Furthermore it contains a digital thermometer and 236 bytes of non-volatile memory to store user settings and other data. For more information, check out the module page here.


January 21, 2015

Build a people counter with Raspberry PI and Ubidots

One of the great benefits of using a Raspberry Pi is the ease of connecting electronic circuits to the Internet thanks to the networking capability of the Pi and the simple GPIO control. One interesting and useful project taking advantage of this synergy is a people counter by the team at Ubimaker.

They have demonstrated how easy it is to capture data with a Raspberry Pi and send it to their cloud-based data service Ubitdots, The example is that of a people counter, and uses an inexpensive passive infra-red sensor to detect movement and relay it back to the online service via a simple python program.

Even if you're not interested in counting people, this project gives you the framework to interface your own circuitry to the cloud with a Raspberry Pi. And for more, we're on facebookGoogle+, and twitter - so follow us for news and product updates as well.

If you need to add external circuitry to your Pi, one option is to use our PiBreak board.It provides labelled breakout pins for all GPIOs, a large prototyping area with solder pads, and power rails for easy power connection:

Furthermore the PiBreak also includes mounting hardware to firmly attach it to your Raspberry Pi using a nut, bolt, and spacer - and is compatible with all revisions of both model A and B Raspberry Pi computers. For more information about our PiBreak board, our Getting Started guide, and to order - visit the product page.

January 20, 2015

Turn your Raspberry Pi into an instant photo printer

If you're having a party or other event, the concept of having a photo booth is increasing in popularity. If you think this would be fun, or just because you can - then check out this project by Instructables member SWJTUyuhui. They show how simple and easy it is to use a Raspberry Pi, matching camera, power supply and a colour inkject printer as an instant photo printer system.

Furthermore with the use of a sound sensor module, the camera can be activated by noises of certain levels. For example, people may need to shout to get it to work, or just say "print!" - it's up to you.

Either way, for complete details please visit the project's Instructable page. And for more, we're on facebookGoogle+, and twitter - so follow us for news and product updates as well. 

If you're buiding the photo printer above - or interested in experimenting with sound and your Arduino or other development board, our Freetronics MIC: microphone and sound module is perfect. 

The MIC: contains an integrated dual signal amplifier converts the sound to separate channels for pulse / frequency measurement, and sound volume (pressure) level. Designed to connect straight to an Arduino compatible microcontroller, Analog to Digital converter, or many other circuits. For more information and to order click here

January 20, 2015

Automating LEGO train crossings with Arduino

Although at first glance the LEGO train system may seem to be quote proprietary, there are many people who have worked with their own electronics to harness these fun trains for even more enjoyment, and one of these is YouTube member almightyarjen who often surprises us with his LEGO train creations.

His latest work involves a custom-made PCB containing an Arduino compatible circuit that ensures train crossings are accident free, by determineing the location of a train before a crossing and controlling the power to the track to ensure two trains don't collide. The system is customisable with adjustable timers for the delay between trains and other fun. A full demonstration is shown in the following video:

Although still a work-in-progress, it's a great project and quite inspiring for LEGO train fans. To keep up with the project, subscribe to the creator's YouTube channel. And for more, we're on facebook, twitter and Google+, so follow us for news and product updates as well. 

If you're wanting to make your own Arduino-compatible project such as the train controller above, you'll need an ATmega328P MCU with Arduino Uno bootloader:

This is the same Atmel AVR ATmega328P microcontroller used in the official Arduino Uno, as well as our ElevenEtherTenUSBDroid, and other boards. Perfect for building your own Arduino-compatible project directly on a breadboard or on a custom PCB, or for replacing the MCU in an existing board. Comes with the Arduino Uno bootloader pre-installed. Better still, it even has a special label stuck on top with details of the pinout, so you don't even need to look up the datasheet when connecting it up in your project! For more information and to order, click here!

January 19, 2015

"Ted" - the Arduino-powered LED Head voltmeter

And now for something completely different, we have a neat mixture of art and basic test equipment with "Ted". This is a figure made from solid-core wire and a barebones Arduino-compatible circuit which has LEDs for eyes and other places, brought to us by Johann van Niekerk.

Ted can be used as a voltmeter for use with low-voltage circuits up to 5V such as those used on a breadboard with an Arduino or other platform. You can see Ted in action through the following video, as he shows us some of his effects at boot-up and use as a voltmeter:

This is not only a fun project but also an interesting example of how Arduino-compatible circuits can be art or integrated within in. For complete instrucitons, visit Ted's Instructable page. And for more, we're on facebookGoogle+, and twitter - so follow us for news and product updates as well. 

Have you been reading about Arduino and would like to understand more so you can work with projects like the example above, but not sure where to start? Then order one of our Experimenter's Kit for Arduino - as used in many classroom and learning environments:

The package includes a wide variety of parts, sensors and modules including: a servo motor, lights, buttons, switches, sound, sensors, breadboard, wires and more. Furthermore a Freetronics Eleven Arduino-compatible board is included to make this an extensive hobby experimenter, inventor and starter kit. 

However we don't leave you alone to figure it all out, included is a great project and instruction booklet, plus access to a supporting web page and software examples. In other words - this is everything you need to get started for a fun range of electronics and Arduino related projects! So to get started or for more information and to order, check out the product page.