January 10, 2015

Build an animated Sound Locator with Arduino

The Arduino platform is great for woking with a wide variety of sensors, and one example is sound. With this in mind, Instructables member TechKiwi has created and demonstrated a fun device to show the direction of the louded sound in an area.

The device consists of an Arduino connected to three Freetronics MIC: sound sensor modules, and uses a home-made LED matrix as an output device. They've added a neat "Pac Man"-style design to the top of the display which then shows a little monster moving about to show where the sound is coming from - as shown in the following video:

This could also be the base for a intersting interactive game, for example controllong the character on the display by finding noise (or being quiet!). Either way, check out the project's Instructable page for complete details.  And for more, we're on facebookGoogle+, and twitter - so follow us for news and product updates as well. 

To experiment with audio sampling yourself you can make an easy start with a simple electret microphone board, and our Freetronics MIC: microphone and sound module is perfect. 

January 10, 2015

Freetronics LCD Keypad Shield now compatible with mbed and Freescale FRDM-64F

Although a variety of our products are designed for use with our Arduino-compatible products and so on, a growing range of development boards for non-Atmel microcontrollers are adopting the Arduino-style physical features such as shield compatibility - such as Freescale's Freedom line of ARM Cortex boards that use the mbed online IDE.

We're now happy to note that enthusiasts from this area have published the code required to use our LCD Keypad Shield with the Freescale board under the mbed environment, which makes using this convenient shield a breeze with this powerful Freescale platform.

For mbed users, the library can be imported into your online or external IDE from this page. And for more, we're on facebookGoogle+, and twitter - so follow us for news and product updates as well.

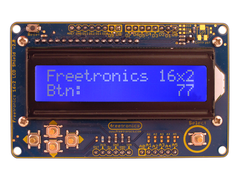
Looking for a rapid-use LCD for your Arduino or compatible development boards such as the Freescale example above? Save time and move forward with the Freetronics LCD & Keypad shield which contains a bright 16x2 character LCD and five buttons that can be read from only one analogue input pin:


January 10, 2015

Hacking vintage VCR into a Raspberry Pi Media Centre

The Raspberry Pi single-board computer is a great platform for an inexpensive media centre, and this has been demonstrated countless times. However thanks to the size, it can also double as the base of a portable media centre, and this has been demonstrated very well by Martin Mander with a vintage twist.

In this example Martin has fitted everything - including an LCD display - into the enclosure of a vintage VCR from the early 1980s. Furthermore the enclosure has been cleaned up and modified for the better, including a pop-out USB hub, interesting LED matrix clock and much much more. Check out the following video for a great demonstration:

Kudos to Martin for such a great project, of which you can learn more about in his Instructable page.  And for more, we're on facebookGoogle+, and twitter - so follow us for news and product updates as well.

If you need to add external circuitry to your Pi, one option is to use our PiBreak board. It provides labelled breakout pins for all GPIOs, a large prototyping area with solder pads, and power rails for easy power connection:

Furthermore the PiBreak also includes mounting hardware to firmly attach it to your Raspberry Pi using a nut, bolt, and spacer - and is compatible with all revisions of both model A and B Raspberry Pi computers. For more information about our PiBreak board, our Getting Started guide, and to order - visit the product page.


January 08, 2015

Experimenting with Arduino and Ultrasonic-radar

With an Arduino and some inexpensive sensors you can experiment with and possibly recreate all manner of complex devices. One example of this is to build a simple "radar" style device, and this has been demosntrated by Ujash Patel with great success. By using an inexpensive ultrasonic distance sensor mounted on a servo, it can be rotated over the range of the servo and a distance taken for each degree.

This data can then be sent to a PC to be mapped graphically on the screen, and Ujash has used Processing to do this quite well - a screen that wouldn't look out of place in a movie or elderly submarine can be created to display the data from the sensor, for example:

This could be a lot of fun, and an interesting framework for adding "vision" to an autonomous robot. For complete details on this example, visit Ujash's Instructable page. And for more, we're on facebookGoogle+, and twitter - so follow us for news and product updates as well.

If you're looking for an Arduino Uno-compatible board to embed into various projects, choose what tens of thousands of others have done and use our Freetronics Eleven - the Arduino-Uno compatible with low-profile USB socket, onboard prototyping space and easy to view LEDs: 

January 08, 2015

Build a tabletop arcade game machine with Raspberry Pi

After reminiscing about classic video games from the 1980s, Instructables member jhawkins14 decided to make their own aracade game cabinet, but on a a smaller scale. With the help of their family they've created a miniature version of a classic "Donkey Kong" arcade game that's based around a Raspberry Pi with a 7" display.

Acquiring the software to emulate various games with a Pi isn't a challenge, however building a top-notch enclosure or cabinet can be - and the group involved have done a fine job as shown below. With some extra effort the use of realistic arcade-style buttons, signage on the cabinet and even backlighting the header board has made this a desirable and fun piece of work  - for example:

Another great example of what is possible with a Raspberry Pi! For more information and inspiration, check out their Instructable. And for more, we're on facebook, twitter and Google+, so follow us for news and product updates as well.

If you're looking for a neat display for a Raspberry Pi, check out our 128x128 pixel OLED Module. With a diagonal size of 1.5" and 16,384 colours to select from, so almost anything is possible.

Furthermore there's a microSD card socket, and removable tabs on each side which can hold LEDs and buttons:

And using the module is made simple - we have tutorials and drivers for both the Arduino and Raspberry Pi platforms - great for experimenters or those who use both systems.

Furthermore, check out the forum where members are already creating modified drivers to rapidly increase the display speed. For more information including our Quickstart guides - and of course to order - visit the OLED Module product page.

January 07, 2015

The Arduino-powered "Time Ruler"

And now for something completely different is the "Time Ruler" by Instructables member glazur. This is a neat combination of hardware and some creative photography. The hardware is an Arduino-powered single digit display in the format of a seven-segment LED display that can found in most digital clocks. This can be activated at the press of a button to display digits in turn which can represent time or other data.

Whilst doing that, the user then waves it across the field of vision of a camera set to a long exposure, which allows the display to be captured all in the one frame, an example of which is shown below:

An interesting project that can be built with only a few parts, so to get started check out the Instructable page. And for more, we're on facebookGoogle+, and twitter - so follow us for news and product updates as well. 

Have you been reading about Arduino and would like to understand more so you can work with projects like the example above, but not sure where to start? Then order one of our Experimenter's Kit for Arduino - as used in many classroom and learning environments:

The package includes a wide variety of parts, sensors and modules including: a servo motor, lights, buttons, switches, sound, sensors, breadboard, wires and more. Furthermore a Freetronics Eleven Arduino-compatible board is included to make this an extensive hobby experimenter, inventor and starter kit. 

However we don't leave you alone to figure it all out, included is a great project and instruction booklet, plus access to a supporting web page and software examples. In other words - this is everything you need to get started for a fun range of electronics and Arduino related projects! So to get started or for more information and to order, check out the product page.

January 07, 2015

Build a Raspberry Pi-based Word Clock

We see plenty of word clocks with the Arduino platform, however the following version by Bernd Krolla is quite unique and also driven by a Raspberry Pi. The clock itself has many feautres apart from telling the time in words - it can scroll messages using each word as a pixel, has a capacitive-touch interface - and even display low-resolution images as well.

Thanks to the connectivity of the Raspberry Pi this clock could be modified to display all sorts of data that can be obtained from the Internet, giving you a whole world of options with display possibilties. Finally, Bernd gives us a detailed description about his clock in the following video:

For more information, links to code and so on - visit the clock's website. And for more, we're on facebookGoogle+, and twitter - so follow us for news and product updates as well.

For projects that require interaction between an Arduino and a Raspberry Pi you can save time and space by using our new PiLeven board:

The PiLeven is an Arduino-compatible board based on the Arduino Uno, but with a few changes. Obviously it's a bit of a strange shape! The PiLeven fits right on top of a Raspberry Pi (either model B or B+) using the Raspberry Pi expansion headers.

The PiLeven also has a high-current switchmode power supply, so you can plug in anything from 7V to 18Vdc using the standard 2.1mm jack. The PiLeven can power the Raspberry Pi, so you don't need a regulated 5V USB connection anymore.

Serial communications on the PiLeven is linked through to the Raspberry Pi, so your Pi can upload new sketches straight to the PiLeven or send/receive data and commands. We've included level shifters so the 3.3V Pi can talk safely to the 5V PiLeven. And you can plug standard Arduino shields right into the PiLeven, giving your Raspberry Pi access to the huge range of shields already available. For more information about the PiLeven, including our tutorials - and to order yours today, visit the PiLeven webpage.

January 06, 2015

Create music with Arduino and a LEGO Tannerin

And now for another musical Arduino project, brough to  us by Steven Goodwin. With some simple electronics, an Arduino and LEGO Steven has created a "Tannerin". This is "... a musical instrument that is played by sliding a marker along the length of a wire or pad. This produces a pure sine wave tone, which can extend over as many notes or octaves as you wish, always in a smooth (i.e. portamento/pitch bend) fashion."

The effects are based on voltage divider partially made from nichrome wire, whose value is altered by the use of a wand. By building this into a LEGO channel the moving parts are kept under control and with some creativity you can make an interesting enclsoure for the Tannerin. An overview and demonstration of the instrument is shown in the following video:

Another great example of what's possible with an Arduino and a few extra parts. For complete details, check out Steven's Instructable page. And for more, we're on facebookGoogle+, and twitter - so follow us for news and product updates as well.

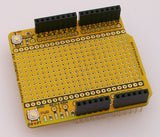
If you need to add external hardware or devices to your next Arduino project, you'll need a protoshield to mount the external circuitry. In doing so, consider our range of ProtoShields. From the tiny LeoStick to the Mega we have a wide range to suit your application.


January 06, 2015

Make an analogue Bluetooth voltmeter with Arduino and Android

It's no secret that you can create all sorts of measurement devices and test equipment with an Arduino or compatible board, however the display component can be quite complex or expensive. However if you have an Android device it's quite easy to make your own display that rivals commercial products thanks to a simple Bluetooth link.

Instructables member planetleak gives us an example of this by making a voltmeter with an Arduino, that sends the resulting value via a Bluetooth link to an Android device running an app created with the free MIT Android App inventor environment. As you can see in the detailed vide below, the process isn't difficult and with some imagination you could create all sorts of dashboards for data from an Arduino:

Furthermore, here's the link for the Arduino sketch.  And for more, we're on facebookGoogle+, and twitter - so follow us for news and product updates as well.

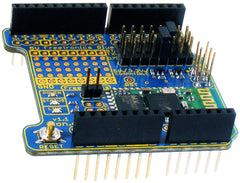
As part of the Arduino and Bluetooth experience you'll need a Bluetooth device for your Arduino projects, and to meet this need we've released the Freetronics Bluetooth Shield:


We've made it simple to use - the Bluetooth Shield acts as a serial link between the other Bluetooth device. Furthermore there's a wide range of jumpers allowing you to select which digital pins to use for data transfer, increasing compatibility with other shields. And with our Quick Start guide it's easier than ever.

Our Bluetooth Shield for Arduino is now in stock and ready to ship, so for more information and to order - visit the shield's product page.

January 06, 2015

Save time typing repetitive functions with an Arduino-powered keyboard

An Arduino Leonardo or compatible board (such as our LeoStick) can easily emulate an interface device such as a USB mouse or keyboard, and with a small amount of work this can be used to your benefit. One example of this has been documented by Instructables member jjurotte who has created a secondary USB keyboard with specific functions.

Their example emulates popular editing functions - however you can generate almost any sequence of keystrokes to be sent to the host PC. Taking this idea a little further, the creator has used capacitive-touch functions with a secondary Arduino-compatible to allow the user to simply glide their finger over the "buttons".

A simple project that you can recreate in a few hours, and modify when required. To get started, visit the project's Instructable page. And for more, we're on facebookGoogle+, and twitter - so follow us for news and product updates as well.

Need a small Arduino-compatible for use with your own control projects? Then check out out our LeoStick. It's the Arduino Leonardo-compatible board that's cheaper and smaller than the original:

 Apart from being one of the smallest Arduino-compatibles on the market with USB, it also has an onboard RGB LED and piezo which can be used a knock sensor and various tune and sound effects. Plus you can add extra circuitry with the matching protostick! For more information and to order, click here.