April 07, 2015

Emulate an Apple II with an Arduino

Once again Damian Peckett has documented an excellent project based around an Arduino Uno or compatible board, and quite frankly this just plain awesome. Damian has managed to emulate the original Apple II computer - including video output, a cassette interface and the use of a PS/2 keyboard for input.

As with his previous Arduino Ghetto VGA system the video frame buffer is held in the secondary microcontroller, freeing up more RAM for the Apple emulator. Although this is still a work in progress, the emulator works and could be reproduced in a few hours. The following image is an example of a Mandelbrot fractal created by the emulator:

Furthermore Damian explains the workings and thought behind many of the emulator components which make interesting reading. Either way, to get started check out the emulator web page. And for more, we're on facebookGoogle+, and twitter - so follow us for news and product updates as well.

If you need to add external hardware or devices to your next Arduino project, you'll need a protoshield to mount the external circuitry. In doing so, consider our range of ProtoShields. From the tiny LeoStick to the Mega we have a wide range to suit your application.

April 02, 2015

Annoy people with a remote-control car horn

Although April the first has passed us by, the following project by Lewis Callaway has both very annoying and very useful aspect. The main purpose is to have a car horn that you can activate from afar via an Internet-connected Raspberry Pi.

By adding a USB webcam to the Pi you can view the unlucky person before giving them the toot of the horn from the relative safety of your remote location - a demonstration of this is shown in the following video:

However this project also offers you the framework for creating a remote-controlled device that could be more useful to you, such a combined CCTV/remote door or garage opener amongst other things.

Nevertheless for complete details, visit the project page. And for more, we're on facebookGoogle+, and twitter - so follow us for news and product updates as well.

For more complex Raspberry PI projects that require interaction between an Arduino and a Raspberry Pi for enhanced hardwre control you can save time and space by using our new PiLeven board:

The PiLeven is an Arduino-compatible board based on the Arduino Uno, but with a few changes. Obviously it's a bit of a strange shape! The PiLeven fits right on top of a Raspberry Pi (either model B or B+) using the Raspberry Pi expansion headers.

The PiLeven also has a high-current switchmode power supply, so you can plug in anything from 7V to 18Vdc using the standard 2.1mm jack. The PiLeven can power the Raspberry Pi, so you don't need a regulated 5V USB connection anymore.

Serial communications on the PiLeven is linked through to the Raspberry Pi, so your Pi can upload new sketches straight to the PiLeven or send/receive data and commands. We've included level shifters so the 3.3V Pi can talk safely to the 5V PiLeven. And you can plug standard Arduino shields right into the PiLeven, giving your Raspberry Pi access to the huge range of shields already available. For more information about the PiLeven, including our tutorials - and to order yours today, visit the PiLeven webpage.

April 02, 2015

Capture images from a remote camera with Arduino

Although most enthusiasts may use a Raspberry Pi or other single-board computer for this type of task, an Arduino with an Ethernet connection can also be used to control inexpensive VGA-resolution digital cameras with a TTL output. This has been demonstrated by Instructables member iam_maker_leo who gives us a neat way of activating the camera from a web browser to view a still image.

The camera used is an inexpensive TTL serial version which connects to the Arduino via a software serial connection. The Arduino is loaded with a basic webserver sketch that can interpret the serial data from the camera and offer it up as an image. And thus with a static IP address you can request a still image from the camera by requesting a specific URL, an example of which is shown below:

This is a neat and low-cost method of remote on-demand surveillance, so check out the Instructable to get started. And for more, we're on facebookGoogle+, and twitter - so follow us for news and product updates as well. 

Looking for an Arduino-compatible board with more connectivity possibilities and options than the original? Then check out our EtherDue board:

It's the Arduino Due-compatible board with the Freetronics additions including Ethernet network connectivity, MAC address chip, microSD storage, optional PoE, upgraded power supply and more - while retaining the simplicity and ease of the Arduino IDE (with 100% compatibility). And you still have a full USB interface for uploading sketches and direct programming. For more information on this powerful board, check out the EtherDue product page.

April 01, 2015

Programming for the ESP8266 now possible with the Arduino IDE

The ESP8266-based projects are appearing at an exponential rate thanks to the low cost of this neat WiFi-enabled SoC (System on a Chip) - however working on your own projects can present a challenge in some environments. However this is set to change thanks to the efforts of the ESP8266 community forum, and their release of the Arduino IDE for the ESP8266. 

Although still a work in progress, the functions including GPIO, ADC, and WiFi are working with more to come. This is very user-friendly approach to the ESP8266 and offers the Arduino user an easy entry path to this neat chip.

For more information and to download the IDE - visit the project Github page. And for more, we're on facebookGoogle+, and twitter - so follow us for news and product updates as well.

If you're starting out with ESP8266 WiFi serial modules, save time and eliminate risk by using our new ESP-01 WiFi Module shield for Arduino:

Our new shield has a socket that's perfect for the ESP-01 module, and addresses all the needs of the ESP8266 - such as:

  • 3.3V regulator dedicated to the module to ensure sufficient current capacity
  • Logic level shifters on TX/RX lines: compatible with both 3.3V and 5V Arduino models
  • Selectable TX/RX pins: use D0/D1 for hardware serial, or D2 - D7 for software serial
  • CH_PD pin on ESP-01 module pre-biased for correct operation mode
  • Extra ESP-01 pins broken out for your own connections
  • Prototyping area with 5V and GND rails
  • All Arduino headers broken out for easy connections
  • Stacking R3-style Arduino headers including the ICSP header

So don't fiddle with jumper wires or sub-standard power supplies - order your the Freetronics ESP-01 WiFi Module Shield today. They're in stock right now for only $14 including GST.

April 01, 2015

Build an automated squirrel feeder with a Raspberry Pi

After becoming interested in the activities of local squirrels but wanting to keep a distance, Ulf Bögeholz turned to the Raspberry Pi platform to solve the problem in several ways. Ulf made a device which is controlled by a servo that dispenses nuts or other treats upon activation - controlled by the Pi.

By using a camera above this the Pi can detect movement and then dispense the food when required. However this created some false positives, so the system was altered to use an ultrasonic movement detector which was only activated by a physically closer animal. Overall the system is a success, and demonstrated in the following video:

For more information code and updates visit Ulf's interesting website. And for more, we're on facebookGoogle+, and twitter - so follow us for news and product updates as well.

If you're looking for a neat way to add external circuitry to your Raspberry Pi model A+, B+ or 2 model B then check out our new PiBreak Plus Raspberry Pi Prototyping Board:

This is a great way to add your own electronic components, circuitry, sensors or other devices to your Raspberry Pi model A+, B+ or 2 Model B - any of the current Raspberry Pis with a 40 pin GPIO header. The PiBreak Plus also includes a GPIO female header to solder yourself, and a pair of nuts, bolts, washers and spacers to ensure a a great fit.

And in the Freetronics fashion we've used a quality gold-plated (ENIG) PCB for durability, brought out all the power rails along with the GPIO next to the prototyping area to make adding circuits a breeze. Furthermore the pinouts are labelled on both the top and bottom of the PCB to save time referencing the right GPIO pins. For more information and to order - visit the PiBreak plus page now!

March 31, 2015

Flashing LUA onto ESP8266 modules with a USB to Serial adaptor

Now and again we see our products "out in the wild", and another example has been reviewed by a popular video blogger MrHobbyelectronics - who demonstrates how easy it is to upload the LUA firmware to an ESP8266 ESP-01 board using our USB Serial adaptor.

By using LUA with the ESP8266 you can have a much easier development experience, thanks to the ease of programming in LUA vs. dealing with the standard AT command set and a separate mircontroller to harness the power of the ESP8266. His tutorial explains how to connect the USB to serial adaptor and flash the new firmware to the module - as shown in the following video:

For more interesting videos like this, subscribe to the MrHobbyElectronics YouTube channel. And for more, we're on facebooktwitter and Google+, so follow us for news and product updates as well.

If you're experimenting with serial ESP8266 modules - or using other circuits that need a serial to USB interface, check out our USBserial module:

It offers much more than the typical FTDI-based adapter. Apart from dual-voltage USB-serial support, it's also a full ATmega16U2 breakout board with all I/O pins arranged for easy access. The board can be flashed easily, and has the pinouts for a USBasp programmer. For more information including our Quickstart guide and of course to order - visit the USB Serial product page. And for more, we're on twitter and Google+, so follow us for news and product updates as well.

March 31, 2015

Automating LEGO trains with ultrasonic distance sensors

Next in the series of ongoing tutorials for the beginner from the Arduino LEGO Trains YouTube channel is a neat explanation of how to use inexpensive ultrasonic distance sensors to detect trains as they approach a buffer (the end of a line or siding) and cause them to stop for a duration.

As the train approaches the end of the line, the ultrasonic sensor reports back to the Arduino how far the train has to go before causing an accident. Then the sketch can slow down or stop the train (either via a motor controller for 9V trains or infra-red for PF-series LEGO). These sensors can give your layouts more intelligence and options when automating the layout. The entire procedure is demonstrated in the following video:

The sensors used in the demonstration can also be used for other applications, such trackside detection or adding collision-avoidance to other devices. For more interesting LEGO train videos, subscribe to their YouTube channel. And for more, we're on twitter, facebook and Google+, so follow us for news and product updates as well.

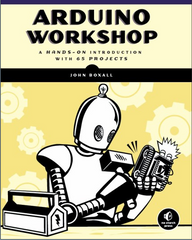
If you're looking to learn about Arduino development platform and how it interacts with external devices such as ultrasonic distance sensors -  you can't go past "Arduino Workshop -  A Hands-On Introduction with 65 Projects” by John Boxall.

Arduino Workshop takes the reader from having zero knowledge about the Arduino platform, electronics and programming and leaves them with the know-how and instructions on everything from blinking an LED, to robotics, wireless data, cellular communications, motor control, sensors, Internet connected systems and more. For more information including a sample chapter and table of contents, visit the book page.

March 30, 2015

Browsing the web on a vintage Mac Plus with the help of a Raspberry Pi

In what can be either described as a fascinating project to add life to a vintage computer, or a sheer act of masochism Jeff Keacher has used an ingenious method based around a Raspberry Pi to get his Apple Macintosh Plus connected to the Internet and viewing basic websites.

The software side of the challenge was relatively simple, as a basic TCP/IP stack and PPP (Point to Point Protocol) was available for System 7 and a simple web browser was also located. The hardware is a bit of a kludge, involving connection from the Mac's serial port to the Raspberry Pi via level shifters. The Pi can then offer an easy interface to the WWW. And with some more code trickery such as a python-based filter to remove unwanted incoming browser code to the Mac's browser - the goal was met... as shown in the following video:

Kudos to Jeff and his associates for such an interesting renewal of a classic Mac, more of which you can learn about from their project page. And for more, we're on facebook, twitter and Google+, so follow us for news and product updates as well.


If you're going to interface your Mac Plus or other 5V device with a Raspberry Pi - you'll need to interface  the GPIO pins with different voltages. When you're faced with this situation - don't panic! Make sure you have some of our LEVEL: bidirectional 5V-3.3V level converters in stock. For more information and to order, click here.

March 30, 2015

Generate VGA video output from your Arduino

Following on from our news article last week that described how to generate composite video from an Arduino we can now tell you about a solution to generate VGA video output from an Arduino or compatible, using an interesting method described by Damian Peckett.

Previously methods have relied on the processing power of the onboard microcontroller, however Damian's solution takes advantage of the Atmel 16U2 on later Arduino Uno and compatible boards, using it as a part of the solution as a frame buffer and more. This helps increase the possible screen refresh rate and results with readable text, for example:

Furthermore Damian also explains how VGA video is generated, and the challenges of doing so with limited hardware. For more information, visit Damian's interesting website. And for more, we're on facebook, twitter and Google+, so follow us for news and product updates as well.

If using a larger monitor via VGA is a little too much, consider our 128x128 pixel OLED Module. With a diagonal size of 1.5" and 16,384 colours to select from, so almost anything is possible. Furthermore there's a microSD card socket, and removable tabs on each side which can hold LEDs and buttons:

And using the module is made simple - we have tutorials and drivers for both the Arduino and Raspberry Pi platforms - great for experimenters or those who use both systems. Furthermore, check out the forum where members are already creating modified drivers to rapidly increase the display speed. For more information including our Quickstart guides - and of course to order - visit the OLED Module product page.

March 27, 2015

Explore early computing with a Digital PDP-8/I replica

Oscar from Obsolescence Guaranteed has once again demonstrated an excellent example of creating a replica vintage computer with contemporary hardware. His latest example is a Digital PDP-8/I replica powered by a Raspberry Pi Model A+, called the "PiDP-8/I".

Software to emulate the original already exisits (see the Computer History Simulation Project) and runs nicely on the Pi, however as you can see from the image below the standout is the replica front panel. This is much more than looking good - the LEDs and switches do function thanks to a lot of multiplexing that interfaces the Pi's GPIO with 92 LEDs and 26 switches

For further realism Oscar is working on a paper tape reader, however the enture project is still a work in progress. Nevertheless it's quite fascinating and you can follow the updates from his project website. And for more, we're on facebookGoogle+, and twitter - so follow us for news and product updates as well.

If you're looking for a neat way to add external circuitry to your Raspberry Pi model A+, B+ or 2 model B then check out our new PiBreak Plus Raspberry Pi Prototyping Board:

This is a great way to add your own electronic components, circuitry, sensors or other devices to your Raspberry Pi model A+, B+ or 2 Model B - any of the current Raspberry Pis with a 40 pin GPIO header. The PiBreak Plus also includes a GPIO female header to solder yourself, and a pair of nuts, bolts, washers and spacers to ensure a a great fit.

And in the Freetronics fashion we've used a quality gold-plated (ENIG) PCB for durability, brought out all the power rails along with the GPIO next to the prototyping area to make adding circuits a breeze. Furthermore the pinouts are labelled on both the top and bottom of the PCB to save time referencing the right GPIO pins. For more information and to order - visit the PiBreak plus page now!