August 21, 2015

Detect Electromagnetic Interference with Arduino

You can make a wide varierty of test equipment with an Arduino, and some more accurate than others. However you can still find success towards the simpler end of the spectrum, and one example of this is by Instructables member JohnE12 and their electromagnetic interference detector.

This is based around an Arduino board with a long wire feeding into an analogue input. This can pick up all sorts of EMI and other signals - the strength of which is measured by the analogue to digital converter and the strength value approximated using a series of LEDs. The user then can easily walk around the area and determine the strength of EMI and thus possibly the source.

Although simple, this is a useful and also a fun tool to share with beginners as an exampel of using an analogue input. To learn more about this project, visit the Instructable page. And for more, we're on facebookGoogle+, and twitter - so follow us for news and product updates as well.

If you need to add external hardware or devices to your next Arduino project, you'll need a protoshield to mount the external circuitry. In doing so, consider our range of ProtoShields. From the tiny LeoStick to the Mega we have a wide range to suit your application.

August 19, 2015

Build your own Arduino-powered Fireworks Controller

An interesting example of what is possible with the Arduino development platform has been described by Instructables member Jonathan Bush whose fireworks controller system is quite simple in design yet effective in operation. 

Based around an Arduino Mega board, the controller includes a solid user interface panel and can trigger relays which send current to the electronic matches with the fireworks. Although fireworks aren't available to the public in most areas, this still shows what can be done or perhaps motivate your own control panel project. A quick demonstration is shown in the following video:

For more information and some interesting discussions about this control module, visit the Instructable page. And for more, we're on facebooktwitter and Google+ - so follow us for news and product updates as well.

When working on your own projects based on an Arduino Mega or EtherMega that require external circuitry or wiring - and you're not up for making a PCB - consider using a Freetronics Protoshield Mega. It includes the male header pins and a reset button to fit, and is also a little shorter to allow space for the RJ45 socket on an EtherMega. For more information and to order, visit the product page

August 17, 2015

Convert N64 Controllers into USB Gamepads using Arduino

If you long to play games with Nintendo N64 controllers on your PC - it can be done, thanks to the neat conversion project detailed by Instructables user BobJones6732. As you may already know, an Arduino Leonardo or compatible board such as the Freetronics LeoStick can emulate a USB joystick or keyboard.

With some simple rewiring the N64 controlled can be polled by the Arduino and the commands converted to USB gamepad signals that can be interpreted by the PC. To make this a success a whole new board profile has been provided, however you can reproduce it yourself in no time at all.

Once you have the controller connected to your PC, have fun classic emulated and contemporary games. To learn more about this project, visit the Instructable page. And for more, we're on facebook, twitter and Google+, so follow us for news and product updates as well.

Looking for a small Arduino-compatible board to use as the basis of your own USB controller? Consider our LeoStick - it's the Arduino Leonardo-compatible board that's cheaper and smaller than the original:

Apart from being one of the smallest Arduino-compatibles on the market with USB, it also has an onboard RGB LED and piezo which can be used a knock sensor and various tune and sound effects. Plus you can add extra circuitry with the matching protostick! For more information and to order, click here.


August 11, 2015

Create animatronic eyeballs with Freetronics OLED Displays

Realism is the key to successful animatronics and robotics, and enthusiasts have demonstrated excellent examples of their efforts - such as the following eyeball display by marcwolf.org. They have embedded a Freetronics OLED display inside a plastic sphere with a clear section that acts allow the image to be seen.

Finally, the OLED is controlled by a high-performance Arduino-compatible board that allows for an excellent frame rate on the OLED - and thus a realistic eye complete with pupil dilation and other effects.

To learn more about this fascinating eyeball, visit the project page. And for more, we're on facebook, twitter and Google+, so follow us for news and product updates as well.

If you're looking for a neat and colourful display to use with your Arduino or Raspberry Pi - consider our 128x128 pixel OLED Module. With a diagonal size of 1.5" and 16,384 colours to select from, so almost anything is possible. Furthermore there's a microSD card socket, and removable tabs on each side which can hold LEDs and buttons:

And using the module is made simple - we have tutorials and drivers for both the Arduino and Raspberry Pi platforms - great for experimenters or those who use both systems. Furthermore, check out the forum where members are already creating modified drivers to rapidly increase the display speed. For more information including our Quickstart guides - and of course to order - visit the OLED Module product page.


August 10, 2015

Mr HobbyElectronics reviews the Freetronics Dot Matrix Display Panels

Now and again we see our products "out in the wild", and another example has been reviewed by a popular video blogger Mr Hobbyelectronics - who demonstrates how easy it is to set up and use our DMD LED Dot Matrix Display boards.

An excellent adaptor board is included with all our DMDs that allows for plug-and-play operation with an Arduino or compatible - and our custom Arduino library makes controlling the display very easy.

There's plenty of example projects and you'll be displaying data, time, date or more in no time at all. However don't take our word for it, watch the following video to see more:

 Please note that when attaching external power to the rear of the DMD - use 5V DC (not 12V). For this and other interesting videos related to the Arduino, Raspberry Pi and technology world - subscribe to Mr Hobbyelectonics' YouTube channel. And for more, we're on facebookGoogle+, and twitter - so follow us for news and product updates as well. 

If you would like to have fun with a large LED dot matrix display as demonstrated in the video above, check out the Freetronics Dot Matrix Displays. They're simple to use, yet very bright for indoor and outdoor situations. Available in various colours, the 32 x 16 LED matrix can display text and graphics quite easily - and can be daisy-chained together for extended displays. For more information, see our range of Dot Matrix Displays here

August 04, 2015

Make an Internet-of-Things Gauge with Arduino

There's an almost infinite number of uses for the "Internet of Things" - some useful, some perhaps not. However the following project by Instructables member tamberg shows how you can harness the IoT for your own means throught the description of a neat gauge project.

As you can see from the image below, a simple gauge has been made to display the location of a particular person - which is driven via an Ethernet-enabled Arduino or compatible. This is controlled via a REST API running on the Arduino, which listen for commands from the ITTT (If This, Then That) cloud-based service. By tweakinhg ITTT that to your needs, you can control a neat web- or Android device-based control panel to control the gauge from almost anywhere.

An excellent example of how easy it is to harness the IoT with Arduino - so head over to the Instructable page to get started. And for more, we're on facebook, twitter and Google+, so follow us for news and product updates as well.

When putting together your next Internet-enabled Arduino project - save time, space and money with the Freetronics EtherTen. Apart from being fully Arduino Uno-compatible, it has onboard Ethernet, microSD socket, full USB interface (so you don't need a costly FTDI cable just to upload a sketch!) and supports optional Power-over-Ethernet.

August 03, 2015

Built a neat home thermometer with Arduino

Although many of our projects can often be found and used "on the bench", it's nice to take them one step further into a usable end product. And one usable example of this has been demonstrated by Instructables member whose Arduino thermometer not only looks good but is useful as wel.

By building a small Arduino-compatible circuit that uses a DS18B20 digital temperature sensor and two seven-segment LED displays - the result is an accurate digital thermometer that has been fitted inside a kitschy ornament that wouldn't look out of place in any home - for example:

This is a great project for the beginner or enthusiast alike, and you can find all the details in the project's Instructable page. And for more, we're on facebookGoogle+, and twitter - so follow us for news and product updates as well. 

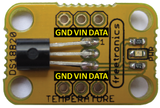
If you're interested in measuring termperature with a reliable sensor - consider using our DS18B20-based temperature sensor module:

The Freetronics temperature sensor modiule uses the Dallas DS18B20 1-wire digital temperature sensor, with a wide measurement range of -55 to +125°C at an accuracy of +/- 0.5°C. For more information, tutorials and to order - visit the product page

July 30, 2015

Monitor multiple buttons with only one Raspberry Pi input

Reading the status of more than one digital input such as a button with only one input pin is a common method of minimising I/O usage and is accomplished with a resistor network and a single analogue-to-digital pin. However as the Raspberry Pi doesn't have an ADC, another method is required. 

One example of this has bee demonstrated by Instructables member JRV31 whose solution still uses a resistor network, but instead uses the resulting voltage to charge a capacitor at a varying rate depending on which button has been pressed. The Pi then monitors the duration between state changes of the digital pin connected to the circuit - and then with the timing knowledge can determine which button has been pressed. 

An ingenious solution to a common problem, of which you can learn more about from the Instructable page. And for more, we're on facebookGoogle+, and twitter - so follow us for news and product updates as well.

Another neat way to interface your Raspberry Pi with external hardware is to use an Arduino-compatible board - and one neat example is the Freetronics PiLeven board:

The PiLeven is an Arduino-compatible board based on the Arduino Uno, but with a few changes. Obviously it's a bit of a strange shape! The PiLeven fits right on top of a Raspberry Pi (either model B or B+) using the Raspberry Pi expansion headers.

The PiLeven also has a high-current switchmode power supply, so you can plug in anything from 7V to 18Vdc using the standard 2.1mm jack. The PiLeven can power the Raspberry Pi, so you don't need a regulated 5V USB connection anymore.

Serial communications on the PiLeven is linked through to the Raspberry Pi, so your Pi can upload new sketches straight to the PiLeven or send/receive data and commands. We've included level shifters so the 3.3V Pi can talk safely to the 5V PiLeven. And you can plug standard Arduino shields right into the PiLeven, giving your Raspberry Pi access to the huge range of shields already available. For more information about the PiLeven, including our tutorials - and to order yours today, visit the PiLeven webpage.

July 27, 2015

Build your own custom Minecraft controller with Arduino

Fans of any keyboard-based computer game - and especially Minecraft players, will appreciate the ability to execute commands as quickly as possible. One neat method of doing so is to make your own control board with an Arduino or compatibe and a great example of this has been demonstrated by Lakhan Mankani.

By using an Arduino Leonardo or compatible board - as they can emulate a USB keyboard or mouse - you can easily create your own input device and have that emulate keyboard presses or a sequence of keystrokes to your PC. Thus by arranging simple buttons to the Arduino in the required layout - and with the matching code - you can have a custom keyboard to take care of finicky commands.

This type of device is also useful for non-gamers, any sequence of keystrokes used repetitively can be assigned to a button and exectured when necessary. To learn more and make your own, visit Lakhan's website. And for more, we're on facebook, twitter and Google+, so follow us for news and product updates as well.

Looking for a small Arduino-compatible board to use as the basis of your own keyboard? Consider our LeoStick - it's the Arduino Leonardo-compatible board that's cheaper and smaller than the original:

Apart from being one of the smallest Arduino-compatibles on the market with USB, it also has an onboard RGB LED and piezo which can be used a knock sensor and various tune and sound effects. Plus you can add extra circuitry with the matching protostick! For more information and to order, click here.

July 22, 2015

Make your own "connected" lighting device with Raspberry Pi and PubNub

One of the great benefits that comes with the Raspberry Pi is the ease of connecting external hardware to the Internet thanks to the onboard network interface. This synergy can be harnessed for your benefit and one neat example of this is the connected light device described by Kevin Gleason.

His example of a connected device is the ability to control a RGB LED connected to the Pi from an Android device via the PubNub cloud-based data service. This is made easier thanks to PubNub's python and C++ libraries for Raspberry Pi - along with notes on creating an Android app for control. 

Even if you're not interesting in controlling lights, this project is an excellent framework for creating connected devices you can control from afar - so visit the project's Instructable page to get started. And for more, we're on facebookGoogle+, and twitter - so follow us for news and product updates as well.

If you're looking for a neat way to add external circuitry to your Raspberry Pi model A+, B+ or 2 model B then check out our new PiBreak Plus Raspberry Pi Prototyping Board:

This is a great way to add your own electronic components, circuitry, sensors or other devices to your Raspberry Pi model A+, B+ or 2 Model B - any of the current Raspberry Pis with a 40 pin GPIO header. The PiBreak Plus also includes a GPIO female header to solder yourself, and a pair of nuts, bolts, washers and spacers to ensure a a great fit.

And in the Freetronics fashion we've used a quality gold-plated (ENIG) PCB for durability, brought out all the power rails along with the GPIO next to the prototyping area to make adding circuits a breeze. Furthermore the pinouts are labelled on both the top and bottom of the PCB to save time referencing the right GPIO pins. For more information and to order - visit the PiBreak plus page now!