September 15, 2015

Simulate a Babbage Difference Engine with Arduino

An an educational exercise - or just for fun, you can recreate mechanical mathematical calculators quite easily with a microcontroller - and the Arduino is no exception. One great example of this is emulation of Charles Babbage's Difference Engine by Tom Crawford.

A difference engine is "is an automatic mechanical calculator designed to tabulate polynomial functions. The name derives from the method of divided differences, a way to interpolate or tabulate functions by using a small set of polynomial coefficients" (thanks Wikipedia), and was part of a series of machines devised by Babbage that were ahead of their time.

Tom's example uses an Arduino-compatible and some inexpensive numerical displays to give the output - such as the original number, cube and so on. A demonstration of the project is shown in the following video:

Kudos to Tom for such an interesting project, of which you can learn more through the Arduino forum. And for more, we're on facebook, twitter and Google+, so follow us for news and product updates as well.

If you're looking for a neat and colourful display to use with your Arduino or Raspberry Pi - consider our 128x128 pixel OLED Module. With a diagonal size of 1.5" and 16,384 colours to select from, so almost anything is possible. Furthermore there's a microSD card socket, and removable tabs on each side which can hold LEDs and buttons:

And using the module is made simple - we have tutorials and drivers for both the Arduino and Raspberry Pi platforms - great for experimenters or those who use both systems. Furthermore, check out the forum where members are already creating modified drivers to rapidly increase the display speed. For more information including our Quickstart guides - and of course to order - visit the OLED Module product page.

September 14, 2015

Make an Arduino-controlled Voting System

For groups, clubs and other smaller organisations that require a simple yet accurate voting system, the following Arduino-based solution by Frank Donald will solve the problem. His system allows for four possible candidates, and each voter may only vote once.

With a little supervision the system works well and the results can be displayed in the Arduino IDE's serial monitor, or with some modification a connected LCD. Frank runs us through his voting system in the following video:

As always if you want to modify this to meet your own needs - this can easily be done. However for complete details, visit Frank's detailed website. And for more, we're on facebookGoogle+, and twitter - so follow us for news and product updates as well.

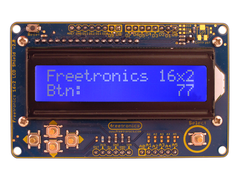
Looking for a rapid-use LCD for your Arduino or compatible development boards such as the example above? Save time and move forward with the Freetronics LCD & Keypad shield which contains a bright 16x2 character LCD and five buttons that can be read from only one analogue input pin:


September 10, 2015

Build an Arduino-powered Bluetooth call notifier

Whether it be in a noisy office at work, or a nice relaxing day at home - you may be waiting for an important phone call on your mobile. You learn when a call is coming in you can make a neat illuminated call notifier such as the unit described by Instructables user geekrex.

Designed for Arduino-based smartphones - the system uses an Android app that sends data over Bluetooth when a call comes in. This data is received by a Bluetooth-equipped Arduino or compatible board which can then take action, in this case activate some LEDs. A quick demonstration is shown in the following video:

Thanks to using an Arduino, you could create all sorts of useful to very annoying notifications for this device and have some fun. For more information including links to the Android app, visit the project Instructable page. And for more, we're on facebook, twitter and Google+, so follow us for news and product updates as well.

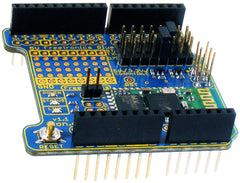
As part of the Arduino and Bluetooth experience you'll need a Bluetooth device for your Arduino projects, and to meet this need we've released the Freetronics Bluetooth Shield:


We've made it simple to use - the Bluetooth Shield acts as a serial link between the other Bluetooth device. Furthermore there's a wide range of jumpers allowing you to select which digital pins to use for data transfer, increasing compatibility with other shields. And with our Quick Start guide it's easier than ever.

Our Bluetooth Shield for Arduino is now in stock and ready to ship, so for more information and to order - visit the shield's product page.

September 08, 2015

Use a Sinclair ZX81 Keyboard with your Raspberry Pi thanks to Arduino

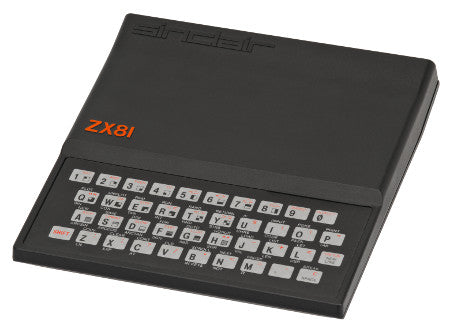
Over the last few years the rise of retro-computing enthusiasm has been helped by the world of Arduino, as a Leonardo-compatible can be used as a bridge between a 20th century keyboard and a USB interface. One example of this has been demonstrated by David Stephenson who shows us how to add a USB interface to the keyboard from a Sinclair ZX81.

The process is made easy thanks to the Leonardo's ability to emulate a USB keyboard, so once the original has been wired to the digital input pins, you're set to go with a simple sketch. And to keep things neat - David has used our Freetronics LeoStick - the tiny Leonardo-compatible that isn't much larger than a USB stick. 

"Sinclair-ZX81" by Evan-Amos - Own work. Licensed under CC BY-SA 3.0 via Commons - https://commons.wikimedia.org/wiki/File:Sinclair-ZX81.png#/media/File:Sinclair-ZX81.png

This is a fun project that can be applied to almost any older keyboard, so head over to David's website to get started. And for more, we're on facebook, twitter and Google+, so follow us for news and product updates as well.

Looking for a small Arduino-compatible board to use as the basis of your own USB controller? Consider our LeoStick - it's the Arduino Leonardo-compatible board that's cheaper and smaller than the original:

Apart from being one of the smallest Arduino-compatibles on the market with USB, it also has an onboard RGB LED and piezo which can be used a knock sensor and various tune and sound effects. Plus you can add extra circuitry with the matching protostick! For more information and to order, click here.

September 07, 2015

Create a password-protected remote control with Arduino and Android

It's no secret that you can create an remote-controlled Arduino-based device using an Android smartphone - as creating your own Android apps that can comminucate via Bluetooth is free and not difficult at all. With this in mind, Instructables user taifur has created a practical example that can be reproduced easily.

This example is a password-controlled electric door control - allowing the door to be locked or unlocked via a password entered into a nearby Android device. Of course you can complete other tasks - anything that can be controlled by an Arduino can be controlled using this system - which is demonstrated in the following video:

An excellent framework for a smartphone-controlled device, of which you can learn more from the project's Instructable page. And for more, we're on facebookGoogle+, and twitter - so follow us for news and product updates as well.

As part of the Arduino and Bluetooth experience you'll need a Bluetooth device for your Arduino projects, and to meet this need we've released the Freetronics Bluetooth Shield:


We've made it simple to use - the Bluetooth Shield acts as a serial link between the other Bluetooth device. Furthermore there's a wide range of jumpers allowing you to select which digital pins to use for data transfer, increasing compatibility with other shields. And with our Quick Start guide it's easier than ever.

Our Bluetooth Shield for Arduino is now in stock and ready to ship, so for more information and to order - visit the shield's product page.

September 03, 2015

Create text on your oscilloscope using an Arduino

If you're looking for something different to do with your oscilloscope then some fun can be had by creating vector images and text on the display. This can be done quite easily using an Arduino with a small amount of external circuitry, and is described by Instructables user MadEncoder.

The process is simple, and involves feeding a pair of PWM (Pulse-Width Modulation) signals each through a low-pass filter then to a channel of the oscillscope, set to X-Y mode. The low-pass filters alter the PWM signals in a way that allow them to rise and fall and appear as vectors on the display - and thus creating the required image, for example:

Certainly something different, and you can start to find out more from the project's Instructable page. And for more, we're on facebookGoogle+, and twitter - so follow us for news and product updates as well.


If you need to add external hardware or devices to your next Arduino project, such as the circuit described above - you'll need a protoshield to mount the external circuitry. When doing so, consider our range of ProtoShields. From the tiny LeoStick to the Mega we have a wide range to suit your application.

September 01, 2015

Make a desktop CNC plotter with Arduino

Have you ever seen a plotter or CNC (Computer-Numerical Control) machine and thought "wow, I'd like one of those"? Well now you can make your own based around an Arduino or compatible hardware and the notes by Instructables member ardumotive.

They describe a desktop CNC plotter that not only introduces you the theory and control of a CNC device - the results are the neat unit shown in the video below.

Apart from the hardware and Arduino sketches, you are also introduced to converting images into the required instructions in order to have them created by the plotter - a complete package.

To get started with your own version, visit the project's Instructable page. And for more, we're on facebookGoogle+, and twitter - so follow us for news and product updates as well.

If you're looking to develop projects based on an Arduino that use stepper motor, CNC machines on a larger scale, and much more - simplify the process with our Freetronics StepDuino board:

The StepDuino is a complete, self-contained Arduino-compatible board with 2 onboard stepper motor drivers, 2 servo outputs, a 20x4 LCD, a micro SD card slot, and more! It's a fantastic general purpose board for any project that uses stepper motors. You can use it as the brain of your next robotics project!

The StepDuino uses the same processor architecture as the common Arduino Uno, so you can program it right from the Arduino IDE simply by selecting "Arduino Uno" as the board type. Everything simply works out of the box, just as it would with a regular Arduino - but now you can also drive steppers directly and display feedback on the huge LCD. For more infromation, tutorials and to order - visit the StepDuino page.


August 31, 2015

Build your own huge stepper motor with Arduino

Have you ever wondered how a stepper motor worked? Like most things if you work through making it yourself, all your questions can be answered and more. With this in mind Instructables user ProtoG did just that and has documented their home-made stepper motor made from 3D-printed parts.

The motor is capable of 15 degree full steps, or 7.5 degree half steps in either direction, and is controlled via an Arduino or compatible board. Each coil can be controlled via an N-MOSFET which allows for easy Arduino connection - the MOSFETs can be neatly activated by a digital output pin. For a demonstration of the stepper motor, watch the following video:

To make your own, all the design files and information can be found on the motor's Instructable page. And for more, we're on facebook, twitter and Google+, so follow us for news and product updates as well.

If you're looking into starting with Arduino and robotics, such as controlling a stepper motor (or DC motors) from your Arduino or compatible, check out our HBRIDGE: DC/stepper motor shield.

Based around the powerful Allegro A4954 H-bridge driver IC you can control two DC motors with complete ease, or one bipolar stepper motor. With connections for external power management, a complete beginners' guide and documentation - motor control couldn't be any easier. For more information and to order, visit the HBRIDGE: page.

August 27, 2015

Make a wireless parking assistant with Arduino

Parking cars in garages can always be a challenge when you're in a hurry, or if your new car or garage is just a bit too tight. This problem can be solved with Arduino and some spare time, and is demonstrated by Instructables member saiyam.

They created a device based around an Arduino circuit and an ultrasonic distance sensor, which measures the distance between the vehicle and the wall, and sends the data back to a receiver unit via a 433 MHz wireless data link. The receiver is a portable model kept inside the vehicle, which emits a tone relative to the distance available - keeping you accident free and also learning more about Arduino.

Apart from helping avoid a small accident, this is a fun project that's inexpensive and easy to build, so to get started visit the project's Instructable page. And for more, we're on facebook, twitter and Google+, so follow us for news and product updates as well.

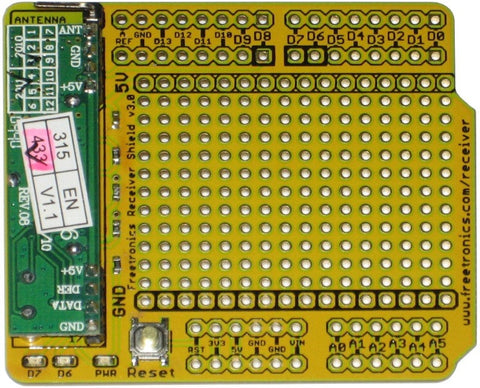
If you're looking to work with your own RF wireless hardware, but don't want to make your own receiver circuit - check out our range of  315/433 MHz receiver shields:

Apart from being idea for working with the various low-cost data links on the market, the shield can also be used to capture wireless weather station data, as described in the book "Practical Arduino". For more information and ideas, check out the product page.

August 25, 2015

Build a classic Star Trek Wall Comm with Arduino

Fans of the original "Star Trek" can now recreate the wall communicator units as used on the Enterprise in a short period of time thanks to Instructables member FredO2 - whose wall comm replacement is made with an Arduino, some hacked walkie-talkies and some 3D-printed enclosure parts.

The new system allows for sending the various boatswain signals and for the recipient to reply via radio in the classic fashion. Furthermore an alert and siren/klaxon can be sounded at the press of a button. All very good fun and ideal for amateur theatre, a different form of intercom or just for fun.

For complete details including design files and code - visit the project's Instructable page. And for more, we're on twitter, facebook and Google+, so follow us for news and product updates as well.

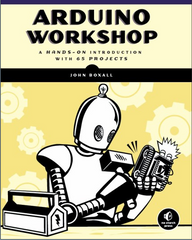
If you have heard about the Arduino development platform and wanted to learn more -  you can't go past reading a copy of "Arduino Workshop -  A Hands-On Introduction with 65 Projects” by John Boxall.

Arduino Workshop takes the reader from having zero knowledge about the Arduino platform, electronics and programming and leaves them with the know-how and instructions on everything from blinking an LED, to robotics, wireless data, cellular communications, motor control, sensors, Internet connected systems and more. For more information including a sample chapter and table of contents, visit the book page.