November 22, 2016

3D Printed Arduino UV Meter

With warmer summer months approaching (at least for us in Australian) it is becoming more important to be sun smart. What better way to start being sun smart than to build your own Arduino UV Meter! Impressively this project also has an inbuilt breathalyser! The keychain uses an OLED display a ESP-1 WiFi module along with a number of sensor to read the UV and blood alcohol level and to display this information back to the user.

Keychain

If you want to find out more about this impressive project check out the instructable from funelab.  The instructions are well explained and include instructions on how to 3D print a case which is perfectly designed for the keychain.

Keychain

If you are looking for a OLED display to use in your keychain why not checkout our 128x128 pixel OLED module.

OLED

Better still, our OLED Stick LCD Adapter for LeoStick allows you to very quickly and easily connect our OLED display to our LeoStick Arduino-compatible board for a tiny, handy display! Perfect for this project!  To find out more about our fantastic OLED Stick LCD Adapter for LeoStick check out the product page.

LeoStick Adaptor

Inspired to build your own keychain? Decided to use 3D printing in your next project? Let us know in the comments section below or on Facebook and Twitter.  

November 20, 2016

Skill Sunday: What is Arduino?

If you have been following our Facebook and Twitter pages or reading our blog you have probably heard a lot about this wonderful thing called “Arduino”.  Although most of you are probably well versed in what Arduino is, some of our readers may have no idea. For this weeks Skill Sunday we have put together a brief introduction about exactly what Arduino is and why you should be interested, you can find it here.

Meme

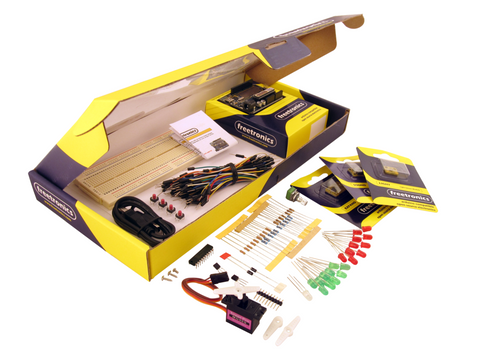
Just discovered what Arduino is an would like to learn how to use it yourself? Checkout our Experimenter's Kit for Arduino - as used in many classroom and learning environments:

Experimenter's Kit

The package includes a wide variety of parts, sensors and modules including: a servo motor, lights, buttons, switches, sound, sensors, breadboard, wires and more. Furthermore a Freetronics Eleven Arduino-compatible board is included to make this an extensive hobby experimenter, inventor and starter kit. The kit also includes a great project and instruction booklet, plus access to a supporting web page and software examples. To get started or for more information and to pre-order (just in time for Christmas), check out the product page.

Have an idea of a skill that should feature on next week's post? Let us know in the comments section below or on Facebook and Twitter.  

November 17, 2016

Project Showcase - Keiran's Automation System

At Freetronics we take great joy in seeing the amazing projects that our customers put together. We are starting a new “project showcase” blog segment, not only so we can see all the cool projects that our customers create but also so that we can share these awesome projects with the rest of the world and use them to inspire others to make their own projects!

Our first showcase project is from Keiran who has started building his own home automation system, inspired by SuperHouse. Keiran currently uses his system to control the fountains and lights in his pool and some of the lights in his house. He also has been working on using MQTT to interact between Arduino and Home Assistant running on a Raspberry Pi. It is great to see the Freetronics EtherTen, POE Injector and Terminal Shield used in such a practical way!

Home Automation System

Keiran has lots of ideas to keep adding to his system including motion activated lights and a power monitoring system.  If you want to find out more about Keiran’s project you can read about his progress on our forum.

Home Automation System

Thanks to Keiran for sharing this awesome project with us. If you would like us to feature your project in our blog, please get in contact with us on Facebook or Twitter or send us an email at support@freetronics.com.

If you are interested in home automation projects why not checkout SuperHouseTV. Presented by Freetronics cofounder Jon Oxer, the SuperHouse series provides plenty of project ideas, in depth explanations and entertainment. To find out more about SuperHouse visit the website or YouTube channel.

November 15, 2016

Arduino Animatronics

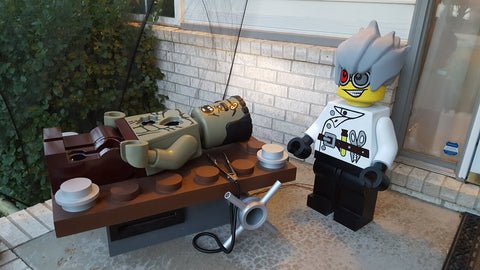
One of the great things about Arduino is the wide range of projects it can be used for. One of these unique projects is Mathew Harrell’s giant lego animatronics. Mathew’s animatronic lego figures are controlled by an Arduino Uno and use a number of servo motors and speakers to talk and move. To find out more about these awesome animatronics and to learn how you can start building your own checkout the following link.

Animatronics


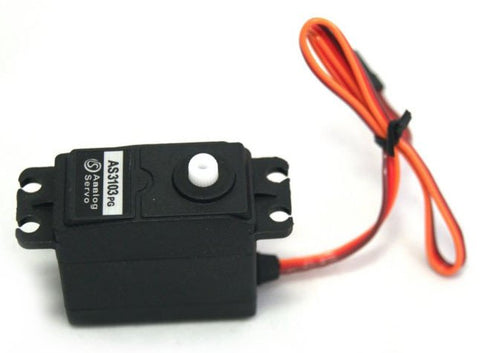
 If you are looking for a servo motor to use in your own animatronics project why not checkout our standard servo. Standard hobby servo that rotates approximately 180 degrees. Comes with a variety of horns, mounting screws, and rubber mounting bushes. To find out more check out the product page

Servo

Found this project interesting? Working on own of your own projects you would like us to feature? Let us know in the comments section below or on Facebook and Twitter.  

November 13, 2016

Skill Sunday: Surface Mount Soldering

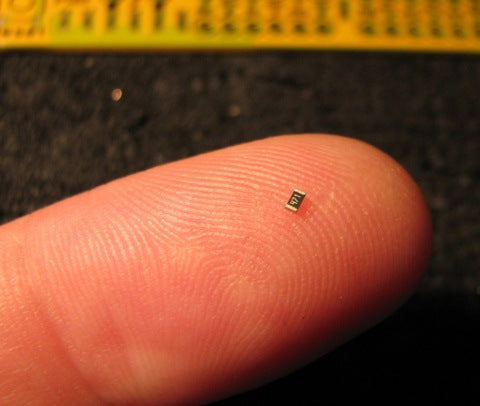
Surface mount parts can be so small that assembling surface mount projects can seem like magic! However, nowadays with the increasing prevalence of surface-mount technology (SMT)  knowing how to put SMT projects together has become an increasingly important skill. Luckily we have put together a great tutorial to help you get started with SMT assembly. To get started assembling your own SMT boards in no time checkout the following link

SMT

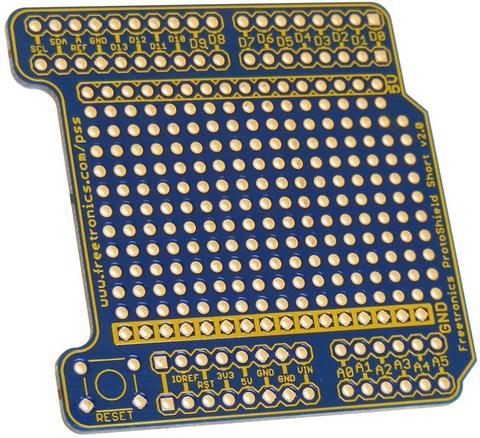
If you are looking to get started making your own smart trash can, why not check out our own ProtoShield for Arduino. The ProtoShield is an excellent tool to turn your temporary, breadboarded project into something more permanent. ProtoShields fit directly onto an Arduino board and have a large general purpose area in the middle where you can solder on your own parts to create a durable, long lasting project! The ProtoShield is a high quality, corrosion resistant gold plated PCB and represents great value at only $3!

ProtoShield

To find out more about our fantastic ProtoShields check out the product page. Already a master at SMT assembly? Decided to use SMT in your next project? Let us know in the comments section below or on Facebook and Twitter.  

November 11, 2016

Arduino Clock

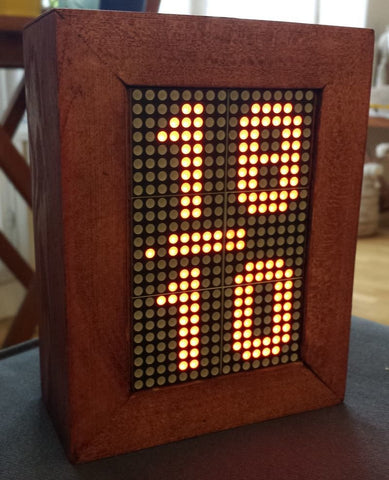
If you are getting bored of your current clock why not have a shot at making your own? Barzok has put together a great tutorial explaining how you can use a number of small LED matrix to build your own very professional looking clock. Although the time display looks fabulous,  it is the Arduino and real time clock module found inside which are responsible for ensuring the correct time is displayed. If you like the look of this project check out the following link to find out more.

Arduino Clock

If you are looking for a real-time clock module to complete this project (or any other project which requires precise timing) checkout our Maxim DS3232 real-time clock IC module:

RTC Module

Apart from keeping accurate time for years due to the temperature-controlled oscillator and having a tiny coin-cell for backup, it is very simple to connect to your Arduino project. A driver library allows your program to easily set or read the time and date. Perfect for clock projects, dataloggers or anything that needs to know the date and time. For more information, check out the module page.

Planning on making your own clock? Let us know in the comments section below or on Facebook and Twitter.

November 09, 2016

Smart Home Dashboard

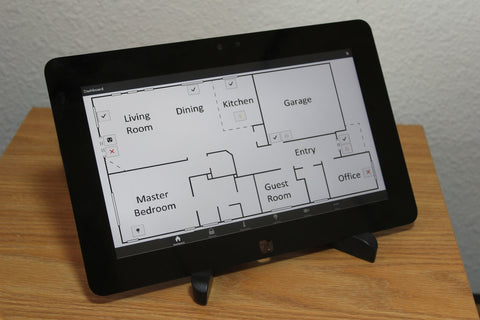
One difficulty facing hobbyists who undertake home automation projects, is finding a common platform to centrally control all aspects of their smart home. Justin Unterreiner has attempted to solve this problem with his smart home dashboard. The project uses a Raspberry Pi and a touch screen to run a customisable interface to control different smart devices. To find out more about this project check out the following link.  

Smart Home Dashboard

To learn about more cool projects like this, we're on facebook and twitter - follow us for news and product updates.

Have you been reading about cool projects like this and would like to understand more? Checkout our Experimenter's Kit for Arduino - as used in many classroom and learning environments:

Experimenters Kit

The package includes a wide variety of parts, sensors and modules including: a servo motor, lights, buttons, switches, sound, sensors, breadboard, wires and more. Furthermore a Freetronics Eleven Arduino-compatible board is included to make this an extensive hobby experimenter, inventor and starter kit. The kit also includes a great project and instruction booklet, plus access to a supporting web page and software examples. To get started or for more information and to order, check out the product page.

November 07, 2016

Particle Photon Gas Detector

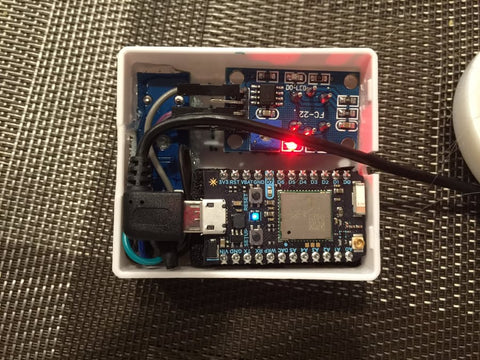
Undetected gas leaks can have extremely nasty consequences. Unlike a leaking tap, a gas leak can be at risk of explosion and, in the case of a carbon monoxide leak cause poisoning or even possibly death. One way to avoid these consequences is to acquire a gas detector, or even better, to make your own! This is exactly what Stefan G has done using a Particle Photon, a gas detector module and a buzzer. To find out more about this project and to learn how you can make your own gas detector checkout this following link.

Gas Detector

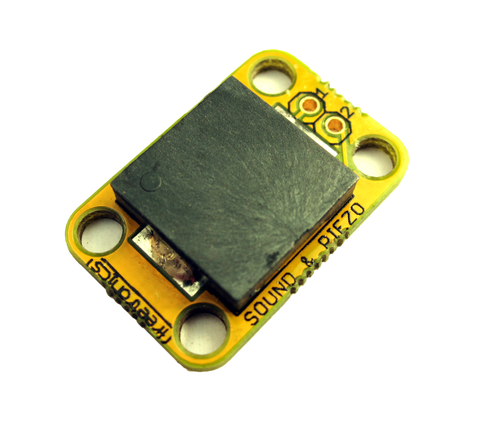
If you're looking for a buzzer module to use in this project check out our sound and buzzer module:BuzzerAlthough you can use the sound and buzzer module to generate sounds, it can also be used as a knock-detector input to sense events and react to them. This means it is perfect for this project! For more information and to order, please visit the product page.

Planning on making your own xylophone? Let us know in the comments section below or on Facebook and Twitter.

November 05, 2016

Arduino CNC Plotter

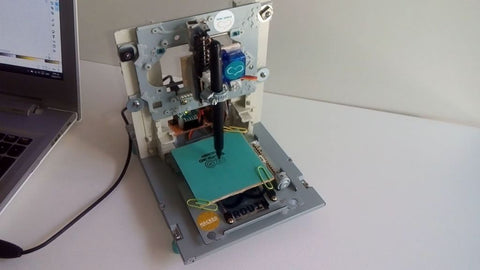
CNC or (Computer Numeric Control) is used in many machines such as 3D printers, pick and place machines or even laser cutters.  This cool project from Automotive uses CNC to create an Arduino powered drawing machine.

Drawing Machine

Building your own CNC plotter would be a great way to learn about more advanced applications of Arduino, and there is no excuse not to get started with full video tutorials avaliable. The plotter uses a number of stepper motors and servos to precisely control the system's movements. To find out more check out the following link or the video below.


If you're looking to develop projects based on an Arduino that use stepper motors - simplify the process with our Freetronics StepDuino board:

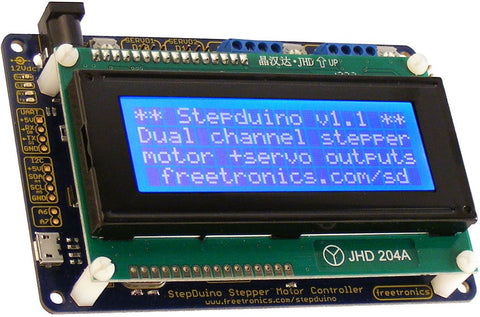
StepDuino

The StepDuino is a complete, self-contained Arduino-compatible board with 2 on board stepper motor drivers, 2 servo outputs, a 20x4 LCD, a micro SD card slot, and more! It's a fantastic general purpose board for any project that uses stepper motors. You can use it as the brain of your next robotics project!

The StepDuino uses the same processor architecture as the common Arduino Uno, so you can program it right from the Arduino IDE simply by selecting "Arduino Uno" as the board type. Everything simply works out of the box, just as it would with a regular Arduino - but now you can also drive steppers directly and display feedback on the huge LCD. For more information, tutorials and to order - visit the StepDuino page.

October 18, 2016

Foodie

Have you ever thought it would be interesting to track food consumption? Foodie is an IoT project that tracks your food usage over time. The project uses a number of weight sensors connected to an Arduino and Raspberry Pi to monitor the contents of your pantry or fridge. By creating a network of weight sensors the “Foodie” system can track the consumption of individual items and link this data to individual product barcodes so that it can automatically update your shopping list! To get started with this project check out the following link.

Foodie

If you are working on a projected that requires interaction between an Arduino and a Raspberry Pi you should check out our PiLeven board.

The PiLeven is an Arduino-compatible board based on the Arduino Uno that fits right on top of a Raspberry Pi using the Raspberry Pi's expansion headers. ThePiLeven also has a high-current switchmode power supply, so you can plug in anything from 7V to 18Vdc using the standard 2.1mm jack and even use it to power the Raspberry Pi. The serial communications on the PiLeven are linked through to the Raspberry Pi, so your Pi can upload new sketches straight to the PiLeven or send/receive data and commands.

PiLeven

The PiLeven is fully compatible with standard Arduino shields adding a huge amount of potential functionality to your Raspberry Pi. For more information, tutorials and to order, visit the PiLeven webpage.

Are you thinking of making a project that requires interaction between Arduino and Raspberry Pi? Let us know in the comments section below or on Facebook and Twitter.