June 20, 2017

We're back ... almost

I'm back in the office and busy shipping out orders, but we've had a major problem: while I was away over the last few days our ".com" domain expired!

Unfortunately that domain was registered by someone who left Freetronics a few years ago, so I didn't receive any warnings that it was going to expire and I haven't been able to renew it. Luckily our site has been running on the ".com.au" version of our domain so it's still accessible, but problems include:

  • We're not receiving any support email
  • Product / documentation URLs printed on some product packages and PCBs don't work
  • The forum URL doesn't work
  • Order confirmation emails and shipping notification emails came from an email address that couldn't receive replies
  • Our direct email addresses don't work

To work around this I've transitioned as much as I can over to the .com.au domain, so if anything doesn't work, just add ".au" into the address. That goes for the forum, email, documentation, etc:

I'm really sorry about this inconvenience. Hopefully we'll have the .com domain back soon.

June 14, 2017

Freetronics shipping closed until June 21

Over the next few days Freetronics will be closed, with shipping to resume around Wednesday next week.
If you're super quick, orders placed in the next couple of hours may ship out today. Otherwise they will have to wait until next week.

Sorry!

May 29, 2017

Quickstart Guide for the CNCPlot stepper motor controller

The CNCPlot is an Arduino Leonardo compatible board with a couple of built-in stepper motor controllers, perfect for a DIY X/Y plotter or other robotics project.

CNCPlot now has a step-by-step Quickstart Guide, which includes connection details and example source code for using the onboard LCD, stepper outputs, servo output, and SD-card slot.

See the full guide at CNCPlot Quickstart Guide.

May 28, 2017

Skill Sunday: Interfacing Arduino with MATLAB

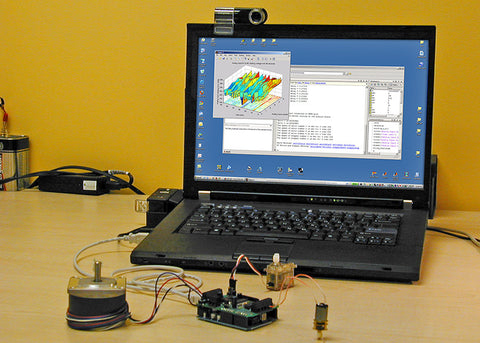
MATLAB is a very popular tool often used by engineers for technical computing, data visualization, simulation and algorithm development. What many people don’t know is that it is possible to connect an Arduino compatible board to MATLAB. This can be achieved through the MATLAB Support Package for Arduino which allows MATLAB to communicate to the Arduino through the USB cable. Not only does this give you to power to blink LEDs from MATLAB, but you can also configure your Arduino to easily collect data and send it into the MATLAB environment where it can be processed using the full power of your PC. Using the MATLAB environment it is also possible to create graphical interfaces to control hardware attached to your Arduino board, and much more! If you want to learn more about how this can be done there are many tutorials available including this one from from All About Circuits or this video series from Mathworks (the creators of MATLAB).  

MATLAB

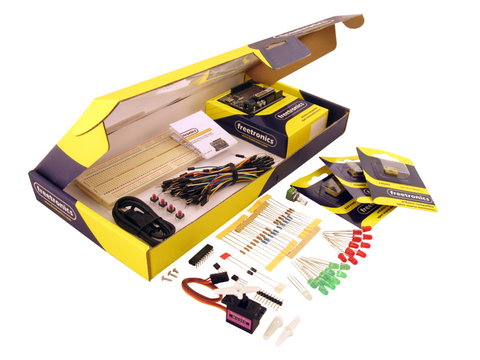
Have you been reading about Arduino and would like to understand more? Checkout our Experimenter's Kit for Arduino:

Experimenter's Kit

The package includes a wide variety of parts, sensors and modules including: a servo motor, lights, buttons, switches, sound, sensors, breadboard, wires and more. Furthermore a Freetronics Eleven Arduino-compatible board is included to make this an extensive hobby experimenter, inventor and starter kit. The kit also includes a great project and instruction booklet, plus access to a supporting web page and software examples. To get started or for more information and to order, checkout the product page.

Working on  a project you want us to feature in this blog? Had success using MATLAB with Arduino in the past? Let us know in the comments section below or on Facebook and Twitter.  

May 21, 2017

DIYODE Magazine: Made for Electronics Enthusiasts!

Here at Freetronics we are very excited about the upcoming launch of a new Australian electronics magazine, DIYODE! The magazine will have a strong focus on DIY electronics and promises new issues every month with 100 pages of exciting projects, tips and ideas. With the magazine set to launch on the 1st of July 2017 there are currently some fantastic pre launch deals available! Checkout the DIYODE website for more.  

May 21, 2017

Skill Sunday: Speeding Up Your Code

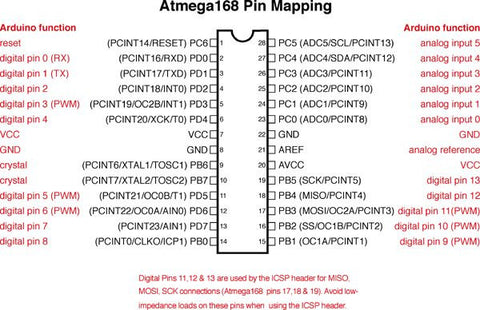
Arduino is a very easy to use platform and comes with many pre existing functions that make it a great learning tool. However, this does come at a cost. One of the costs that comes with this simplicity is that many of the functions can actually be quite slow. You might not notice this when you are flashing a single LED, however once your projects become more and more complicated and tight timing is required, you may start to notice that commands such as digitalWrite may not be as quick as you require. Fortunately it is not too hard to program your Arduino in “true c” which gives you far greater control and can increase the speed of turning on and off a digital input (and other functionality) by as much as 10x! To find out more checkout this instructable from RazorConcepts.

Microcontroller Pinout

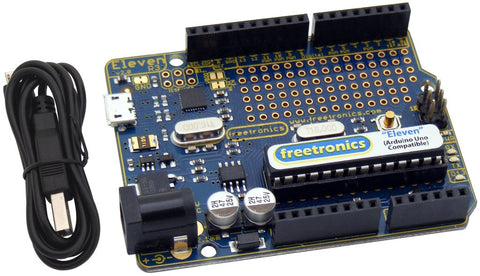
If you are looking for an Arduino board why not check out the Freetronics “Eleven” Arduino Compatible Board.  

Eleven

The Eleven is just like an Arduino Uno (and 100% compatible), however the Freetronics team have made a number of improvements to the Arduino Uno design such as adding in a prototyping area, using a micro-USB connector and many more. These improvements mean that the Eleven is as easy to use as possible and is of the highest quality! To find out more about the fantastic Freetronics Eleven check out the following link. The Eleven has just come back into stock, so order soon to avoid missing out!

Did you find this Skill Sunday interesting? Let us know in the comments section below or on Facebook and Twitter.   

May 14, 2017

Skill Sunday: Writing an Arduino Library

Have you ever written some code that you thought would make a great library but didn’t know where to get started? This weeks Skill Sunday will be perfect for you!

If you haven’t used libraries before they provide a really simple way to extend the functionality of the Arduino environment. For example there are libraries that make it very easy to connect to Ethernet, work with servo motors or even work with LCD displays.  

Writing a library

So how do you create your own library? First you will need to create two files, one header file (.h), which lists everything that is inside the library, and the source file (.cpp) which contains the actual code. After this you will need to take your existing sketch and appropriately fill out the header and source files. Fortunately this is quite a simple process and there is a great example available on the Arduino website.

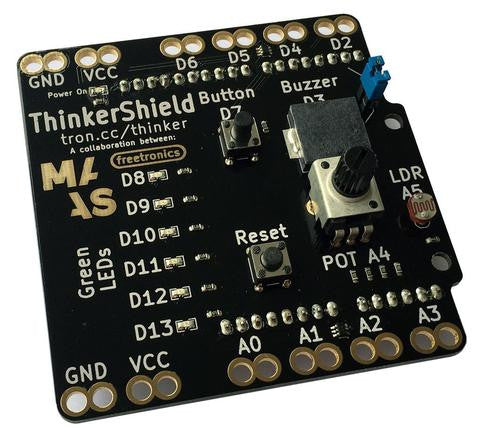
If you are looking for a great resource to develop your Arduino skills why not checkout our Thinker Shield? The shield is ideal for beginners and includes a number of buttons, a buzzer, LEDs and more so that you can get started making all sorts of cool projects! Not only this, but you can find a fantastic project guide on our website! Checkout the product page to find out more.

Thinker Shield

Found this tutorial useful? Interested in our Thinker Shield? Let us know in the comments section below or on Facebook and Twitter.  

May 07, 2017

Skill Sunday: Arduino Interrupts

Interrupts are a fantastic tool to help increase the efficiency of your Arduino code and are typically very underutilized! So what exactly is an interrupt? In simple terms, interrupts are a mechanism found on Arduino (and many other microcontrollers) that simplify the process of reacting to real time events. This is achieved by constantly monitoring the status of a pin and immediately executing code, interrupting whatever was currently running, when the state of a pin changes (or on a rising or falling edge as desired). As you can imagine, this is significantly more efficient than having to wait for your code to reach the specific line where it checks the status of an input, and it frees up your Arduino to focus on other tasks rather than monitoring the state of a pin. To learn more about interrupts and how you can use them in your projects check out the video below from one of our re sellers, Core Electronics.  


Have you been reading about cool projects like this and would like to understand more? Checkout our Experimenter's Kit for Arduino:

Experimenter's Kit

The package includes a wide variety of parts, sensors and modules including: a servo motor, lights, buttons, switches, sound, sensors, breadboard, wires and more. Furthermore a Freetronics Eleven Arduino-compatible board is included to make this an extensive hobby experimenter, inventor and starter kit. The kit also includes a great project and instruction booklet, plus access to a supporting web page and software examples. To get started or for more information and to order, checkout the product page.

Did you learn something this Skill Sunday? Let us know in the comments section below or on Facebook and Twitter.  

May 06, 2017

Project Showcase: Hockey Sin Bin Management System

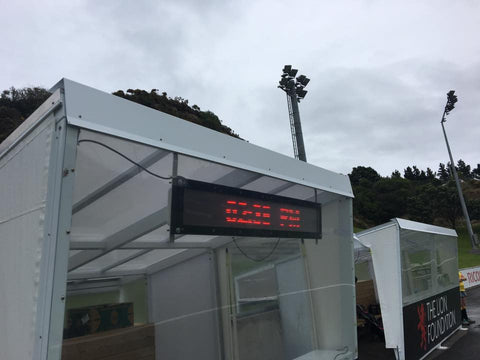
At Freetronics we love it when our customers share with us what they have created with our products. Ben Lennard from Lennard Electronics recently got in touch and shared his great project. Using four Freetronics dot matrix displays, Ben has built a sin bin management display for the National Hockey Stadium in Wellington. Whilst the system is used to display the time and various advertisements, the primary use is to keep track of how long different players have been in the sin bin. According to Ben, the affordable price, existing code libraries and the fact that the displays were bright enough to be visible from the other side of an outdoor hockey field, made our displays the perfect choice for his project! 

The displays

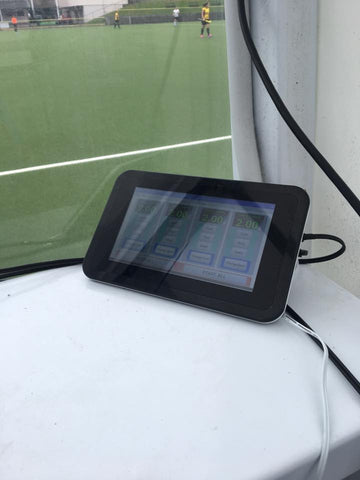
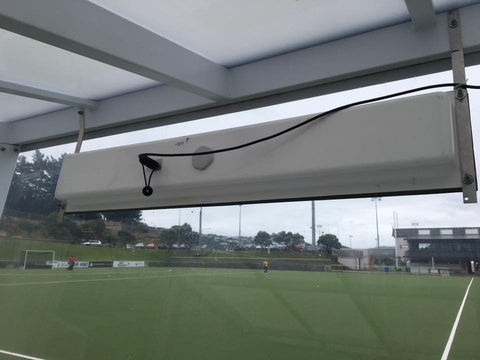
Ben’s project uses four DMD's which are chained together and controlled by an Arduino Uno. The Uno receives commands from a Raspberry Pi powered touchscreen controller box, via a Bluetooth link. The outdoor display is housed in a custom built fiber glass case, which has special vents built into it to allow air to flow in and out whilst still keeping dust and water out. Thanks Ben for sharing!

The touch screen controller

The Hockey Statium

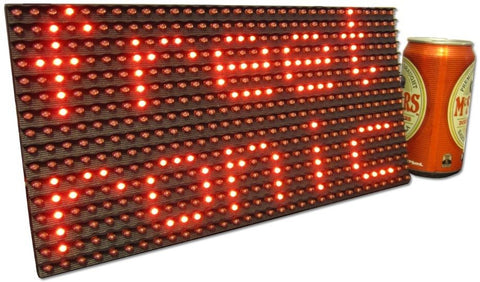
If you are impressed by this project why not checkout our range of displays? They are simple to use, yet very bright for indoor and outdoor situations. Available in various colours, the 32 x 16 LED matrix can display text and graphics easily, and can be daisy-chained together for extended displays. For more information, see our range of Dot Matrix Displays.

DMD displays

Working on a project you want us to feature in this blog? Let us know in the comments section below or on Facebook and Twitter.  

April 30, 2017

Skill Sunday: I2C For Arduino

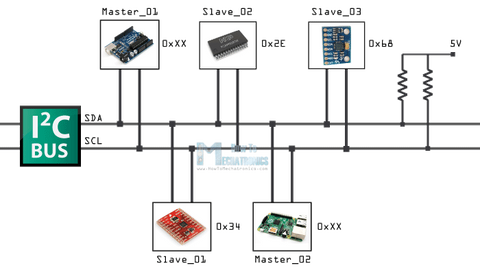
The I2C or “I squared C” bus is a simple way to transfer data between different integrated circuits, boards or sensors in your Arduino project. I2C stands for “Inter-Integrated Circuit”. One of the great things about I2C is that it only requires two connections to your Arduino, SDA (data) and SCL (clock), and you can easily connect multiple devices to the bus. If you want to learn more about the I2C bus checkout this tutorial from tronixstuff, or this tutorial from How To Mechatronics.

I2C

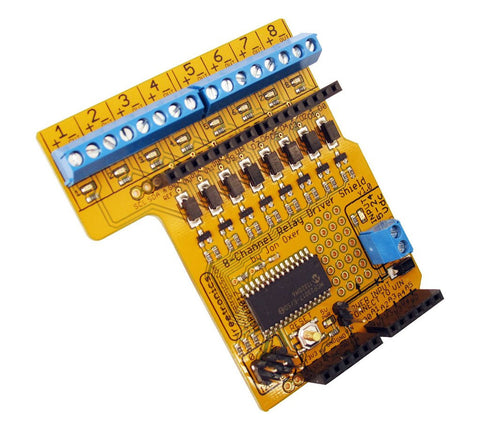
One of our products that uses an I2C interface is our RELAY8: 8-channel relay driver shield.

Relay 8

You can drive up to 8 relays from your Arduino using just 2 I/O pins with this shield. It communicates with your board using I2C, so you can even stack several shields together to drive 16, 24, or more outputs! Includes back-EMF protection and works with a wide range of relays. Perfect for home automation projects! For more information and to order, click here.

Already working on  a project you want us to feature in this blog? Let us know in the comments section below or on Facebook and Twitter.