September 29, 2017

Shipping delayed by the Grand Final public holiday

Australia Post is closed today due to the public holiday here in Victoria, Australia. Unfortunately that means any orders placed now will be shipped after the weekend.

This is totally outside our control. We'd much rather be packing orders than watching some silly football game, even if the Tigers did make the Grand Final for the first time in more than 3 decades!

September 27, 2017

New retail packaging to save space and shipping costs

Our standard retail packaging includes enough room for larger boards such as the EtherMega, or for smaller boards like the Eleven with a USB cable included.

But for many smaller boards, such as the N-Drive Shield, the standard packaging is bigger than it needs to be. So to save on shipping costs and make our packaging more efficient, we've just started packaging some of our smaller boards in this new retail box.

The inner plastic clamshell splits in half to provide two handy parts trays that you can keep for your projects, and the outer cardboard shell can be recycled so there's no packaging waste going into landfill.

And because this new small box is almost exactly half the volume of our standard box, we can pack twice as many of them into the same shipping size. This will help save on shipping costs.

September 26, 2017

New product: MAC Address Module

If you're building an Internet-connected project, you might find that one annoying aspect of most Arduino compatible Ethernet devices is that you have to set the MAC address manually in the sketch. This is really frustrating, because every device needs a unique MAC address so you'll often find yourself modifying the sketch for every device you want to build. Even worse, you have to keep track of the addresses so that you don't re-use the same address and cause network problems.

This module solves the problem. With a simple I2C interface, it's pre-programmed with a unique MAC address that your sketch can load at startup using just a few lines of code.

Our own Ethernet enabled boards such as the EtherTen and EtherMega already include this same chip so you don't need the module on our boards, but for just $5 it can be a life-saver if you're using Ethernet boards from another supplier.

Grab some online now.

September 26, 2017

New stock after a big production run

We've just done a big production run, so many items are now back in stock. If you've been waiting for any of these, now is the time to grab some!

August 06, 2017

Skill Sunday: What is a Shift Register?

Have you ever come across the term “”shift register” and had no idea what it refers to? This weeks Skill Sunday is for you! A shift register is a versatile device that is often used to expand the I/O available on a microcontroller. For example, if you are using 10 LEDs in your project, instead of wiring each LED to an output, you could use a shift register to control the LEDs which would only require 4 pins! This functionality is usually achieved by sending bytes of data to a shift register where each bit represents one of the outputs of the shift register. For a more detailed explanation, visit the Arduino ShiftOut tutorial over at the Arduino website, it explains how to use one or more shift registers to expand the number of digital outputs very easily.

Shift Register

When working with 74HC595 shift registers and solderless breadboards (or more permanent solutions) consider using the Freetronics EXPAND: Expansion/Shift register module. It contains the 74HC595 shift register on a small board with standard 0.1" spacing holes that are perfect for soldering header pins into for breadboard use, and a small "power on" LED. By doing this you have a robust vehicle to insert and remove easily without tools or the risk of bending the IC pins. This is only one of our large range of prototyping modules - check the full range today!

Shift Register

If you have any questions or comments about this week's Skill Sunday don’t hesitate to get in contact with us on Facebook and Twitter.

July 23, 2017

Skill Sunday: Serial Communication Basics

Whilst there are many forms of serial communication comes in many forms,  this tutorial will focus on the connection that exists between an Arduino compatible device and a PC. This connection is particularly important as it allows sketches to be uploaded to the Arduino device and can be an invaluable tool for debugging your Arduino projects. Interestingly you can also use the serial port to send commands to your Arduino from a PC. To find out more about serial communications checkout this guide from Arduino Basics.

Serial Communications

If you are looking to get started making your own custom Arduino projects, why not check out our ProtoShield for Arduino. The ProtoShield is an excellent tool to turn your temporary, breadboarded project into something more permanent. ProtoShields fit directly onto an Arduino board and has a large general purpose area in the middle where you can solder on your own parts to create a durable, long lasting project! The ProtoShield is a high quality, corrosion resistant gold plated PCB and represents great value at only $3!

ProtoShield

To find out more about our fantastic ProtoShield’s check out our full collection at the following  page. Found this week's Skill Sunday useful? Let us know in the comments section below or on Facebook and Twitter.   

July 16, 2017

Skill Sunday: Breadboard Fundamentals

A common barrier faced by many new electronics hobbyists is understanding exactly how a breadboard works. Fortunately with a simple explanation and some practice this is a skill that can be quickly mastered. Although breadboards can be found in many configurations a common format is shown below:

Breadboard layout

As you can see on either side of the bread board are two columns (usually referred to as power rails) and on both sides of a central divider (used for bread boarding ICs), horizontal rows of connected holes. Each row or rail is a “node” of the circuit meaning that the voltage at any point of the same “node” will be the same. It is for this reason that different component pins are usually connected between different rows or rails and not on the same one (otherwise they would have 0V across them!). For example, the following circuit is from our Experimenter’s Kit and highlights where electrical connections are present with green lines:

Experimenter's Kit Example

If you are still struggling to master the art of breadboarding you can find a more thorough explanation at the following link.

Working on  a project you want us to feature in this blog? Had success with breadboarding in the past? Let us know in the comments section below or on Facebook and Twitter.    

July 09, 2017

Skill Sunday: Troubleshooting Arduino Projects

If you have ever used Arduino in one of your projects it is likely that you have experienced the frustration of your code failing to upload to your board, your sketch not running as you imagined, or your project failing after a subtle breadboarding error! Fortunately with some patience and a systematic approach to troubleshooting, these problems can usually be easily overcome.  Indeed, Brock Craft has put together a great guide on how you can troubleshoot basic problems with your Arduino projects. Brock’s guide provides some great suggestion about where you should start looking for errors in both your hardware and software and can be found at the following link.

Troubleshooting

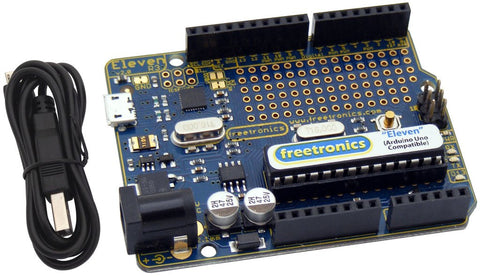
Have you been reading about cool Arduino projects and would like to understand more? Checkout our Experimenter's Kit for Arduino:

Experimenter's Kit

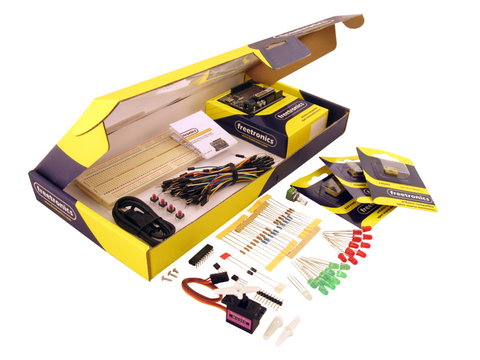
The package includes a wide variety of parts, sensors and modules including: a servo motor, lights, buttons, switches, sound, sensors, breadboard, wires and more. Furthermore a Freetronics Eleven Arduino-compatible board is included to make this an extensive hobby experimenter, inventor and starter kit. The kit also includes a great project and instruction booklet, plus access to a supporting web page and software examples. To get started, or for more information and to order, checkout the product page.

Already working on  a project you want us to feature in this blog? Let us know in the comments section below or on Facebook and Twitter.  

July 06, 2017

Arduino Rubik’s Cube Solver!

If you are looking for an exciting but challenging project to put your Arduino skills to the test, checkout this Rubik’s Cube solving robot, designed by instructables member matt2uy!

Rubik's Cube Robot

Impressively the robot takes only 20 minutes to solve a 3x3 Rubik’s Cube and, unlike many other Rubik’s cube solvers, matt2uy’s project is made out of very easy to source materials such as pop sticks and skewers meaning it is a very accessible DIY project! To find out more about how you can build your own rubik’s cube solving robot checkout the following link.


If you are looking for an Arduino board why not check out the Freetronics “Eleven” Arduino Compatible Board.  

Eleven

The Eleven is just like an Arduino Uno (and 100% compatible), however the Freetronics team have made a number of improvements to the Arduino Uno design such as adding in a prototyping area, using a micro-USB connector and much more. These improvements mean that the Eleven is as easy to use as possible and is of the highest quality! To find out more about the fantastic Freetronics Eleven check out the following link.

Did you find this project inspiring? Let us know in the comments section below or on Facebook and Twitter.   

June 28, 2017

Now we really are back!

The freetronics.com domain renewal finally went through on Monday so everything is running smoothly again.

Thanks for your patience!