I'm treating myself to a looooong weekend, so I won't be shipping any orders for the Freetronics and SuperHouse online stores for a few days.
I'll be shipping again from next Wednesday, so if you place an order now I'll ship it then.
April 04, 2019
I'm treating myself to a looooong weekend, so I won't be shipping any orders for the Freetronics and SuperHouse online stores for a few days.
I'll be shipping again from next Wednesday, so if you place an order now I'll ship it then.
November 29, 2018
During December I'll be taking a break from shipping orders from the Freetronics and SuperHouse online stores.
Any orders placed after December 4th, 2018 will be shipped right after Christmas, hopefully around December 28th and 29th. If you want to get something in time for Christmas, make sure you place your order now!
I'll be back with new products and more videos on the SuperHouse YouTube channel after Christmas.
See you then!

In November 2017, Vela Georgiev took a group of engineers to China for a tour through a variety of factories and the famous Huaqiangbei electronics markets. The group visited Seeed Studio, ITEAD, the Shenzhen Maker Faire, the LiFX factory, Hytera EMS, and many other fascinating places to learn about rapid prototyping, low/high volume manufacturing, hardware focused business accelerators, and successful electronics startups.
 Vela will be interviewed live on YouTube by Freetronics founder Jonathan Oxer, and will share her plans for doing it all again on the HardworX Shenzhen Innovation Tour 2018.
Join the livestream to ask questions about the tour, or about electronics manufacturing in general. Vela will take questions via live chat so if there's anything you've wanted to know about how electronics is manufactured at scale or how you can take your idea and turn it into a product, this is your chance to ask.
If you're interested in electronics, the Innovation Tour could be one of the most important events you ever take part in.
To see the livestream or watch it later, subscribe to Jonathan's YouTube channel at www.youtube.com/superhousetv and also click the bell icon so that you will be notified when the livestream starts.
The livestream will begin at 8pm Monday 13 August. A few representative timezones around the world:
August 07, 2018
We have recently completed a large production run, which means lots of items are back in stock! Items back in stock include our Experimenter's Kit, EtherMega, EtherTen, PiBreak Plus, USB Serial Adapter and our popular Power-over-Ethernet Regulator 802.3af. With plenty of new stock available for purchase now is the perfect time to start on a new project! If you are struggling to think of project ideas have a browse through our blog.
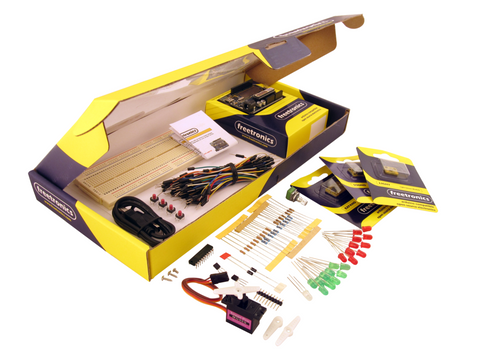
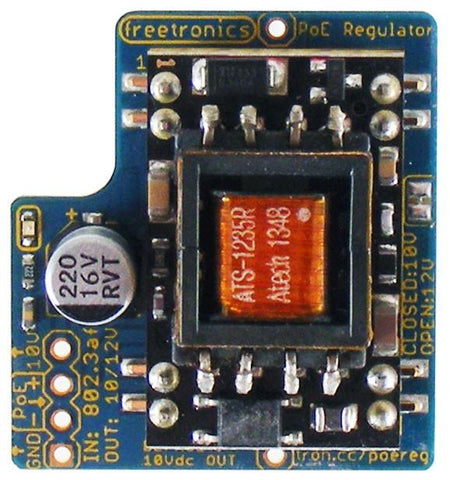
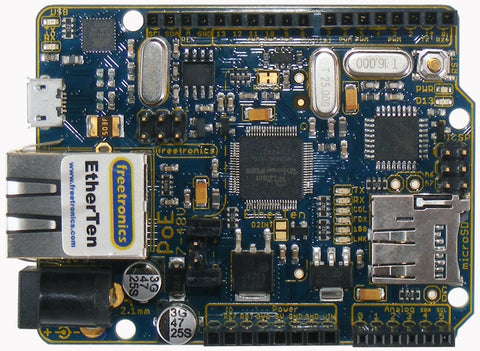
Already working on a project you want us to feature in this blog? Know someone who has been anxiously waiting for one of these products to come back in stock? Let us know in the comments section below, Facebook, Twitter or on our brand new Instagram.
July 23, 2018
At Freetronics we get a lot of joy from seeing our products being used in all sorts of cool projects and applications. Recently we received an email from Instructables member TechKiwiGadgets who shared with us his LED Gyro Sphere which features our Microphone Sound Input Module and was the Runner Up in the 2017 Instructables Arduino Contest.
The sphere consists of 130 colored LEDs which fit into a specially designed 3D printed case and are controlled by a number of different sensors including a gyroscope and the Freetronics Microphone. There are an almost endless list of visual effects that the sphere can display including a gyroscope driven “rolling colour change” and various sound meter displays.
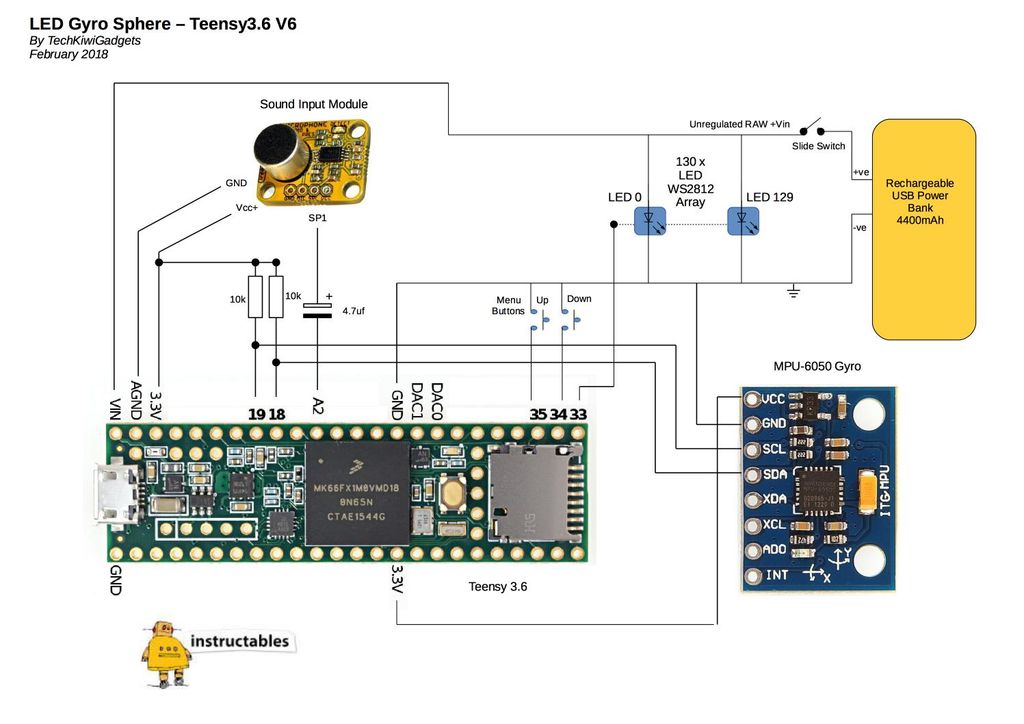
To find out more about how you can build your own LED Gyro Sphere, checkout the following link.
If you are looking for a Microphone to use in your projects why not checkout our Microphone Sound Input Module. The module provides two inputs: one providing the raw audio waveform, and one providing the sound pressure level (SPL) providing maximum flexibility for your projects. If you want to process the audio waveform directly you can use the MIC output, or if you just want to detect sound level (for example, to detect noise above a certain threshold) you can use the SPL output.
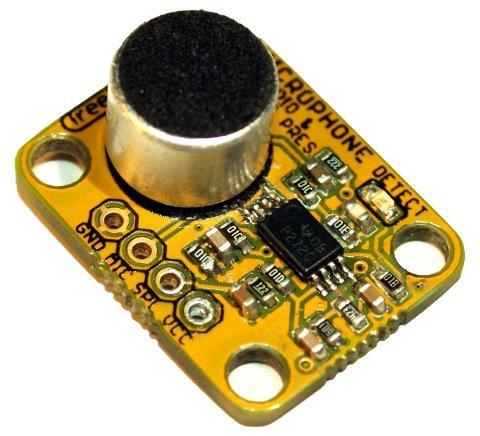
The module also features a “DETECT” LED which illuminates proportionally to the detected sound pressure, providing quick and simple visual feedback that the module is working. This module is great value at only $7! For full details visit the product page.
Working on a project that you think could be featured in this blog? Let us know in the comments section below, or on Facebook and Twitter.
The Experimenters Kit for Arduino comes with a 50 page printed project guide, showing how to build 11 different projects and explaining how they work.
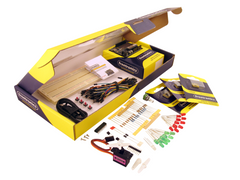
Over the last couple of years there have been updates to the Arduino IDE that have moved things around. The example sketches are in different places, some of their source code has been updated, and some menus are now in different locations.
The project guide has just had a big update to make sure everything matches the latest Arduino software. Some of the improvements in the guide include:
Version 1.5 of the guide is available right now as a PDF, so if you have the Experimenters Kit for Arduino make sure you grab the v1.5 PDF now.
Future batches of the Experimenters Kit will include the new version as a hard copy.
Enjoy!
May 13, 2018
Have you ever wondered why Arduino boards have bizarre spacing between the top headers?
The reason is that back in 2005, the design for one of the very first Arduino boards was being finished late one night so that it could be sent to a PCB factory the next day, and Massimo Banzi accidentally bumped the location of the D8-D13 header slightly sideways off the 0.1" grid that he used to lay out the parts. He didn't notice when looking at the design on the computer screen, so when the PCBs came back from the factory with the header in the wrong position they decided to just use them anyway.
After this first batch of PCBs had been used up the header could have been moved into the correct position for the next batch, but by then it seemed like it would be too disruptive to change the design and break compatibility with the projects they had already made using the first boards. So the decision was made to leave it there, and we've been stuck with bizarre header positions ever since.

For many people it's frustrating because you can't use regular 0.1" prototyping board to make your own shields, but this little accident of history had a good side effect: it makes the Arduino header format only work one way. You can still put a shield into the wrong position, but most of the time it takes extra force to insert it.
Some types of headers and connectors have a mechanical "key" that prevents them being misaligned or inserted backwards, but not all headers have this benefit. Many headers are symmetrical, so they can be accidentally inserted backwards or offset to one side.
Danny Vagg was pondering how to solve this problem after he accidentally inserted a Zigbee board into the wrong holes and damaged the board, with a higher voltage being applied to a pin that could only operate at 3.3V.
To prevent it happening again, Danny came up with a very easy solution for making your own keyed headers. Danny's suggestion is:
1. Select a pin that you don't need to use, and cut it off.
2. Cut off a short length of wood skewer, and split it lengthwise to make it narrower.
3. Insert the small piece of wood skewer into the matching hole in the header.
By leaving the wood slightly longer so that it protrudes from the header, it's easy to remove it again later if you need to.
In this photo Danny inserted skewers into the NC, IOREF, VIN, A6, and A7 pins of an EtherMega. On his shield (not shown) he's left off those same pins to allow the shield to only be inserted in the correct position:
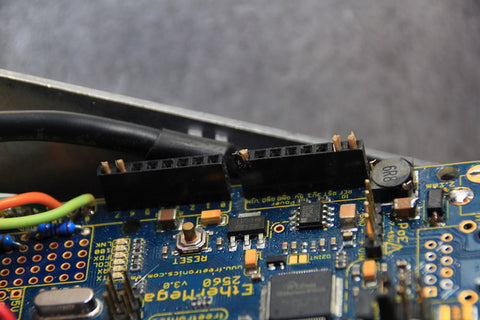
Now the headers can only be inserted in the correct position, and it'll be impossible for you to push the board in the wrong place.
And because he specifically selected unused power pins for the key locations, it reduces the chance of a shield pin being connected accidentally to a higher voltage than the shield rating.
The NC (not connected) and VIN pins are particularly good ones to pick if you want to add keys to your header. The NC pin isn't used by any current Arduino design, and the VIN pin can often expose 12V or more which can be enough to damage some parts that are designed to operate at 5V or 3.3V.
Thanks for the tip, Danny! We'll send you a prize for your suggestion.
April 29, 2018
Have you ever wondered where common consumer electronic gadgets come from? Or maybe you have an idea for a product, and you want to learn how to engage with the necessary factories to turn your idea into reality?
In late 2017, Australian film-maker Karl von Moller travelled to China with Freetronics founder Jonathan Oxer and a small group of engineers as part of the HardworX Shenzhen Innovation Tour.

The group visited the global centre of the electronics manufacturing industry: Shenzhen, China. Tour organiser Vela Georgiev lead the group on a 10 day in-depth tour of factories, local hackerspaces, and the famous Huaqiangbei electronics markets.
The tour included the LiFX production line, Maker Faire Shenzhen, SEEED studios, PCB assembly production lines, several plastics fabrication factories, the HAX incubator, and one of the most automated production lines in the world: Hytera EMS.
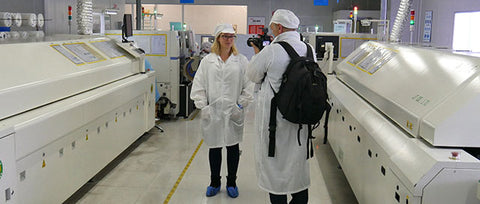
Karl has now edited the many hours of footage of the trip into a documentary, and released it in 18 chapters. You can start at the beginning and follow through the entire trip, or jump around and check out the parts that interest you.
Either way, Karl has produced an amazing resource that will help provide a roadmap for anyone who wants to learn about taking a product from concept to mass production.
1: The Makers road to Shenzhen
2: The tour begins and the Makers Faire
3: MAKE
4: The Factory Tours of Shenzhen - Defond
5: The Electronics Markets of Shenzhen
6: Factory Tours of Shenzhen - Jiafuh Metal & Plastics
7: The Factory Tours of Shenzhen - HLH Prototypes
8: LiFX - The Beginning
9: The LiFX Production Line
10: The Factory Tours of Shenzhen - Kaier Wo
11: The Factory Tours of Shenzhen - SEEED Studios
12: The xFactory
13: Incubators and the Role of Government
14: Hardware Accelerators
15: The Factory Tours of Shenzhen - Hytera EMS
16: Artificial Intelligence & Automation
17: The Factory Tours of Shenzhen - HYX Gears and ITEAD Studios
18: The Shenzhen Innovation Tour 2017 Wraps Up
What did you think of the tour? Discuss it in the forum.
January 19, 2018
Next week I'll be in Sydney for linux.conf.au, the big annual Linux and Open Source conference run by Linux Australia. While I'm away some orders may ship out, but it's best to assume that any orders placed after today won't ship until Monday, January 29.
If you're coming along to linux.conf.au, ask around for Jonathan Oxer and come and say hi! I'll be running the Open Hardware Miniconf on the first day of the conference so I should be easy to find. At the OHMC we'll have a bunch of people building this little soccer-playing robot:

November 08, 2017
I'm heading off to Shenzhen, China, on Friday November 10th and returning on the 18th.

During that time I'll have someone looking after shipping, but it will probably only be processed every few days.
Any orders placed today will be shipped before I leave, but after that there may be some delays until I return.
Thanks for your patience!