August 01, 2016

Remotely Open Your Garage Door Using the Freetronics EtherTen and WIFI

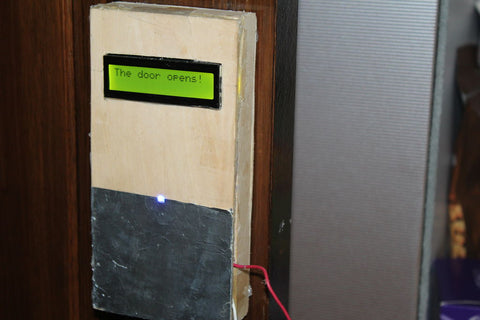
For those who are chronically forgetful or who often find themselves locked out of home, Instructables member and Freetronics customer MegunoLink has developed a system that allows you to open your garage using only your smartphone, granting quick and easy entry even without your keys.

Garage Door

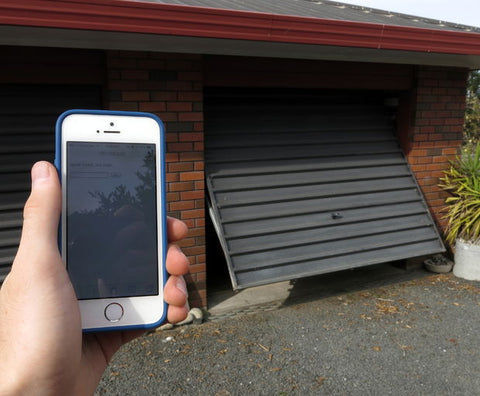
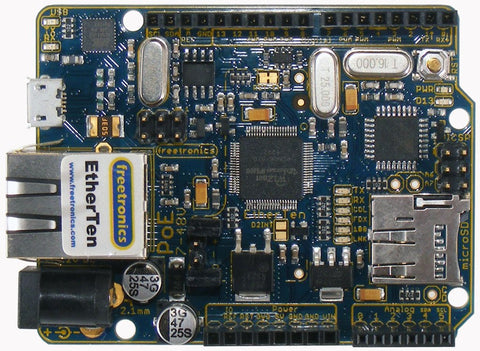
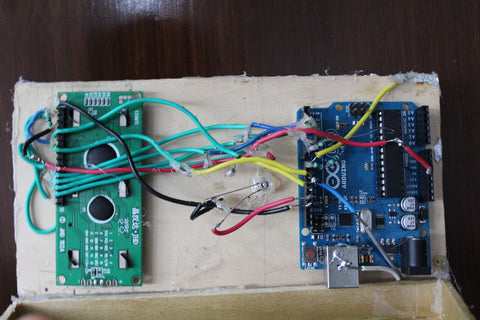
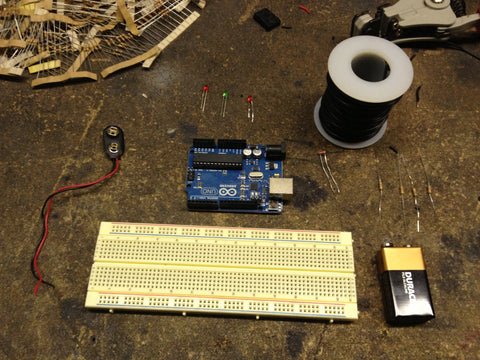
The project uses an EtherTen to host a web page which can be accessed from any device on your local network. When you enter the password on the website, the Arduino switches a relay that triggers the opening of the garage door. The project should work on most motorised garage doors and only requires basic soldering to assemble. All of the parts are readily available, and completing this project will introduce you to the basics of controlling anything and everything over the internet.

EtherTen

Once you have obtained the parts required, you could easily add internet connectivity to your garage door in a few days - visit the Instructables page to get started. To find out about more cool projects like this follow us on Facebook and Twitter.

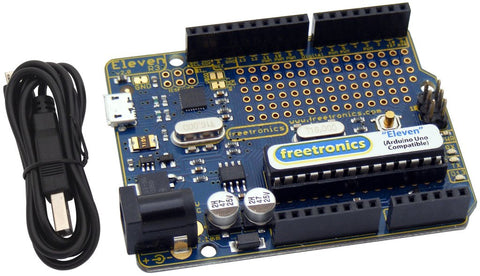
If you’re looking for an Arduino Uno compatible board that can talk to the world and add connectivity to your projects, use our Freetronics EtherTen - the Arduino-Uno compatible board with built in Ethernet:

EthernTen

July 31, 2016

Arduino Powered Automatic Door Opener

Do you struggle to open your front door while you are carrying the groceries inside? Do you have elderly parents who could benefit from an automatic door? With this project from Saral Tayal you can add a motor to any door around your house for effortless opening.  

Door

The door opener uses an Arduino to control a geared motor which opens the door and an LCD which provides feedback about the door status.  Check out the video below to see the door in action!


This is a really cool project is a great way to learn about interfacing Arduino, motors and LCDs. To get started check out the following instructable.

Door

If you are looking for an Arduino to use in your automatic door why not check out the Freetronics “Eleven” Arduino Compatible Board.

Eleven

The Eleven is just like an Arduino Uno (and 100% compatible), however the Freetronics team have made a number of improvements to the Arduino Uno design such as adding in a prototyping area, using a micro-USB connector and more. These improvements mean that the Eleven is as easy to use as possible and is of the highest quality! To find out more about the fantastic Freetronics Eleven check out the following link. The Eleven has just come back into stock, so order soon to avoid missing out!

Planning on building your own automatic door? Let us know in the comments section below or on Facebook and Twitter.  

July 30, 2016

Maker + Swimming Pool = ?

You may be wondering why you would ever want to connect your swimming pool to the internet? The answer is simple. Adding internet connection to your swimming pool allows you to monitor the temperature and water quality, and gives you precise control over the pump, filtering and heating systems! This pool collects data from a number of sensors which are fed into a Raspberry Pi via an Arduino. A relay then allows the system to have precise control over the workings of the pool based on the sensor inputs! Convinced? Check out the instructions Kevin has prepared to find out more!     

Pool System

Check out the video below to see it in action:


If you are working on a projected that requires interaction between an Arduino and a Raspberry Pi you should check out our PiLeven board.

The PiLeven is an Arduino-compatible board based on the Arduino Uno that fits right on top of a Raspberry Pi using the Raspberry Pi's expansion headers. The PiLeven also has a high-current switchmode power supply, so you can plug in anything from 7V to 18Vdc using the standard 2.1mm jack and even use it to power the Raspberry Pi. The serial communications on the PiLeven are linked through to the Raspberry Pi, so your Pi can upload new sketches straight to the PiLeven or send/receive data and commands.

PiLeven

The PiLeven is fully compatible with standard Arduino shields adding a huge amount of potential functionality to your Raspberry Pi. For more information, tutorials and to order, visit the PiLeven webpage.

Are you thinking of making a project that requires interaction between Arduino and Raspberry Pi? Let us know in the comments section below or on Facebook and Twitter.

July 29, 2016

Twitter Enabled Coffee Pot

Do you love coffee but can’t find the time to put a pot on? With the Tweet-a-pot you can send a tweet to your coffee pot and have it prepare you a coffee while you are still stuck in traffic. Brilliant! The Tweet-a-pot works by interfacing between a Computer, an Arduino board and a relay to ensure that you can control your coffee pot from anywhere in the world.

Tweet-a-pot

The project uses python to interface between Arduino and twitter. The best thing about this project is that the same principles used to create a Tweet-a-pot can be used to control any AC device over twitter, so the possibilities are endless! To get started with this fantastic project check out the instructable from frenzy. Check out the video below to see the Tweet-a-pot in action!


If you are looking for an Arduino to power your Tweet-a-pot why not check out the Freetronics “Eleven” Arduino Compatible Board.

Eleven

The Eleven is just like an Arduino Uno (and 100% compatible), however the Freetronics team have made a number of improvements to the Arduino Uno design such as adding in a prototyping area, using a micro-USB connector and more. These improvements mean that the Eleven is as easy to use as possible and is of the highest quality! To find out more about the fantastic Freetronics Eleven check out the following link. The Eleven has just come back into stock, so order soon to avoid missing out!

Planning on building your own Tweet-a-pot? Working on a project you would like to share with us?  Let us know in the comments section below or on Facebook and Twitter.  

July 28, 2016

Arduino Night Lamp

Are you kids scared of the dark? Do you spend a lot of time and effort setting up lights for your kids so that it is the perfect ambience for them to get to sleep? With this Arduino-Controlled Night Light from Andre you can very easily automate this process and never have to worry about setting a night light ever again. The project is very simple and uses an Arduino and a photodiode to automatically turn on a night light when it gets dark. You could easily make this project out of parts found in our experimenters kit! Furthermore, you can easily customise this project to suit your exact needs. To get started with this cool project check out the following link.

Electronics Parts

Want to make your night light but don’t know where to get started with Arduino? Check out our Experimenter’s Kit which provides a perfect platform to learn the basics.

Experimenters Kit

The kit is comprised of a wide range of parts including a servo, sensors, lights, buttons, a sound module and more. Importantly, a Freetronics Eleven Arduino-compatible board is included to ensure that the kit contains everything you need to get started with Arduino (and this project). All these great parts would be useless without some form of instructions which is why we have developed a comprehensive project and instruction booklet to get you started. Check out the product page to find out more.

Will this project help you get your kids to bed smoothly? Working on a project you would like us to feature in this blog? Let us know in the comments section below or on Facebook and Twitter.  


July 27, 2016

Control your RC Car from a Smartphone using Bluetooth

Many people are unaware of the powerful bluetooth capabilities possessed by Arduino. What better way to learn than by modifying an existing remote control car so that you can control it using your smartphone over bluetooth! At a basic level this project works using a H-Bridge motor controller to enable the Arduino to have control over the remote control car's motors. A bluetooth module allows the Arduino to receive messages from an Android phone over bluetooth which can be used to control the car. Very cool!   

RC Car

To get started learning how to control your own remote control car using your smartphone check out the following instructions prepared by Herbaltea.

If you are looking for a bluetooth module to work on this project why not check out the Freetronics Bluetooth Shield?

Bluetooth

Our Bluetooth Shield plugs right in to your Arduino and lets you send and receive data and commands from your sketches. You don't even need to do anything fancy in your sketches, because the Bluetooth link acts as a serial port: you just pair it with your computer, then you can simply use "Serial.read()" and "Serial.write()" as normal! The Bluetooth Sheild can operate as a Bluetooth master or slave and is packed full of useful features. To find out more check out the Freetronics Bluetooth Shield product page

What did you think of this project? Let us know in the comments section below or on Facebook and Twitter.  

July 26, 2016

Arduino Water Tank Level Tracker

Do you ever find yourself wondering exactly how full your water tank is? With this project from Boris Landoni you can create your very own water tank level sensor using Arduino. This sensor allows you to track tank level trends, and even potentially automatically switch between tank water and mains water if your tank runs dry. An ultrasonic distance sensor is used to determine how far the water is from the top of the tank, and this is used to calculate the current water level. The output output is displayed on an LCD screen so that you can easily see how full your tank is! The possibilities for a project such as this are really limited to your imagination! To get started on this project check out the following link.   

Depth Sensor

If you decide to build your own tank depth sensor, why not check out the ProtoShield for Arduino. The ProtoShield is an excellent tool to turn your temporary, breadboarded project into something more permanent. The shield fits directly onto an Arduino board and has a large, general purpose area in the middle where you can solder on your own parts to create a durable, long lasting project! The ProtoShield is a high quality, corrosion resistant gold plated PCB and represents great value at only $3! For more information or to order visit the ProtoShield product page.

ProtoShield

Feel as though you would benefit from this project? Let us know in the comments section below or on Facebook and Twitter.

July 25, 2016

Build Your Own Pressure Plate Switch

This is a very simple project which could be used for an infinite number of different purposes! You could use your pressure plate switch to add perfect timing into your haunted house, automatically trigger your doorbell when someone stands on your doormat, track the presence of mail or parcels, or even set up your alarm clock to only turn off when you get out of bed and step on the switch! The switch is made up of two separated sheets of aluminium covered cardboard which connect when pressure is applied, closing the circuit. 

Pressure plate switch

The possibilities are really limited to your imagination. This project allows you to easily build something that is impressive and useful! The best thing about this project is that all you need to get started is some wire, aluminium foil and cardboard! To begin making your own pressure plate check out the following instructable from Jason.


To get the most out of your pressure plate switch why not add a Freetronics “Eleven” Arduino Compatible Board to your project so you can use the switch to easily control different outputs.  

Eleven

The Eleven is just like an Arduino Uno (and 100% compatible), however the Freetronics team have made a number of improvements to the Arduino Uno design such as adding in a prototyping area, using a micro-USB connector and more. These improvements mean that the Eleven is as easy to use as possible and is of the highest quality! To find out more about the fantastic Freetronics Eleven check out the following link. The Eleven has just come back into stock so order soon to avoid missing out!

Planning on building your own pressure plate switch? Let us know in the comments section below or on Facebook and Twitter.  

July 24, 2016

Skill Sunday: Interfacing Between the Wii MotionPlus and Arduino

Wouldn’t it be awesome if you could use a Wii MotionPlus controller to control your Arduino projects? This week on “Skill Sunday” we are going to learn how to program your Arduino to communicate with the Wii controller’s i2c (inter-integrated circuits) protocol, so that you can gather data from the gyroscope in the Wii controler.  To get started hacking into the Wii controller, all you will need is a few resistors and jumper wires! Once you have the hack working there is any number of ways you can use it.  For example you could make three motion controlled servos using the data from the Wii controller! To get started learning how to get your Arduino to talk to your Wii controller check out the following instructions from rileyporter.

Wii MotionPlus

If you are looking for an Arduino board to work on this hack why not check out the Freetronics “Eleven” Arduino Compatible Board.  

Eleven

The Eleven is just like an Arduino Uno (and 100% compatible), however the Freetronics team have made a number of improvements to the Arduino Uno design, adding in a prototyping area, using a micro-USB connector, and more. These improvements mean that the Eleven is as easy to use as possible, and is of the highest quality! To find out more about the fantastic Freetronics "Eleven" check out the following link. The Eleven has just come back into stock, so order soon to avoid missing out!

Have an idea of a skill that should feature on next week's post? Let us know in the comments section below or on Facebook and Twitter.  

July 23, 2016

Connected Laundry with Arduino

Sick of losing valuable drying time when you forget to take the washing out of the machine? This project allows you to turn your washing machine into an Internet of Things (IoT) device which notifies you via Twitter and sms when the washing is finished. Rather than modifying your washing machine, the project cleverly uses an accelerometer to detect when the washing machine is in use.  The project can be made very cheaply from commonly available parts and could be easily finished over a few hours.

Washing Machine

Completing this project will teach you a lot about building internet connected devices and could end up saving you a lot of time. To get started check out the instructable from MakerBee.

If you are looking for a accelerometer to complete this project why not check out the Freetronics 3-Axis Accelerometer Module. The module has independent X,Y and Z axis outputs ready to connect directly into an Arduino. To find out more and to order check out the product page.

Accelerometer

Considering optimizing your washing machine? Let us know in the comments section below or on Facebook and Twitter.