March 12, 2015

Build a PSK31 Encoder with USB keyboard using an Arduino Due

Those of you interested in radio teletype may find the following project by Jeff Whitlach KO7M of interest - which uses an Arduino Due or compatible board as the brains behind a full USB keyboard to PSK31 interface. For the uninitiated, PSK31 is (thanks Wikipedia)

..."Phase Shift Keying, 31 Baud" is a popular computer-soundcard-generated radioteletype mode, used primarily by amateur radio operators to conduct real-time keyboard-to-keyboard chat, most often using frequencies in the high frequency amateur radio bands (near-shortwave).

Using Jeff's previous work with the DAC on the Due, the PSK31 project is explained well and with some thought you can recreate your own version. Connecting a USB cable to the Due is accomplished with a USB OTG cable, and also remember to heed the notes about connecting low-impedence circuitry to the DAC output. To work around this a small audio amplifier circuit is created to boost the output.

With the addition of an LCD or other display you can add feedback for the user input, however this isn't required for use. To get started on this PSK31 project, visit Jeff's interesting website. And for more, we're on facebookGoogle+, and twitter - so follow us for news and product updates as well. 

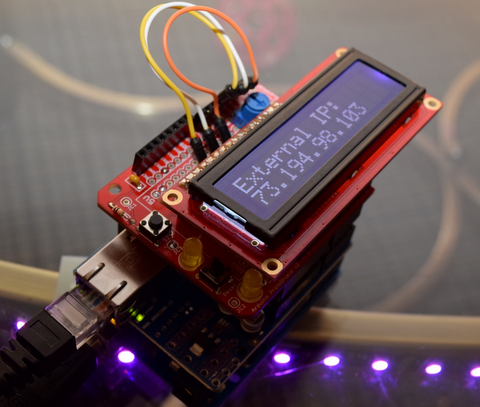
Looking for an Arduino Due-compatible board with more connectivity possibilities and options than the original? Then check out our new EtherDue board:

It's the Arduino Due-compatible board with the Freetronics additions including Ethernet network connectivity, MAC address chip, microSD storage, optional PoE, upgraded power supply and more - while retaining the simplicity and ease of the Arduino IDE (with 100% compatibility). And you still have a full USB interface for uploading sketches and direct programming. For more information on this powerful board, check out the EtherDue product page

March 12, 2015

Control your CNC over Wi-Fi with Raspberry Pi

Having your own CNC (Computer Numerical Control) machine to do your own routing or cutting is very useful and fun, however some users find the to-and-fro between the computer and the CNC machine to be annoying. However this can be solved with the help of a Raspberry Pi which can be used as a WiFi transceiver for the CNC machine and thus allow remote control from another PC via WiFi.

This has been demonstrated by Instructables member eLVirus88 who shows how a CNC machine with a GRBL control board can be controlled over WiFi with not only a PC but with any web-enabled device on the local network. Doing so requires a Raspberry Pi to be dedicated to the CNC, and certain software such as GRBLweb to be installed however this is explained in detail.

For complete details visit the project's Instructable page. And for more, we're on facebookGoogle+, and twitter - so follow us for news and product updates as well.

If you're looking for a neat way to add external circuitry to your new Raspberry Pi model A+, B+ or 2 model B then check out our new PiBreak Plus Raspberry PiPrototyping Board:

This is a great way to add your own electronic components, circuitry, sensors or other devices to your Raspberry Pi model A+, B+ or 2 Model B - any of the current Raspberry Pis with a 40 pin GPIO header. The PiBreak Plus also includes a GPIO female header to solder yourself, and a pair of nuts, bolts, washers and spacers to ensure a a great fit.

And in the Freetronics fashion we've used a quality gold-plated (ENIG) PCB for durability, brought out all the power rails along with the GPIO next to the prototyping area to make adding circuits a breeze. Furthermore the pinouts are labelled on both the top and bottom of the PCB to save time referencing the right GPIO pins. For more information and to order - visit the PiBreak plus page now!

March 11, 2015

Arduino IDE v1.6.1 now available for download

Hot on the heels of the recent v1.6 release of the Arduino IDE, a small update has been published which leads us to this latest version. This offers some neat new features, including file association under Windows so you can double-click an .ino file to open the IDE, an updated SoftwareSerial library, improved library name matching - so libraries with similar names won't cause problems, and much more.

You can learn about all the changes and updates from the Arduino github page and get your new IDE from the download page. And for more, we're on facebookGoogle+, and twitter - so follow us for news and product updates as well.

If you're looking for an Arduino Uno-compatible board to use with various projects, choose what tens of thousands of others have done and use our Freetronics Eleven - the Arduino-Uno compatible with low-profile USB socket, onboard prototyping space and easy to view LEDs: 

March 10, 2015

Make an Arduino-powered external IP notification device

Some home Internent connections aren't given a fixed or static IP address by their service provider which can be a challenge if remote access is required from another site to a home network or device. There are methods around this including paying for a fixed IP address, however one solution has been documented by hackday.io member bayres.

This involves an Ethernet-enabled Arduino whose sketch attemps a connection to an external IP check site. If this is successul a HTTP request follows which should return the allocated IP address. Once the address has been parsed from the incoming message it can be displayed on an LCD for local users or a short email sent via SMTP to a predetermined address.

For more information including links to the required Arduino sketch, visit the project's website. And for more, we're on facebook, twitter and Google+, so follow us for news and product updates as well.

When putting together your next Internet-enabled Arduino project - save time, space and money with the Freetronics EtherTen. Apart from being fully Arduino Uno-compatible, it has onboard Ethernet, microSD socket, full USB interface (so you don't need a costly FTDI cable just to upload a sketch!) and supports optional Power-over-Ethernet.

March 09, 2015

Getting Started with ESP8266 serial WiFi modules and Arduino

The ESP8266 is an awesome SoC (System on a Chip) that can be found on various modules and with different types of firmware pre-loaded. One of these is the ESP-01 which behaves as a WiFi adaptor that is controlled with a neat serial interface and AT commands.

These modules don't arrive with documentation so it's great to see Michael Teeuw's demonstration of how easy it is to connect an Arduino or compatible board to the Internet with an ESP8266.

From getting the hardware connections right through to retrieving time from a remote server, Michael offers a clear and interesting explanation. There's some neat example sketches, hints and tips to get your Arduino onto the Internet in no time at all. To get started, visit Michael's detailed website. And for more, we're on facebookGoogle+, and twitter - so follow us for news and product updates as well.

If you're starting out with ESP8266 WiFi serial modules, save time and eliminate risk by using our new ESP-01 WiFi Module shield for Arduino:

Our new shield has a socket that's perfect for the ESP-01 module, and addresses all the needs of the ESP8266 - such as:

  • 3.3V regulator dedicated to the module to ensure sufficient current capacity
  • Logic level shifters on TX/RX lines: compatible with both 3.3V and 5V Arduino models
  • Selectable TX/RX pins: use D0/D1 for hardware serial, or D2 - D7 for software serial
  • CH_PD pin on ESP-01 module pre-biased for correct operation mode
  • Extra ESP-01 pins broken out for your own connections
  • Prototyping area with 5V and GND rails
  • All Arduino headers broken out for easy connections
  • Stacking R3-style Arduino headers including the ICSP header

So don't fiddle with jumper wires or sub-standard power supplies - order your the Freetronics ESP-01 WiFi Module Shield today. They're in stock right now for only $14 including GST.

March 09, 2015

Experimenting with CNC using Arduino and Blu-ray lasers

 With some simple hardware and a disused DVD or Blu-ray player you can have all sorts of laser-based fun and one example is a home-made CNC machine with a laser cutter. We'd just like to note at this point that working with bare lasers is dangerous so please take care. Moving on, Nava Whiteford has used two old CDROM drives and the laser from a Blu-ray drive to make a simple CNC (Computer Numerical Control) laser cutter.

The CDROM drive mechanisms provide movement over the X- and Y-axis for the laser, which can cut through thin plastic quite well, which you can see demonstated in the following video:

For more information about this raw project, visit Nava's website. And for more, we're on facebookGoogle+, and twitter - so follow us for news and product updates as well.

If you're interested with making your own CNC-type device, save time and increase reliability with the Freetronics CNCPlotter Stepper Motor controller:

The CNCPlotter is a complete twin stepper motor solution - from the onboard Arduino Leonardo-compatible microcontroller, microSD card socket, USB interface and twin stepper motor controllers - all topped with a 20x4 LCD. Simply connect power and your motors, upload a control sketch and your CNC-based device is ready to go. For more information, details and to order visit the CNCPlotter page.

March 06, 2015

Adding gesture control to a mechanical maze with Arduino

Interfacing with various types of user inputs is easy with an Arduino, and a popular method is using the Nunchuk controller from a Nintendo Wii. As the controller uses the I2C bus to communicate the controller's data can be interpreted by an Arduino without too much work. This can then result with interesting control projects, such as this mechanical maze.

The X- and Y-axis knobs have been removed and replaced with small servos, which can then be rotated with the Wii controller for a remote-control maze as demonstrated in the video below:

Even if you're not working on a maze, this is a good demonstration of how to add Nunchuk control to an Arduino for your own purposes. To learn more, visit the Arduino forum for links to code and more discussion. And for more, we're on facebookGoogle+, and twitter - so follow us for news and product updates as well.

If you're looking to learn about Arduino development platform and how it interacts with external devices, you can't go past "Arduino Workshop -  A Hands-On Introduction with 65 Projects” by John Boxall.

Arduino Workshop takes the reader from having zero knowledge about the Arduino platform, electronics and programming and leaves them with the know-how and instructions on everything from blinking an LED, to robotics, wireless data, cellular communications, motor control, sensors, Internet connected systems and more. For more information including a sample chapter and table of contents, visit the book page.


March 06, 2015

The "Illumaphone" - a light-based Arduino-controlled musical instrument

With some imagination and an Arduino you can make all sorts of musical instruments, and the following example by Bonnie Eisenman is an excellent demonstration of what can be done. Created for a university project, hter "Illumaphone" uses light sensors for different music notes - with each sensor used to control the volume and vibrato for each note.

The sensors are arranged in small cylineders allowing the artist to control the amoutn of light falling over each sensor. Then the Arduino takes the data from the light sensors and converts this into commands for a PC running musical synthesiser software and finally into sounds. A demonstration of the Illumaphone is given in the following video:

To learn more about this project and the construction details, visit the project page. And for more, we're on facebook, twitter and Google+, so follow us for news and product updates as well.

Looking for a light sensor? Although it can be tempting to use a light-dependent resistor, they're fragile and can give varying results. Instead - consider our LIGHT: light sensor module based around the digital TEMT6000 sensor. It gives consistent and reliable readings, and is incredibly easy to use with our Getting Started guide. For more information and to order, click here!


March 05, 2015

Make an Arduino-based MIDI sound synthesiser

Thanks to the ease of controlling digital inputs and outputs, an Arduino or compatible board works well with digital audio hardware that has a MIDI interface. In this example by Instructables member Christhian180 an Arduino programmed with various sound data can be controlled with a MIDI instrumnet - in this case a keyboard, and used to make all sorts of sound or effects.

For sound output a simple amplifier circuit based on the classic LM386 is constructed which takes the output from one of the Arduino's PWM outputs and boosts it for use with an external speaker. It's a lot of fun, and a quick demonstration is given in the following video:

To learn more - visit the project's Instructable page. And for more, we're on facebookGoogle+, and twitter - so follow us for news and product updates as well.

If you need to add external hardware or devices to your next Arduino project, you'll need a protoshield to mount the external circuitry. In doing so, consider our range of ProtoShields. From the tiny LeoStick to the Mega we have a wide range to suit your application.

March 05, 2015

Musical beat detection using an Arduino

Digital signal processing is usually a task for PCs with customised software or at least 32-bit microcontrollers - however with some clever coding an external circuitry an Arduino or compatible can also perform some functions, and one of these is beat detection.

This process is explained by Damian Peckett who not only explains various methods of DSP methods but also the Goertzel Algorithm used in his project. With the addition of a small preamplifier circuit the Arduino can receive an amplified signal from an electret microphone and determine the lower-frequency sounds.

For more information about the process, including example circuits and sketches - visit Damian's interesting website. And for more, we're on facebookGoogle+, and twitter - so follow us for news and product updates as well.

If you're looking for an Arduino Uno-compatible board to use with various projects, choose what tens of thousands of others have done and use our Freetronics Eleven - the Arduino-Uno compatible with low-profile USB socket, onboard prototyping space and easy to view LEDs: