July 09, 2012

Build your own Giant Bubble Machine

 Not content with blowing bubbles from a loop of old wire, or the kit from the two-dollar shop? Need to create adult-sized bubbles to outdo the children? Then this project fits the bill. Using a frame, electric fan, motors, Arduino and related circuitry you can make an automated  device that creates bubbles over 50 cm in diameter - for example:


Certainly something different, yet fun and interesting for outdoors in summer. For detail instructions, visit the project page here. To get started with your bubble machine and other Arduino-embedded projects, consider the Freetronics LeoStick - one of the smallest Arduino-compatibles  on the market with onboard USB, RGB LED and piezo:


July 09, 2012

DIY Rotating Monitor stand with Android and Arduino

 If you haven't already lost your marbles, they can be used as part of this great project - a motorised swivel base perfect for monitors or large displays. The marbles act in a similar method to bearings between two surfaces, and a servo rotates the top surface. The servo is controlled by an Arduino board and use two potentiometers for base speed and position. Furthermore, the unit can be controlled easily by  Bluetooth which then lends itself to be controlled by a custom Android app. You can see the demonstration below:


Even if you don't use Bluetooth and Anroid to control the base, it's still a great and workable project which lends itself to other forms of control. For example using an IR receiver and Arduino library would be very simple as well. For more information and details, visit here. To  get started with your own base, consider our Freetronics Eleven - the Arduino-Uno compatible with low-profile USB socket, onboard prototyping space and easy to view LEDs:


July 09, 2012

Retrieve data from EPROMs with Arduino

 For one reason or another you may have the need to retrieve the data stored in an old EPROM (erasable programmable read-only memory) IC. You may be trying to reverse-engineer some vintage technology, curious about the character set in a display driver or just looking for a new challenge. Nevertheless, using an Arduino Mega-compatible board and some simple instructions from the NYC Resistor hackerspace - dumping the EPROM contents can be quite simple.


For a fascinating read and more information, visit the NYC Resistor website. To get started with your own EPROM-dumping a board such as our Freetronics EtherMega is perfect. It has the extra I/O pins and is fully compatible with the Mega2560, and also has onboard Ethernet, microSD socket and optional power-over-Ethernet support:


July 06, 2012

Build your own Arduino-based HALO System

 No, we're not helping you do high-altitude, low-opening parachute jumps. Instead, we will bring to your attention a device that offers Haptic Assistance for the Location of Obstacles. User 'polymythyic' created a system using ultrasonic distance sensors, motors, an Arduino Mega and related circuitry that allows the blind to walk and avoid obstacles. Worn on the user's head - the sensors each have a matching motor, and as an obstacle becomes closer to a particular sensor, the motor will spin with relation to the distance. Here is a demonstration video of the HALO system at work:


This is a fantasic project and also won the creator the grand prize in a competition. It also has other applications and could be used as a base for autonomous vehicles and other intelligent designs. For more information and a complete set of instructions, visit here. To build your own HALO or other complex project, consider using our Freetronics EtherMega. Apart from being fully Arduino Mega2560-compatible, it includes onboard Ethernet, microSD card socket and optional power-over-Ethernet support:


July 06, 2012

DIY Traffic Light with Arduino

 As a base for a musical-controlled lighting device and other applications, the people at colvins.ca designed and built their own traffic light head. Although this may have taken some time to build and paint, doing so allows more control over the project and saves the hassle of procuring a genuine set of lights. Their example is quite lifelike:

The lights are also much simpler to control as the creators used LED-based car lamps instead of incandescent globes. The prime reason for building this was to synchronise the lights with music, as the creator had previously done this with a Halloween pumpkin. You can see the results in the following video:


For more information and design details, visit their website here. When moving forward with your own Arduino-embedded projects, consider the Freetronics LeoStick - one of the smallest Arduino-compatibles  on the market with onboard USB, RGB LED and piezo:


July 06, 2012

Build your own Arduino-controlled Wire Bender

 If you don't have a wise-cracking bipedal bending unit handy and need to shape some wire, then this project may be of interest. The staff from the consulting firm PensaNYC created a wire-beding device that can create two- and three-dimensional objects from spools of solid wire. Vector files containing the required shapes are loaded into their software, and the results are quite effective. See the following video for a complete explanation:


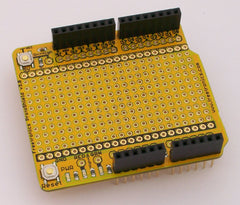
All the design files and required information has been published, so visit the PensaNYC blog for more information and download links. When creating more complex circuitry to work with an Arduino-compatible project - consider our range of ProtoShields. From the tiny LeoStick to the Mega range, we offer a complete range for you to work with


July 06, 2012

Using old floppy drives as musical instruments with Arduino

By now the interested Arduino enthusiast will have seen the videos on the Internet of various sounds and songs being made with floppy disk drives. The stuttering of one or more drives in sequence can produce some credible noises. However actually moving forward and making your own FDD orchestra may have been a mystery - until now. Thanks to "analogue chick", a complete set of instructions has been published to help you get started. Here is an example to fire the imagination:


Not bad, and doing so isn't that difficult at all. You only need two digital pins for each drive, so using a few shouldn't be a problem. For more information and to get started, visit here. Furthermore, for a great base for this and other Arduino-controlled projects, consider our range of Arduino-compatible hardware and protoshields, including the Freetronics Eleven - the Arduino-Uno compatible with low-profile USB socket, onboard prototyping space and easy to view LEDs:


July 06, 2012

DIY Inexpensive Robot Arm with Arduino

Arduino enthusiast "Lucky Larry" was looking at robotics kits and came to the conclusion that they were overpriced, so  instead he set out to make his own robotic arm - with success. Using three servos he has created an arm that can move on the x- and y-axis. A clever point of difference is that instead of mounting the servos on brackets, Larry removed the base from the servos and built them directly into the framework of the arm. This saves money and also reduces the complexity of the arm. You can see it in action below:


Considering the cost of the parts was less than $50 this is a great project. For more details and the instructions, visit Larry's page. When moving forward with your own Arduino-embedded projects, consider the Freetronics LeoStick - one of the smallest Arduino-compatibles  on the market with onboard USB, RGB LED and piezo:


July 06, 2012

Build your own f-stop timer for developing B&W photos

Photographer and electronics enthusiast Brodie Tyrrell has designed and published complete details for an Arduino-based f-stop timer. This is used when developing black and white photographs - the timer is used to determine the length of exposure which affects the darkness of the image. As the relationship between exposure time and darkness isn't linear, using the timer makes the process much simpler. Building the timer can be done in two ways, you can have the PCBs made with Brodie's included design files - or use an LCD Display shield and protoshield for the circuitry. Either way, you can end up with a professional-looking finished product:


For more information including the complete set of design files and code, visit Brodie's site here. To get started with your own timer, consider our range of Arduino-compatible hardware and protoshields, including the Freetronics Eleven - the Arduino-Uno compatible with low-profile USB socket, onboard prototyping space and easy to view LEDs:


July 05, 2012

Arduino-based Emoticon Helmet

 And now for something completely different...  a helmet that can display twelve emoticons using 22 LEDs, an Arduino and associated circuitry. The display is changed using a hand-controller wired to the helmet, and the LEDs are controlled using some simple multiplexing. You can see the helmet in action below:


If you are building your own Emoticon Helmet, be sure to realise that the structural integrity of the helmet will be reduced by cutting into it. In other words, don't use it as a crash helmet! However it looks like fun so to get started - see the instructions, code and schematic here. Although a normal-size Arduino was used in the helmet, space can be saved by using our Freetronics LeoStick - the Arduino-compatible with onboard USB, RGB LED and piezo (for matching sound effects):