July 10, 2012

DIY Arduino-based Engine Control Unit for diesel engines

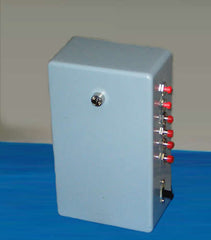
 An Arduino enthusiast in Finland has spent some time and effort into designing what is an amazing project - an Engine Control Unit (ECU) for an Audi 5-cylinder diesel engine. It can be configured in real-time using a PC with terminal emulation, and there is also Processing software for display of parameters, monitoring, debugging and data capture in real time. Watch the following video for a full demonstration:


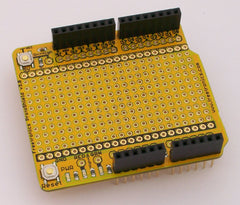
This project is certainly an advanced Arduino application, and shows what you can do with the right knowledge and hardware. For more information including full code downloads, visit the project site here. To build your own complex Arduino-based project like an ECU above, consider our Freetronics EtherMega. It has the extra I/O pins and is fully compatible with the Mega2560, and also has onboard Ethernet, microSD socket and optional power-over-Ethernet support:


July 10, 2012

Building simple twitter-controlled devices with Arduino

 Although the source example for this article relates to a twitter-controlled coffee maker, the project highlights how simple it is to control something over the Internet via twitter, an Arduino, PC and some basic circuitry. Using a Python script that allows communication between the Internet-connected PC and an Arduino board - the script searches twitter for a particular hashtag. Once that tag is found, a byte of data is sent to the Arduino board which then can take action. Here is the original project demonstration:


As the details have been published, including the Python and Arduino code, you can now have twitter help you in your remote Arduino control projects. To move forward with your own Arduino-embedded projects, consider the Freetronics LeoStick - one of the smallest Arduino-compatibles  on the market with onboard USB, RGB LED and piezo:


July 10, 2012

DIY Visual and Aural Guitar Tuner

In order to learn more about guitar tuning and improve their ability to do so, 'gschoppe' has created a guitar tuner that not only creates the matching sounds for each string - it also strobes an LED at the matching frequency. The reason for this is:

The strobe causes the apparent speed of motion of the string to decrease as the user approaches the correct frequency. as the the string gets closer to tuned, the string's vibration will happen in visible pulses of speed and apparent lethargy, which slow as the tuning improves. These variations in speed should coincide with the frequency of audible "beats" when beat tuning.


Once again, a problem has been solved neatly with an Arduino-based solution. The circuitry is quite simple, and it can be found as well as design details and the matching code here. When creating projects with external circuitry to work with an Arduino-compatible project - consider our range of ProtoShields. From the tiny LeoStick to the Mega range, we offer a complete range for you to work with


July 10, 2012

Building an Arduino Nanosecond Signal Delay

 During his time at the University of Auckland's laser laboratory, Jacob Martin built the electronics for a nanosecond transient absorption spectrometer. In his words:

This spectrometer will be able to excite molecules and then detect the excited state. Another laser will work out for how long the excited states are stable. This will be used to help research of photoactive molecules, made of nano particles that can convert sunlight into energy...

Jacob's work was to create the delay generator using Arduino-compatible hardware. He used a Freetronics EtherMega, (however a Freetronics Eleven would also have suited perfectly) and a custom-designed shield for the delay circuitry. It can generate delays of between 4 nanoseconds to 10 milliseconds. In doing this he saved the department over one thousand dollars. 


For more details, including an excellent description of the project - and the design files and Arduino sketches, visit Jacob's notes here. To get started with your own Arduino-based projects, consider our Freetronics Eleven - the Arduino-Uno compatible with low-profile USB socket, onboard prototyping space and easy to view LEDs:


July 10, 2012

Arduino-based Reaction Time Tester

In order to test his dinner guests' reaction times before and after an evening's entertainment, 'bertus52x11' created a simple Arduino-based reaction and decision-time tester that also distracts the user in an attempt to decrease their reaction times. What appeals to use is the professional look of the device considering the maker is only new to our world of Arduino.


A lot of fun and frustration all in one small package. Although this may be a great way of testing reflexes, it is no substitute for determining one's ability to drive after consuming alcohol. So to get started, you can find the instructions here. To  get started with your own reaction timer, consider our Freetronics Eleven - the Arduino-Uno compatible with low-profile USB socket, onboard prototyping space and easy to view LEDs - and our Freetronics LCD and Keypad shield. It contains a bright 16x2 character LCD module as well as five buttons that are read with only one analogue input:


July 10, 2012

Easy traffic lights for Lego worlds with Arduino

 The synergy that can be found with Lego and Arduino is almost infinite, such as the CD duplicator system reviewed previously. However in this example 'Maloffstrano' has built automated traffic lights for a Lego traffic intersection that are life-like and blend completely into the fictional world. Using a tiny Arduino-compatible board and some repurposed Christmas tree lights, the results have been quite successful:


It's good to see how well Lego lends itself to the use of LEDs, wiring and therefore our projects. For more information, the design and code visit here. To get started with your own Arduino-embedded Lego projects - use the Freetronics Leostick. It's one of the smallest Arduino-compatibles on the market with USB, an RGB LED and piezo for sound effects:


July 09, 2012

Build a fun Marble Maze game with Arduino

 Time for another rendition of marble maze games, and this version simulates the maze on a typical 16x2 character LCD module. The hardware is simple - apart from an Arduino-compatible board and display you only need some tilt sensors, potentiometer and simple components. However the project does result with a playable game, for example:


With a small amount of extra work, this game could be mounted in a smaller enclosure for portability and demonstration purposes. For more information on various versions visit the project page here. To build your own compact version - you can't go past using the Freetronics LeoStick - one of the smallest Arduino-compatibles  on the market with onboard USB, RGB LED and piezo:


July 09, 2012

DIY Ultrasonic Distance Combination Switch

 Over at tronixstuff the team has created some ... different projects, and one of these is their Ultrasonic Combination Switch. As an Arduino can generate a number relative to the distance measured by an ultrasonic sensor, this switch is activated by the user placing their hand at four different and fixed distances away from the sensor over a period of time. If the user manages to match the predetermined distances, the switch is activated. For example:


Apart from amusing or irritating those around you, this project offers a futuristic alternative to using a keypad or keyswitch for electronic locking purposes. For more information, Arduino sketches and directions visit the project page. To move forward with Arduino-embedded projects, consider the Freetronics LeoStick - one of the smallest Arduino-compatibles  on the market with onboard USB, RGB LED and piezo:


July 09, 2012

Build your own four-letter word generator

 For fun and a distraction from doing some real work, consider building your own "four letter word generator". Using some Arduino-compatible hardware and a vintage display module, Alexander Davis did just that. Although the usefulness of the project may come into question, it could be a handy talking piece in the office or workshop:


The code translates easily to other display methods, so if you can't find the vintage display - an LCD module would be a fine substitute. To get started with your own generator, visit Alex's instructions here. When building your own Arduino-based projects that require display output - consider our Freetronics LCD and Keypad shield. It contains a bright 16x2 character LCD module as well as five buttons that are read with only one analogue input:


July 09, 2012

Using IR distance sensors to create a simple radar

 Arduino enthusiast Lucky Larry has used a Sharp Infra-Red distance sensor, servos, Arduino and the Processing language to create a simple yet interesting radar-sweep display. The sensor is rotated on a 180-degree sweep using a servo, and the distance data is sent back to the PC via an Arduino. Using a Processing sketch, the computer interprets the incoming data and converts it to the familiar radar-sweep display:


Kudos to Larry for this project. Once again it shows what can be possible with an Arduino-style board and some imagination. For more information and detailed instructions, visit Larry's pages starting here. To get started with your own miniature radar system, consider our Freetronics Eleven - the Arduino-Uno compatible with low-profile USB socket, onboard prototyping space and easy to view LEDs: