July 27, 2012

The CarDiuno - an excellent first Arduino project

After heading over to the new Hackduino meetup group in Melbourne, Steven Occhipinti picked up some new Freetronics gear; and after learning what others were up to with their Arduino systems, got motivated and made a great start with his own project - the CarDuino. Using our LCD Keypad shield, it's a game that involves steering a character 'car' to avoid obstacles as you drive along. For example:


Kudos to Steven and his friends for getting started so quickly and making something interesting. For more information and the sketch, check out Steven's blog here. And we're on twitter and Google+, so follow us for news and product updates as well.  It's always great to see people making things with Freetronics products, and if you have documented your project publicly - please let us know via info at freetronics dot com. 

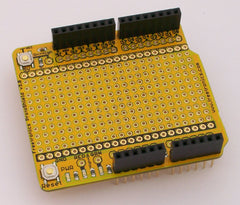
In his CarDuino game, Chris used our Freetronics LCD & Keypad shield which contains a bright 16x2 character LCD and five buttons that can be read from only one analog input pin:


July 27, 2012

The Automated Cat-activated Water Tap

 Technologist Chris Dillon had some spare time and decided to solve a problem using an Arduino, a lot of hardware, and some interesting code. He created a device to control a cold water tap that is activated by an infrared sensor. This was required as his cat likes to drink water directly from the tap. Furthermore, using XBees the movement data is logged and available for analysis via ruby on rails and SQL. See the project in action below:


Sometimes I think it would be easier to train the cat to drink from a bowl. Then again, "dogs have masters, but cats have staff". So head over to Chris' page to follow his designs, and we're on twitter and Google+, so follow us for news and product updates as well. 

If you're working with Arduino projects like Chris' that require some external circuitry, consider one of our range of Protoshields. From the tiny LeoStick to the Mega range, we offer a complete range for you to work with


July 27, 2012

Hacking inexpensive GSM modems to send text messages

 If you need to get current data from a remotely-located Arduino that doesn't have Internet access, one option is to use a GSM module of some sort. There are a few on the market, however the retail costs amount to over $100 once the required parts are accounted for. One inexpensive solution has been documented by Michael Finch - who describes how to modify a very cheap GSM USB modem for use with an Arduino. You will need some fine soldering skills, however the savings will be worth it. 


For more detailed information and instructions, check out Michael's excellent notes here.  And we're on twitter and Google+, so follow us for news and product updates as well. 

If you're planning on using the modem as described above, an ideal matching Arduino-compatible board would be our Freetronics LeoStick. Apart from being one of the smallest Arduino-compatibles on the market with USB, it also has an onboard RGB LED and piezo for sound and knock detection:


July 27, 2012

codebender - the cloud-based Arduino IDE

Although working with the Arduino involves the simple and easy to use IDE, as more people become used to cloud computing the idea of using an online IDE has become less worrisome and more interesting as a developer. It seems to work for the mbed crowd, so it's nice to see an Arduino example take shape - codebender. Here's a screen shot of it in action:


Getting started was simple, however we needed to update the version of Java being used by Chrome. You can upload directly to the Arduino via USB, or download your code in .ino or .hex files (great if you have Java>USB issues). Currently codebender only supports Arduino Uno (Freetronics Eleven/EtherTen/USBdroid) or Duemilanove-style (Freetronics TwentyTen) boards. 

After some quick testing codebender seems ideal for a cloud-based IDE. The look and feel is comfortable and the text editor formats the code nicely. It could also be useful for sharing code across teams (however you would need to share the one account). Included libraries at this time are EEPROM, Ethernet, Firmata, LiquidCrystal, SD, SPI, Servo, SoftwareSerial, stepper and wire.  Although codebender is still in beta, it's an interesting online IDE and we look forward to further developments. For more information and to pre-register, check out codebender.ccAnd we're ontwitter and Google+, so follow us for news and product updates as well.

If you are new to Arduino, join in with our range of Arduino-compatible hardwareprototyping shields and module range. A good start is the Freetronics Eleven, the Arduino Uno-compatible board with onboard prototyping space:


July 27, 2012

Monitor RSS feeds via an Arduino with LCD

Instructables user fritterdonut has described a very simple way to display RSS feeds on a 16x2 character LCD and a PC-connected Arduino board. This opens up all sorts of data monitoring ideas, such as news, twitter searches, keeping an eye on blogs, etc. 

For the uninitiated (from Wikipedia), an RSS feed ("really simple syndication") 

... is a family of web feed formats used to publish frequently updated works—such as blog entries, news headlines, audio, and video—in a standardized format. An RSS document (which is called a "feed", "web feed", or "channel") includes full or summarized text, plus metadata such as publishing dates and authorship.


Almost every Internet-based news source and website should have an RSS feed, so there's plenty of information to choose from. To get started, check out the instructions page here. And we're on twitter and Google+, so follow us for news and product updates as well. 

Instead of building your own LCD module onto a breadboard, save time and move forward with the Freetronics LCD & Keypad shield which contains a bright 16x2 character LCD and five buttons that can be read from only one analog input pin:


July 26, 2012

Play Sudoku on TV with your Arduino

 Arduino enthusiast Carl has helped the game Sudoku transcend from paper books to the big screen by publishing details of his Arduino Sudoku game. It uses the simple Arduino tvout library, and some custom fonts for display. User control is managed by five buttons used for directions and enter. And apart from the sketch and schematic, Carl has documented in great detail the theory behind the game with respect to programming.


So for a fun project and a way to share the game of Sudoku among many people, head over to Carl's code repository and download the Sudoku package hereAnd we're on twitter and Google+, so follow us for news and product updates as well. 

Working with the Arduino tvout library is simple, however requires a small external circuit - perfect for one of our Protoshields. From the tiny LeoStick to the Mega range, we offer a complete range for you to work with


July 26, 2012

Build your own printing Fortune Teller machine

 Unlike other random fortune-telling machines in the past, the unit described in this article is as close to "the real thing" that we have ever seen. Apart from the professional housing and enclosure, this unit uses a small printer similar to those used in point-of-sale machine to print the fortune for the ponderous to take with them. 


Building such a project isn't that difficult, however sourcing an old printer could be a challenge. Don't forget to review our post about using old printers here. Nevertheless, it's a fun project and would be great for fund-raising and so on. So to get started on your own "Lucky Panda" machine, head over to the project page. And we're on twitter and Google+, so follow us for news and product updates as well. 

So if this sort of project intrigues you and you're new to Arduino, the first step is a solid board for your projects - our Freetronics Eleven - the Arduino-Uno compatible with low-profile USB socket, onboard prototyping space and easy to view LEDs:


July 26, 2012

Enable Arduino tweeting without an Ethernet shield

 Although this may sound like an antithesis to our goals, it is possible to have an Arduino board send tweets without directly-connected Ethernet hardware. To do so, Ian Foulds developed a method using a USB-connected Arduino and a PC. The computer runs python scripts that listen for text from the Arduino, and another is python-twitter which sends the text to the twitter service. The main reasons for using this method would be to reduce the Arduino-related hardware size as much as possible; or if you don't have a wired internet connection - as the Arduino board makes use of the host computer's wifi connection. 


Finally, for most users there's no extra cost - so give it a whirl, follow Ian's instructions and get yourself a twitter account. Then you can also follow us on twitter and Google+ for news and product updates as well. 

If you're looking for the smallest piece of Arduino-compatible hardware to use as part of an automated tweeting machine, consider our Freetronics LeoStick. Apart from being one of the smallest Arduino-compatibles on the market with USB, it also has an onboard RGB LED and piezo for sound and knock detection:


July 26, 2012

Controlling relays via the Internet and Arduino

 Although this project can only be described as possible overkill, Peter Lavelle has designed and documented a method of controlling relays using an Ethernet-connected Arduino and the web. The purpose was to switch between headphones and speakers on his PC, however this project is a natural explanation for another method of controlling Arduino-connected items over the Internet. As the control is via a web browser, it also opens up ideas with regards to home automation via web-enabled devices on a home intranet. 


There is some circuit to build, however it is easily accomplished by a beginner. To move forward and explore for yourself, visit Peter's page here. And we're on twitter and Google+, so follow us for news and product updates as well. 

Controlling almost anything is a reality with an Ethernet-enabled Arduino board, and at Freetronics we have what we think is the best one on the market - the Freetronics EtherTen. Apart from being fully Arduino Uno-compatible, it has onboard Ethernet, microSD socket, full USB connection (no pesky FTDI cables needed) and supports optional Power-over-Ethernet:


July 26, 2012

Build an Ultrasonic Anemometer with Arduino

 Carl from the Arduino forum has designed and built an outstanding ultrasonic anemometer (to measure wind speed and direction), and after reading the description and details - is an outstanding example is what's possible with the Arduino development environment. The wind speed and direction data can be logged for analysis and monitoring, and Carl has included not only the Arduino sketches for operation and calibration but Visual Basic code for PC interaction. 


For more discussion about the project, visit the Arduino forum here. And we're on twitter and Google+, so follow us for news and product updates as well. 

If you're looking to work with your own weather-sensing equipment, but don't want to make your own devices - it is possible to interface Arduino-hardware with existing commercially-available weather stations. The key is to capture the wireless data from the sensor and interpret this with an Arduino. Many people have done this with out 315/433 MHz receiver shields:


Apart from being idea for working with the various low-cost data links on the market, the shield can also be used to capture wireless weather station data, as described in the book "Practical Arduino". For more information and ideas, check out the product page