August 24, 2012

Create an Arduino-controlled mains power outlet

 The people at the awooga blog needed a power outlet that would run a battery charger for a fixed period of time, and modified their own using Arduino-based hardware to solve the problem. At this point remember mains current can be lethal, and any mains current electrical work must be completed by a licensed electrician. However the design process for the outlet is interesting and the creators have described a successful project that looks good:


For detailed instructions, schematics and the Arduino sketch, click here. And we're on twitter and Google+, so follow us for news and product updates as well.


When working on your own projects that require accurate timing - consider using our super-accurate real-time clock module. Based on the DS3232, it has a temperature-controlled crystal oscillator for accurate time keeping, battery backup and 236 bytes of non-volatile memory for user data. For more information, see our modules page


August 24, 2012

Build your own Maxim iButton controller with Arduino

 Technology enthusiast Jeff Miller needed a device to control Maxim iButton data loggers - and instead of purchasing a commercial unit rose to the challenge and made his own. Using an Arduino board and external hardware, the device can stop, start and read iButton devices as well as 1-wire temperature sensors (such as those used on our TEMP: module). FInally the project looks great in a neat enclosure. Find out more in Jeff's video below:


For more information including the code and design notes, click hereAnd we're on twitter and Google+, so follow us for news and product updates as well.


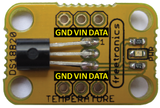
If you're looking for a 1-wire temperature sensor, consider our Freetronics TEMP: module:


This DS18B20-based 1-wire bus temperature sensor module is easy to connect and use, and you can even daisy-chain several together on the same wire. 0.5°C accuracy and fast response. With a range of -55 to +125°C at +/-0.5°C accuracy it's suitable for almost every temperature-measurement project. For more information and to order, click here


August 24, 2012

DIY Arduino-based MIDI foot pedal

 Musician and instructables member 'robtoole' was looking for an easier way to trigger audio samples from MIDI equipment during performances, and turned to the Arduino world for a solution. Using a simple digital input and output, he published a method that encloses the hardware in a foot-pedal, and can trigger any MIDI device. In this example, he has used an iPhone running Garage Band and a MIDI adaptor. 


Quite an inexpensive way to solve the problem, and easy to recreate. So to get started, head over to the instructions here. And we're on twitter and Google+, so follow us for news and product updates as well.

Thinking of embedding an Arduino-compatible board in your next project? consider the Freetronics LeoStick:


 Apart from being one of the smallest Arduino-compatibles on the market with USB, it also has an onboard RGB LED and piezo which can be used a knock sensor and various tune and sound effects. For more information and to order, click here.


August 23, 2012

Tutorial: Arduino-controlled LCD brightness and contrast

 Arduino and technology enthusiast Andy Brown has published another of his excellent tutorials. In this instalment he describes how to control both the contrast and brightness of a typical HD44780-compatible interface LCD module using pulse-width modulation. Having these parameters controlled via software allows more user-interface control and power saving for battery operated projects. Watch the following short video for some demonstration:


For more information and to get started, click here for Andy's tutorials. And we're on twitter and Google+, so follow us for news and product updates as well.

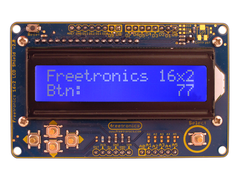
When making your own Arduino projects with a character LCD - save time and move forward with the Freetronics LCD & Keypad shield which contains a bright 16x2 character LCD and five buttons that can be read from only one analog input pin:


August 23, 2012

A simplified Arduino IDE

 Arduino enthusiast Erwin Ried has found some personal sticking points with the Arduino IDE, and taking advantage of its' open-source nature modified it himself. He has created a few modifications, including a streamlined installation for Windows users, more detailed error messages, customised settings, sketch templates and more. 


For more information, discussion and download links click here. And we're on twitter and Google+, so follow us for news and product updates as well.

If you're enjoying working with Arduino projects but find the Uno-sized boards somewhat constricting - it's time to move up to the Freetronics EtherMega:


Quite simple the EtherMega is the fully-loaded Arduino-compatible board on the market today. Apart from being completely Arduino Mega2560-compatible, it includes full Ethernet interface, a microSD card socket, full USB interface, optional Power-over-Ethernet support and still has a circuit prototyping area with extra I2C interface pins. So if your project is breaking the limits, upgrade to the EtherMega today. 

August 23, 2012

Control Arduino digital pins via Visual Basic 6

 Electronics lecturer and enthusiast Bambang Siswoyo has described in simple terms how to control Arduino digital output pins using a PC running Visual Basic v6. The Arduino is connected via the USB and the commands are sent from the VB program as characters which are interpreted by the Arduino, in turn controlling the digital pins. For more information see his video below:


Although this is quite simple it's great to see more methods of interfacing with our Arduino boards. To get started click here. And we're on twitter and Google+, so follow us for news and product updates as well.

f you are new to Arduino, join in with our range of Arduino-compatible hardwareprototyping shields and module range. A good start is the Freetronics Eleven, the Arduino Uno-compatible board with onboard prototyping space:


August 23, 2012

Advanced Arduino LCD animations with Easing functions

 Arduino enthusiast Andy Brown has documented a clever method of creating animations on character LCD modules driven by Arduino. He accomplishes this by using easing functions:

Computer animation of motion involves making an object appear to move from A to B over some time period T. The simple way to do this is to change the object’s position at fixed intervals over time so that it appears to move from A to B as the clock ticks from 0 to T. This is known as linear motion and while it works it appears unnatural because in the natural world objects accelerate and decelerate as they move away from and towards their resting positions.

You can see a great demonstration of this effect in the following video:


Andy has also provided all the raw and Arduino code to make this possible in your own environment, so to get started visit the project page here. And we're on twitter and Google+, so follow us for news and product updates as well.

When making your own Arduino projects with a character LCD - save time and move forward with the Freetronics LCD & Keypad shield which contains a bright 16x2 character LCD and five buttons that can be read from only one analog input pin:


August 23, 2012

Control an iRobot Create with Arduino

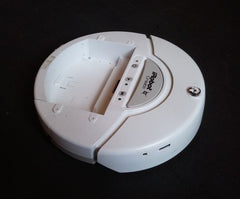
 The iRobot create is a mobile robot platform that can be controlled by uploading various scripts to determine which actions it will take. As it has a simple DB25 interface socket and uses serial communication, Matt Gray and Golan Levin have documented a method to control the iRobot with an Arduino. This includes uploading and executing a command script to the iRobot. 


So if you have one of these remarkable little robots, click here for more Arduino-interface information. And we're on twitter and Google+, so follow us for news and product updates as well.

When developing your own Arduino-embedded projects, consider the Freetronics LeoStick:


 Apart from being one of the smallest Arduino-compatibles on the market with USB, it also has an onboard RGB LED and piezo which can be used a knock sensor and various tune and sound effects. For more information and to order, click here.


August 23, 2012

A smaller Arduino twitter client

 Belgian Arduino enthusiast and forum member JO3RI has written their own twitter-reading client for use with an Ethernet-enabled Arduino board. Their reason for doing so was to reduce the SRAM used by the client and also find speed increases compared to the original twitter-Arduino examples floating around. Note that this is for reading and not sending tweets. In the following video you can see their proof-of-concept demonstration:


Using an Arduino to monitor twitter always opens up various possibilities, and with this example you have another method of doing so. For more information, discussion and code visit the Arduino forum. And we're on twitter and Google+, so follow us for news and product updates as well.

When recreating your own twitter reader or building your own networked Arduino project, consider using our Freetronics EtherTen. Apart from being fully Arduino Uno-compatible, it has onboard Ethernet, microSD socket, full USB connection (no pesky FTDI cables needed) and supports optional Power-over-Ethernet:


August 21, 2012

Lambda Calculus in a Can with Arduino

 The mathematically-inclined Arduino enthusiast will enjoy this project by Tim Fraser, who has created a way of interpreting Lambda Calculus - which in his words is:

... a formal system (programming language) developed by Alonzo Church in the 1930's to attack the deepest mathematical problem of the day. This was the Entscheidungsproblem, the question of whether or not there exists an algorithm capable of deciding the truth or falsehood of all statements in mathematics.


Although the Arduino is limited due to the processing and memory capability, this is still an interesting project. For more detailed explanations, sketch and more - visit Tim's project page. And we're on twitter and Google+, so follow us for news and product updates as well.

If you want to recreate this project, you can make it even smaller by using the Freetronics LeoStick:


 Apart from being one of the smallest Arduino-compatibles on the market with USB, it also has an onboard RGB LED and piezo which can be used a knock sensor and various tune and sound effects. For more information and to order, click here