August 27, 2012

DIY Arduino-based home blast furnace

 Using an Arduino, a PC and a lot of chemistry, instructables user 'ckrobi' has created from scrap an oxygen-injected miniature blast furnace. This is used for experimenting with ceramics and metal. Using a PC running python/GUi software they control an Arduino which takes care of the various furnace hardware. For control integrity they have created their own communication protocol over serial between the PC and Arduino. The system can also monitor various parameters and return the values back to the PC. Furthermore, heed the safety warnings if you're making your own. 


 For more information, code and instructions click here. And we're on twitter and Google+, so follow us for news and product updates as well.

Thinking of making your own blast-furnace with an Arduino? Consider using the Freetronics LeoStick:


 Apart from being one of the smallest Arduino-compatibles on the market with USB, it also has an onboard RGB LED and piezo which can be used a knock sensor and various tune and sound effects. Plus you can add extra circuitry with the matching protostick! For more information and to order, click here.


August 27, 2012

Exchange exercise for computer time with the Personal Energy Orb

 Sometimes we spend too much time in front of a computer. Some of us have no choice (work) and some do (fun). Nevertheless we all need our exercise and the Personal Energy Orb is just the device to help it happen. A project devised by German student Janko Hofmann,  it uses a mixture of PC software and an Arduino. When connected to the PC, the PEO's energy level decreases ... and so does the speed of the mouse. When the energy runs out - the mouse speed is set to the slowest possible, encouraging you to get out. Then when connected to a bicycle with the required hardware, the PEO's energy level increases - allowing you more PC time. For more, check out the  video below:


Fore more information, code and hardware designs check out Janko's blog here. And we're on twitter and Google+, so follow us for news and product updates as well.


When creating more complex circuitry such as the speed alarm as described above for your Arduino - consider our range of ProtoShields. From the tiny LeoStick to the Mega range, we offer a complete range for you to work with.


August 27, 2012

Play "Hunt the Wumpus" with Arduino

 Once again Freetronics forum member 'eturnerx' has made use of the Freetronics LCD and Keypad shield to create some fun. In this instalment the classic game "Hunt the Wumpus" has been adapted to make use of the LCD and controls on the shield. In the following video you can watch an explanation and demonstration of the game:


Neat! For more information and the Arduino sketch, head over to the forum. And we're on twitter and Google+, so follow us for news and product updates as well.

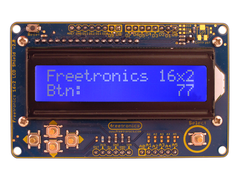
To get some Wumpus action or other data display - you'll need the Freetronics LCD & Keypad shield which contains a bright 16x2 character LCD and five buttons that can be read from only one analog input pin:


August 27, 2012

How fast can you press a button?

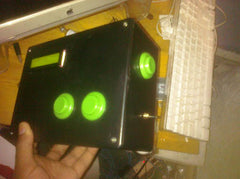
 Video game enthusiast Bryant Davis was interested in how fast he could press a button - a skill useful for playing various games and testing the build quality of arcade games. So he made a simple device using arcade-quality buttons and an Arduino to measure just that. The sketch is quite simple and doesn't use delay functions in order not to miss any rapid keypresses. The entire unit has been mounted in a large box suitable for taking a thrashing:


To get started with your own version, head over to Bryant's blog for code, notes and some interesting history. And we're on twitter and Google+, so follow us for news and product updates as well.

If you're new to Arduino, the first step is a solid board for your projects - our Freetronics Eleven - the Arduino-Uno compatible with low-profile USB socket, onboard prototyping space and easy to view LEDs:


August 27, 2012

Log data from an Arduino to Google Docs

 There are many ways of sending data of logging data with an Arduino board - no secrets there. And getting data from an Internet-connected Arduino can be complex, and even cost real money to use one of the various logging services. However Mukesh Kumar has brought to our attention a method of sending data from an Ethernet-enabled Arduino board straight to a Google Docs spreadsheet. This is great as you can analyse and distribute the data amongst a team of people almost instantaneously at a very low cost.


For more information and a complete tutorial, head over to Mukesh's article hereAnd we're on twitter and Google+, so follow us for news and product updates as well.

Looking to do this for yourself? Then you need an Ethernet-enabled Arduino board. We have two, the Freetronics EtherTen:


... the Arduino-Uno compatible with onboard Ethernet, microSD socket and optional PoE. Or if you need an Arduino Mega2560 board, consider the Freetronics EtherMega:


Quite simply the EtherMega is the fully-loaded Arduino-compatible board on the market today. Apart from being completely Arduino Mega2560-compatible, it includes full Ethernet interface, a microSD card socket, full USB interface, optional Power-over-Ethernet support and still has a circuit prototyping area with extra I2C interface pins. So if your project is breaking the limits, upgrade to the EtherMega today. 


August 27, 2012

Using the Apple OS X terminal to control an Arduino

 Arduino enthusiasts of the Apple persuasion have found that there is no direct way to control an Arduino with live keystroke commands as Applescript doesn't provide a way to detect keyboard strokes. However Martin Koch has described a way of doing so, using the "Terminal" application included with OS X and the with the UNIX screen command which allows communication with the serial port. 


An interesting work-around for the Apple users out there. For more information and a demonstration sketch, click here. And we're on twitter and Google+, so follow us for news and product updates as well.

If you're looking for a simple way of controlling and receiving visual data from an Arduino, consider the Freetronics LCD & Keypad shield which contains a bright 16x2 character LCD and five buttons that can be read from only one analog input pin:


August 26, 2012

Control video cameras via LANC and Arduino

 A variety of video cameras can be controlled by the LANC (Local Application Control Bus) port, which was invented by Sony and found on other brands such as Canon and JVC. It's a simple protocol which can be interfaced quite easily with an Arduino. Neat - so using the knowledge from a tutorial on the ControlYourCamera blog - you can now automate various video functions very easily. 


The required circuitry is quite simple and will fit nicely on a protoshield. So to get started click here. And we're on twitter and Google+, so follow us for news and product updates as well.

Thinking of making your own LANC-automation system with an Arduino? Consider using the Freetronics LeoStick:


 Apart from being one of the smallest Arduino-compatibles on the market with USB, it also has an onboard RGB LED and piezo which can be used a knock sensor and various tune and sound effects. Plus the LANC circuitry will fit on the matching protostick! For more information and to order, click here.


August 24, 2012

The embedXcode project

 For those of you who use more than one microcontroller platform and also use Apple computers - this project will be of interest to you. The embedXcode project is working on allowing use of the Apple Xcode official IDE for use with Arduino, Processing, Wiring, chipKit, TI MSP430 Launchpad and other platforms whose IDE is based on Processing. Having one IDE instead of many saves space, hassle and late-night confusion when working on multiple platforms. There is also a tutorial .pdf, project blog and forum to keep up to date.


Although the embedXcode project is a work in progress, check it out at the project page here. The project is maintained by Rei Vilo and not Freetronics. And we're on twitter and Google+, so follow us for news and product updates as well.

If you're new to Arduino, the first step is a solid board for your projects - our Freetronics Eleven - the Arduino-Uno compatible with low-profile USB socket, onboard prototyping space and easy to view LEDs:


August 24, 2012

Make your own GPS-based speed alarm

 And now for something different - a GPS-based speed alarm that alerts you of travelling too fast by simulating the look of police lights in the rear-view mirror... Using an Arduino loaded with street coordinates and matching speed limits, and a GPS receiver module - the system can determine the location in the local street database and check if you're speeding or not. If you are - the imaginary police lights will fire up to let you know. Great for the paranoid or scaring people with something to hide. For example:


Although this may seem like a complex solution to something that is very easily solved, it's still interesting and good for a laugh. To get started, head over to the project page here. And we're on twitter and Google+, so follow us for news and product updates as well.


When creating more complex circuitry such as the speed alarm as described above for your Arduino - consider our range of ProtoShields. From the tiny LeoStick to the Mega range, we offer a complete range for you to work with.


August 24, 2012

Monitor workflow status with traffic lights and Arduino

 Troy Anderson needed a way to monitor workflow in his organisation, and decided a set of miniature traffic lights would be a great and simple way to display it. He has used an Ethernet-enabled Arduino board, Nathan Kennedy's fantastic teleduino service, relays and circuitry to control the lights via a rails app and teleduino. 


The final results look great, and the project can be adapted to all sorts of status-monitoring or fun tasks. For more information including designs and links to the required code click here. And we're on twitter and Google+, so follow us for news and product updates as well.

Need an Ethernet-enabled Arduino board? And it needs to be an Arduino Mega2560-compatible? Then you're in luck as we have the awesome Freetronics EtherMega:


Quite simple the EtherMega is the fully-loaded Arduino-compatible board on the market today. Apart from being completely Arduino Mega2560-compatible, it includes full Ethernet interface, a microSD card socket, full USB interface, optional Power-over-Ethernet support and still has a circuit prototyping area with extra I2C interface pins. So if your project is breaking the limits, upgrade to the EtherMega today.