August 26, 2014

Make your own Calculator with an Arduino

After being given a previous example of an Arduino-based calculator, Instructables member Kale_3d took the challenge to rebuild and reprogram the calculator into a newer and more powerful version. And it has been a success, with a neat enclosure it's quite workable and the programming experience helps the end user learn about Arduino and coding in general.

Apart from simple functions the calculator also has trigonometric, and although the keypad used only has sixteen buttons a clever menu system is used to select the required operation. This is a fun project for the coding and calculator enthusiasts, and a quick demonstration is shown in the following video:

For complete details visit the project Instructable page. And for more, we're on facebookGoogle+, and twitter - so follow us for news and product updates as well.

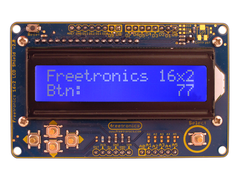
Looking for a rapid-use LCD for your Arduino or compatible projects? Save time and move forward with the Freetronics LCD & Keypad shield which contains a bright 16x2 character LCD and five buttons that can be read from only one analog input pin:

August 26, 2014

An Arduino-powered Sign Language Translator

There are many serious and futuristic uses of the Arduino platform, and an award-winning example of this has been created by young enthusiast Roman Kozak. His sign language translator sounds complex but in reality is somewhat simple. A glove is fitted with force-sensitive resistors, which allows the movement of each finger to generate a numeric value with the Arduino.

Then the combination of values can refer to a predetermined letter - and thus the translator is born. Roman has extended the project with an Android device app and connection to a PC for speech synthesis is also possible. Check out the following video for a demonstration:

Fantastic work, and we look forward to Roman's next efforts. In the meanwhile you can review this project including the code from the project website. And for more, we're on facebookGoogle+, and twitter - so follow us for news and product updates as well.

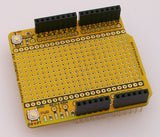
If you need to add external hardware or devices to your next Arduino project, you'll need a protoshield to mount the external circuitry. In doing so, consider our range of ProtoShields. From the tiny LeoStick to the Mega we have a wide range to suit your application.

August 25, 2014

Add a countdown start timer to a washing machine with Freetronics LeoStick

The electricity cost in some homes is determined by the time of day, and with this is mind it can be much cheaper to run large appliances in the cheaper off-peak or night-rate tariff times. However sometimes it's easy to forget to turn something on and thus a day is lost waiting for the cheap power, or you have to run it on peak.

Enthuisast Simon Jowett is exposed to the similar situation adn added an Arduino-compatible countdown timer to his washing machine that lets the user determine a period of time before the washing machine will start. It's a great way to load the clothes and soap, then let the machine wash when the power is inexpensive. Simon gives us a quick demonstration in the following video:

Apart from the main function, we really like how the modification is not obvious at all, and fits right in with the look and feel of the washing machine's control panel. For complete details visit the project's Instructable page. And for more, we're on facebookGoogle+, and twitter - so follow us for news and product updates as well.

Need a small Arduino-compatible for use with your own projects? Then check out out our LeoStick. It's the Arduino Leonardo-compatible board that's cheaper and smaller than the original:

 Apart from being one of the smallest Arduino-compatibles on the market with USB, it also has an onboard RGB LED and piezo which can be used a knock sensor and various tune and sound effects. Plus you can add extra circuitry with the matching protostick! For more information and to order, click here.

August 25, 2014

Add numeric keypad entry to your vehicle with Arduino

If you need a way to allow access to a motor vehicle without using the keys (for example to allow children to retrieve their belongings, without messing around the with radio etc) then the following project by Stephen Newberry solves the problem nicely. Stephen has documented how to add an Arduino-controlled numeric keypad that can activate the central locking and thus let the user open the doors.

The key (!) to a successful system is locating the circuit in the vehicle that activates the central locking, and the rest is quite simple thanks to the ease of working with an Arduino. Finally, a quick demosntration is shown in the following video:

For those interested in reproducing this, Stephen has made the schematic and sketch available on Google Docs. And for more, we're on facebooktwitter and Google+, so follow us for news and product updates as well.

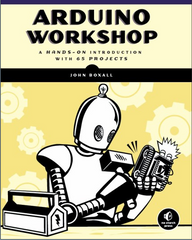
If you're looking to learn how to use an Arduino with numeric keypads and much more, you can't go past reading a copy of "Arduino Workshop -  A Hands-On Introduction with 65 Projects” by John Boxall.

Arduino Workshop takes the reader from having zero knowledge about the Arduino platform, electronics and programming and leaves them with the know-how and instructions on everything from blinking an LED, to robotics, wireless data, cellular communications, motor control, sensors, Internet connected systems and more. For more information including a sample chapter and table of contents, visit the book page.

August 22, 2014

Display RSS news feeds using a Freetronics Dot Matrix Display

Our range of LED dot matrix displays are used for all sorts purposes, and one new example we'd like to share is by Mark Cohen who uses the DMD to display RSS news feeds of interest. The process is quite simple, and requires a PC running ruby code to extract the required RSS feed and send it as text to the serial/USB ouput.

The Arduino-compatible board then receives the text stream via USB and sends it to the DMD. A quick demonstration is shown in the following video:

This is a great example of using a DMD to display relevant information - many websites, services and even cloud-based email providers can offer an RSS feed which you can now harness for the DMD. You could also use two or more DMDs for a longer display!

For more information and the example code, visit Mark's interesting website. And for more, we're on facebookGoogle+, and twitter - so follow us for news and product updates as well. 


As used in the project mentioned above, check out our Freetronics Dot Matrix Displays. They're simple to use, yet very bright for indoor and outdoor situations. Available in various colours, the 32 x 16 LED matrix can display text and graphics quite easily - and can be daisy-chained together for extended displays. For more information, see our range of Dot Matrix Displays here

August 21, 2014

Easily display remote data on a web page using Arduino

Now and again we see our products "out in the wild", and another example has been reviewed by a popular video blogger My Hobbyelectronics - who demonstrates how easy it is to display data gathered by an Ethernet-enabled Arduino board onto a webpage. In this example he uses our TEMP: digital temperature sensor for a source of useful data.

This can be a simple framework for monitoring all sorts of sensors from a distance over the Internet. Doing so is incredibly simple thanks to the examples included with the Arduino Ethernet library, and with our EtherTen board the physical size of the required equipment is reduced as well. Check out the following video to see how it's done:

Kudos to Nick once more for another interesting video. For this and other interesting videos related to the Arduino, Raspberry Pi and technology world - subscribe to Mr Hobbyelectonics' YouTube channel. And for more, we're on facebooktwitter and Google+, so follow us for news and product updates as well.

Have you used a Freetronics product and shown the world? If so - we'd love to hear about it - please email support at freetronics.com or show off in the Project Showcase!

August 20, 2014

Make your own Arduino-powered MIDI Bass Pedals

After purchasing an older Hammon M2 organ and being dissatisfied with the sounds from the pedals, Ron Czarnik refurbished and remounted them into the housing of a child's piano to create a fantastic MIDI-compatible instrument with the help of an Arduino.

Although the original pedal circuit design was somewhat daunting, with some research Ron has converted them to simple switches so they can be read by the Arduino's digital inputs - at which point the MIDI translation and output can easily be created. Finally the new enclosure is a work of art, as shown in the following video:

A great use of some older parts which have been converted into something new - for complete details visit the project Instructable page. And for more, we're on facebookGoogle+, and twitter - so follow us for news and product updates as well.

If you're looking for an Arduino Uno-compatible board for various projects, choose what tens of thousands of others have done and use our Freetronics Eleven - the Arduino-Uno compatible with low-profile USB socket, onboard prototyping space and easy to view LEDs: 

August 20, 2014

Voice-controlled Home Automation with Raspberry Pi

If there's one thing that movies of the 20th century promised - it was voice control of everything at our whim. Although this hasn't become overly prevalent in today's home - you can create your own system with some effort and add voice control to all manner of devices around the home with the help of a Raspberry Pi.

This has been demonstrated by Prince Stevie-Ray Charles Balabis who uses Steven Hickson's Voice Control software in order to trigger wireless 433 MHz power outlets. Thanks to using wireless outlets the system can be completed with a minimum of hardware and zero mains-rated wiring, keeping things safe. The system works very well, as Prince has demonstrated in the following video:

With some imagination and a little effort much more could be controlled with the software, so to get started visit Prince's interesting website. And for more, we're on facebookGoogle+, and twitter - so follow us for news and product updates as well.

If you need to connect external circuitry to your Raspberry Pi, consider our PiBreak board. It provides labelled breakout pins for all GPIOs, a large prototyping area with solder pads, and power rails for easy power connection:

Furthermore the PiBreak also includes mounting hardware to firmly attach it to your Raspberry Pi using a nut, bolt, and spacer - and is compatible with all revisions of both model A and B Raspberry Pi computers. For more information about our new PiBreak board, our Getting Started guide, and to order - visit the product page.

August 19, 2014

Build a huge Arduino-powered Domino Clock

After being inspired by a similar project, Instructables member stregoi decided to recreate their own verison (and at a lower cost) of a large Domino Clock. This type of clock uses three huge dominos, each of which represent a digit in the current time.

The dots for the numbers are usually commerically-available flip-dots, however due to the cost the creator has made their own versions complete with small home-made electromagnets. This has been a success and quite easy to replicate if you have the time, and the final example is pleasing to the eye, for example:

Controllin the dots is simple with high-power shift register ICs which is explained along with construction and sketch details on the clock's Instructable page. And for more, we're on facebooktwitter and Google+, so follow us for news and product updates as well.

The most important part of any clock project is the inclusion of an accurate real-time clock IC. Here at Freetronics we have the Maxim DS3232 real-time clock IC module:

Apart from keeping accurate time for years due to the temperature-controlled oscillator and having a tiny coin-cell for backup, it is very simple to connect to your Arduino project. A driver library allows your program to easily set or read the time and date. Perfect for clock projects, dataloggers or anything that needs to know the date and time. Furthermore it contains a digital thermometer and 236 bytes of non-volatile memory to store user settings and other data. For more information, check out the module page here.

August 19, 2014

The Drinking Bird "Flock Clock"

Next in our series of interesting Arduino-powered clock projects is the "Flock Clock" by Mike Rigsby. His adaption of a clock uses an incredibly original method of displaying the time, by using twelve "drinking birds" - each of which can be triggered to move by a peltier unit underneath each of their bases.

The time is then displayed by moving each bird, whose number of movements can be interpreted into a binary number and then the time of day. Mike gives us a quick demonstration of the clock in the following video:

As an Arduino can't handle the current required for each peltier, relays are used to switch the high current for each unit. Certainly an orginal design, for which you can find all the details on the project page. And for more, we're on facebook, twitter and Google+, so follow us for news and product updates as well. 

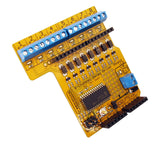
If you're looking for a simple way to control many relays from your Arduino, without using up all your digital I/O pins - check out our RELAY8: driver shield:

So what is the RELAY8:? It's an Arduino shield that allows you to drive up to 8 relays from your Arduino using just 2 I/O pins with this shield. It communicates with your board using I2C, so you can even stack several shields together to drive 16, 24, or more outputs! Includes back-EMF protection and works with a wide range of relays. Perfect for home automation projects! For more information and to order, click here