December 16, 2014

Control your Arduino with a smile

With the right software on a host PC, your Arduino or compatible can be controlled via all sorts of methods - even a smile. This has been demonsntrated by Marianna Mezhibovskaya who uses smile-recognition software on a Mac and an Arduino to make a smile-controlled candy machine.

The software uses a webcam to determine if the subject is smiling - and if so, sends serial text via USB to the Arduino which takes action. In this case it controls the motor inside the candy machine to dispense some treats. This is shown in the following comedic video:

For more information on this project, including download links for the required software and code - visit the project page. And for more, we're on facebookGoogle+, and twitter - so follow us for news and product updates as well.

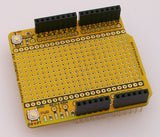
If you need to add external hardware or devices to your next Arduino project, you'll need a protoshield to mount the external circuitry. In doing so, consider our range of ProtoShields. From the tiny LeoStick to the Mega we have a wide range to suit your application.

December 15, 2014

An Arduino-controlled miniature lift

As part of a university course, Diego Serranor was tasked with designing a model lift (or elevator) - and he's accomplished this quite well. Such a project is a good demonstration of how you can create automated devices that respond to user input with an Arduino.

The carriage position is determined with a series of photocells and LEDs, allowing the system to determine the correct position to stop when required. Call buttons and a level display are also used for realism compared to the real thing.

This could also be fitted to a more extravagant dolls house, or even made from LEGO for fun. Either way, to learn how visit the project's Instructable page. And for more, we're on facebookGoogle+, and twitter - so follow us for news and product updates as well.

 If you're looking into starting with Arduino and motor control, such as controlling a DC motor (or stepper motor) from your Arduino or compatible, check out our HBRIDGE: DC/stepper motor shield. Based around the powerful Allegro A4954 H-bridge driver IC you can control two DC motors with complete ease, or one bipolar stepper motor. With connections for external power management, a complete beginners' guide and documentation - motor control couldn't be any easier. For more information and to order, visit the HBRIDGE: page

December 15, 2014

Control an Arduino from within Minecraft

And now for something different comes the following ideas from Instructables member GeckoScraps, who shows us how easy it is to control an Arduino from within your own Minecraft worlds. It's an interesting idea and allows a fun new tangent from within the game.

The process relies on provided Windows software (however the C++ code is provided) that interfaces between Minecraft and the USB port. This software takes commands from Minecraft and converts them to serial text which can be acted upon by the Arduino connected to the USB port.

You can lear more from the project Instructables page, along with downloading all the required code. And for more, we're on facebookGoogle+, and twitter - so follow us for news and product updates as well.

If you're looking for an Arduino Uno-compatible board to embed into various projects, choose what tens of thousands of others have done and use our Freetronics Eleven - the Arduino-Uno compatible with low-profile USB socket, onboard prototyping space and easy to view LEDs: 

December 15, 2014

Build a Raspberry Pi-controlled EEPROM Gang Programmer

When taking some projects from the prototype to production stage, the adage "time is money" certainly rings true. Especially if the projects needs some pre-programmed EEPROMs. One way to solve this is to make a gang programmer, and doing so has been documented by the people at Mikronauts.

A project of theirs requires a preprogrammed Microchip 24LC512 - a common I2C-bus EEPROM, and with their programmer up to eight can be programmed in one pass. The total amount you can use is limited to the available number of I2C bus address options for the EEPROM being programmed, in this case eight. The circuit is very simple, and just requres connections for power, SDA and SCL between the programmer and the Raspberry Pi.

The software is based on work by Amandeep Singh, whose useful Pi I2C programmer code is the base of the software. Overall this is a neat solution to the problem, and more details can be found on the project website. And for more, we're on facebookGoogle+, and twitter - so follow us for news and product updates as well.

If you need to make your own EEPROM programmer for your Pi, one option is to use our PiBreak board. It provides labelled breakout pins for all GPIOs, a large prototyping area with solder pads, and power rails for easy power connection:

Furthermore the PiBreak also includes mounting hardware to firmly attach it to your Raspberry Pi using a nut, bolt, and spacer - and is compatible with all revisions of both model A and B Raspberry Pi computers. For more information about our PiBreak board, our Getting Started guide, and to order - visit the product page.

December 12, 2014

Mr HobbyElectronics reviews the Freetronics PiLeven board

Now and again we see our products "out in the wild", and another example has been reviewed by a popular video blogger My Hobbyelectronics - who demonstrates how easy it is to set up and use our new PiLeven board.

His tutorial explains what is required to connect the PiLeven to the Raspberry Pi right through to creating and uploading an Arduino sketch on the Pi and uploading it to the PiLeven. Review the following video to see this in action:

For more interesting videos like this, subscribe to the MrHobbyElectronics YouTube channel. And for more, we're on facebooktwitter and Google+, so follow us for news and product updates as well.

Have you used a Freetronics product and shown the world? If so - we'd love to hear about it - please email support at freetronics.com or show off in the Project Showcase!

December 12, 2014

"Piccolo" - the tiny open-source CNC robot

Making your own CNC machine (computer numerical control) is a lot of fun, and results with a device that can be used to create artwork to being used as a comptuer-controlled laser cutter. However the cost in both time and funds can be somewhat draining for the beginner. However this is no longer the case thanks to the "Piccolo".

This is an open-source desktop CNC machine which you can make yourself. Based on an Arduino-compatible board and parts that can be ordered or created with a laser cutter yourself, the final result is a CNC machine that is only 50mm square and can be used on any desktop. Check out the video before for a detailed demonstration:

With some canny shopping and some spare time, you should be able to acquire all the parts without much effort at all - to get started, visit the Piccolo home page. And for more, we're on facebookGoogle+, and twitter - so follow us for news and product updates as well.

If you're looking to develope CNC machines on a larger scale, you will need to control full-sized stepper motors and a servo or two. To simplify the process you can use our new Freetronics StepDuino board:

The StepDuino is a complete, self-contained Arduino-compatible board with 2 onboard stepper motor drivers, 2 servo outputs, a 20x4 LCD, a micro SD card slot, and more! It's a fantastic general purpose board for any project that uses stepper motors. You can use it as the brain of your next robotics project!

The StepDuino uses the same processor architecture as the common Arduino Uno, so you can program it right from the Arduino IDE simply by selecting "Arduino Uno" as the board type. Everything simply works out of the box, just as it would with a regular Arduino - but now you can also drive steppers directly and display feedback on the huge LCD. For more infromation, tutorials and to order - visit the StepDuino page.

December 11, 2014

Emulating an Enigma cipher machine with Arduino

Once again the Arduino platform has been used to replicate something incredibly fascinating, and in this example we have the Enigma cipher machine used between the 1920s and 1940s. This device was used to code and decode messages in peacetime and also during World War Two. You can find out more about the Enigma machines through Wikipedia.

The technology behind an Enigma has been reproduced with the help of some clever code and an Arduino, and this latest example uses a neat touch-screen for the display and user interface. As you can see in the video below, the modern-day version works well and makes the process much simpler:

The project is open-source, and the links to the sketch and discussion can be found on the Arduino forum. And for more, we're on facebook, twitter and Google+, so follow us for news and product updates as well.

If you're looking for a neat display on a smaller scale for your Arduino (or Raspberry Pi), check out our 128x128 pixel OLED Module. With a diagonal size of 1.5" and 16,384 colours to select from, so almost anything is possible. Furthermore there's a microSD card socket, and removable tabs on each side which can hold LEDs and buttons:

And using the module is made simple - we have tutorials and drivers for both the Arduino and Raspberry Pi platforms - great for experimenters or those who use both systems.

Furthermore, check out the forum where members are already creating modified drivers to rapidly increase the display speed. For more information including our Quickstart guides - and of course to order - visit the OLED Module product page.

December 11, 2014

Bring vintage car audio into the 21st century with Arduino

Classic car enthusiasts will often obsess over recreating or preserving the vehicle down to the very last detail, however this obsession can often conflict with the needs of the present day - especially if the vehicle is also a daily driver. Andrew Wyatt faced the same problem when restoring his 1977 Toyota Celica - the stereo was well past the use-by date and needed updating.

However a new unit would look completely out of place, so Andrew instead used the orginal unit's housing as a base for a new Arduino-powered replacement. With a custom-made front panel, some classic LED matrix display units and a lot of work - the result is an FM tuner, clock, MP3 player, spectrum analyser and much more that looks "just right":

Kudos to Andrew for such an awesome modification, of which you can learn more about through his fascinating website. And for more, we're on facebookGoogle+, and twitter - so follow us for news and product updates as well. 

Have you been reading about Arduino and would like to understand more so you can work with projects like the example above, but not sure where to start? Then order one of our Experimenter's Kit for Arduino - as used in many classroom and learning environments:

The package includes a wide variety of parts, sensors and modules including: a servo motor, lights, buttons, switches, sound, sensors, breadboard, wires and more. Furthermore a Freetronics Eleven Arduino-compatible board is included to make this an extensive hobby experimenter, inventor and starter kit. 

However we don't leave you alone to figure it all out, included is a great project and instruction booklet, plus access to a supporting web page and software examples. In other words - this is everything you need to get started for a fun range of electronics and Arduino related projects! So to get started or for more information and to order, check out the product page.

December 11, 2014

"Raspdio" - the connected remote-controlled Internet Radio

For an interesting example of automation and the Raspberry Pi - the following project by George Koulouris will be of interest. They have created an Internet radio based arouund the Pi, which plays streaming audio from a varierty of services. However as an interesting twist, the start and stop times for the radio are stored in a Google Docs spreadsheet - which is polled by the Pi to determine when to play the radio. And for local control, a play button has also been added to the project.

Even if you're not interested in the remote aspects, this project results with a very neat end product, placed within a 3D-printed enclosure which looks great. All the design files have been made available so you can recreate your own. For inspiration, a demonstration is shown in the following video:

To get started, visit the Raspdio's project page. And for more, we're on facebookGoogle+, and twitter - so follow us for news and product updates as well.

If you need to rig up some hardware interfacing to your Pi, one options is to use our PiBreak board. It provides labelled breakout pins for all GPIOs, a large prototyping area with solder pads, and power rails for easy power connection:

Furthermore the PiBreak also includes mounting hardware to firmly attach it to your Raspberry Pi using a nut, bolt, and spacer - and is compatible with all revisions of both model A and B Raspberry Pi computers. For more information about our PiBreak board, our Getting Started guide, and to order - visit the product page.

December 10, 2014

There's more than one way to reset your Pi

Thanks to the minimalist design, the Raspberry Pi single-board computer is quite inexpensive - however some simple hardware features have been neglected. One of these is a simple reset button - by not having one you need to either remove and reinsert the USB power lead, or make your own solution.

The DIY option is quite easy, and the folks from hte MakeUseOf website have documented several methods of adding a hardware-based reset switch to your Raspberry Pi. These include a simple jumper across two GPIO pins, to adding a soft reset switch - and much more.


To learn about these various reset methods, visit the reset switch article. And for more, we're on facebookGoogle+, and twitter - so follow us for news and product updates as well.

If you're using a Raspberry Pi or other development board for a critical application, you may not be able to monitor the system at all times in case of a system failure that requires a reset. That's why here at Freetronics we have introduced the Watchdog Timer Module:

The Watchdog Timer Module listens for a signal from your Arduino or other microcontroller - such as a HIGH signal from a digital output, and if one is not received in the required time the Watchdog will reset the Arduino. You can select between one and five minutes for the duration before resetting the Arduino or other board. And with our Quick Start guide you can add this functionality to your project in no time at all. For more information and to order, please visit the Watchdog Timer Module page.