June 25, 2012

DIY Arduino-based Smart Vase

 Although this was designed as a prototype for future hotel rooms, the Smart Vase is an interesting experiment in the field of Internet-connected devices. Using an Arduino Mega, Internet connection and a colour LCD touch screen, Juan Armentia has created a device that can be used to check email, display various information from the web including weather, traffic, and so on. Finally, the hardware has been embedded in a nice vase which merges form and function, for example:


For more information, visit the project page for hardware notes, Arduino code and the project wiki. To build your own smart vase or other Internet-connected device, consider our Freetronics EtherMega. Apart from being fully Arduino Mega 2560 compatible, it includes a microSD socket, full Ethernet connectivity and optional PoE support:


June 25, 2012

Arduino-based Camera Lightning Trigger

 Adam Romanowicz was looking for a simple way to quickly trigger his Canon camera when photographing lightning strikes, and developed a simple and easy to build camera trigger. Using an Arduino, some simple circuitry and a hacked external shutter release cable, the results work very well. For example:


To save processing time the Arduino sketch uses direct port mapping instead of the digitalWrite function, so if you're using an Arduino-style board that uses a different microcontroller to the ATmega168 or -328, be sure to check the code before use. For more information, including the code and circuit, visit Adam's site here. To get started with your own camera trigger, consider using the Freetronics Eleven - the Arduino Uno-compatible with onboard prototyping space:


June 25, 2012

DIY Real time Spectrum Analyser

 Paul Bishop has used the simple Arduino tvout library, a microphone and simple external circuitry and some clever Arduino code to make a real time spectrum analyser that displays its results on a television monitor. The purpose of this is to graphically display the magnitude of an input signal versus frequency within the full frequency range that can be measured. The results are shown in the following video:


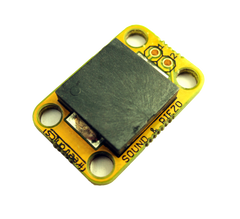
Although you won't get the same range as commercial test equipment, building this version is simple and still could be quite useful. Instead of fiddling with an electret microphone, consider using our MIC sound input module:


An interesting alternative display method would be with our super-bright LED Dot Matrix Displays, which would look great at a party or background visuals in a musical environment:


But in the meanwhile, to get started check Paul's blog here

June 25, 2012

Make your own TV "Etch a sketch" with Arduino

 No doubt many of you are familiar with the original drawing toy known as the "Etch a sketch". And as usual, someone has found a way to replicate this with an Arduino and the simple and effective tvout library. Ruy Lazaro used some simple circuitry and hacked up the circuit as a protoshield for his Arduino with the following results:


It is a simple project that can be a lot of fun, and especially useful when trying to attract younger people into the craft - they can make something and use it very easily on almost any television set or monitor with composite video inputs. When looking to make your own version, the circuitry will fit nicely on one of our range of ProtoShields, such as the ProtoShield Pro:


For more information, circuitry and code visit Ruy's blog here.


June 25, 2012

Sleep better with an Arduino

 Gareth Halfacree was having trouble with his newborn falling to sleep, and after learning that "white noise" and possibly various night light colours can help - designed the "Sleepduino". Using three RGB LEDs, a piezo for noise and some control circuitry the Sleepduino can be configured to output various lights and white noise to help someone get to sleep. 


If you're looking to recreate the Sleepduino for yourself, consider using our range of modules such as the super-bright RGB LED module:


and our SOUND piezo module:


For more information, including design files in Fritzing and the code, visit the Gareth's page here.  

June 22, 2012

Create an Arduino-based arbitrary waveform audio oscillator

 Using the library available from shaduzlabs, you can create arbitrary waveforms such as sine and square waves with an Arduino board. The library controls the PWM digital output and requires an external filter circuit for sine wave output. You can also create your own signals by entering the appropriate values into a lookup table for the library to interpreter.


The library is compatible with Arduino-compatible boards using the ATmega328, which includes our Freetronics KitTen,  Eleven, USBDroid and EtherTen boards. For more information, circuit details and other related Arduino projects, visit their website. One of the benefits of using our Freetronics Eleven board is that you could build the filter circuit required for sine wave output right on the board, as the Eleven has an onboard prototyping area:


June 22, 2012

"108" - an interactive installation made of garbage bags and fans

Using simple garage bags and a serious amount of cooling fans, Nils Völker has created an installation titled "one hundred and eight" that, in his words:

Although each plastic bag is mounted stationary the sequences of inflation and deflation create the impression of lively and moving creatures which waft slowly around like a shoal. But as soon a viewer comes close it instantly reacts by drawing back and tentatively following the movements of the observer. As long as he remains in a certain area in front of the installation it dynamically reacts to the viewers motion. As soon it does no longer detect someone close it reorganizes itself after a while and gently restarts wobbling around. 

Watch the following video for a demonstration of Nils' most elegant and fascinating installation:

One Hundred and Eight – Interactive Installation from Nils Völker on Vimeo.


Although the design instructions have not been published, there is not doubt that there would be a lot of shift registers, I/O expanders and relays involved to get all those fans moving. Once again, a fascinating example of what is possible with an Arduino board, imagination and serious funding. For more information on the 108, visit here

However to get started with your own Arduino-based projects is not expensive at all - start with our Freetronics Eleven, the Arduino Uno-compatible with onboard prototyping space:


June 22, 2012

Arduino-based Palliard Punch Installation

 To commemorate the history of punch-card controlled industrial weaving machines, Meg Grant has created an amazing installation that consists of a punch-card reader and a wall-mounted mimic display. Users can perforate their own cards, and once read the installation will play back various sound loops representative of the original weaving machines. You can see a demonstration in the following video:


Meg has used a mixture of Arduino hardware, an small PC running Processing, and two LED matrices to read the punch cards. For more information about the project, visit Meg's site here. When looking to create your own Arduino-based project, please consider using our Freetronics Eleven - the Arduino Uno-compatible with onboard prototyping area:


June 22, 2012

Build your own Arduino-based Digital Metronome

For those practicing music or looking for a source of various "ticking" noises - a metronome is always a useful tool to have. Kerry Wong has described an updated metronome based on the Arduino hardware that is small, easy to construct - and simple for the end user. 


The circuit is quite simple and well documented. Although he has used a bare Arduino circuit, one could save a lot of time by using a small Arduino-compatible board such as our LeoStick embedded in the project instead:


Apart from being one of the smallest Arduino-compatible boards on the market with full USB, it also has an onboard piezo which could be useful for sound generation in this project. To get started with your own metronome, visit Kerry's webpage here

June 22, 2012

DIY Arduino-powered Steampunk Moonphase Analog Timepiece

 Next in our series of steampunk-related electronics comes this amazing clock from 'fatratmatt'. Based on an Arduino Mega and real-time clock IC, the electronics have been housed inside an antique telephone case. The time and date are displayed using three vintage voltmeters, with the Arduino taking care of the time to voltage conversion. Watch the following video for a detailed look at the clock:


Even if you cannot find such a nice enclosure or vintage meters, the instructions will help you build an interesting clock with the same functions. For the instructions and other notes, visit here. To move forward with your own design, consider using our range of Arduino compatible hardware: including the EtherMega - the Arduino 2560-compatible with onboard EtherNet, microSD socket and optional PoE:


... in conjunction with out highly accurate real-time clock module and Mega-sized protoshields: