There are quite a few Arduino-based implementations of simple oscilloscopes documented in various places, however they generally rely on the analogRead() function and basic output to a processing sketch. Although there isn't anything wrong with this method, it hinders the maximum sampling rate available to the project due to the processor cycles required to churn through the code.
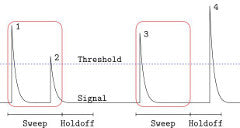
To try and find a better way, Instructables user Caffeinomane has taken the time to share his research into Arduino-based oscilloscopes and how they can be improved. He starts with using code that bypasses Arduino-related functions for speed, buffering data, creating a triggering system and external circuitry to allow measurement of AC signals - which requires a dual-rail power supply.

The concepts learn towards the more advanced Arduino user, however after reading through them you will be better equipped to understand more about suignal analysis with the Arduino. To learn more about the theory and operation of these ideas, check out the project Instructable page. And for more, we're on twitter and Google+, so follow us for news and product updates as well.
If the Arduino-based oscilloscope concept interests you and you need another board, order our Freetronics Eleven - the Arduino-Uno compatible with low-profile USB socket, onboard prototyping space and easy to view LEDs:


