


As one of the first hand-held gaming units of note, the Nintendo Game Boy was incredibly popular and entertained millions of people from the early 1990s. However as technology marches on it was swept by the wayside thanks to other mobile gaming platforms. However they can find a new life, and one example has been created by Instructables member TimG1967 who rebooted his with a Raspberry Pi.
This is an interesting project, as the creator has not only managed to squeeze in a Raspberry Pi model A, a colour LCD and rechargeable battery - he's stayed true with the orginial controls and indicators. That is the cross pad direction buttons, A, B, select and start are all used along with the analogue volume control and indicator LEDs. With the addition of some emulation software, classic games can be played in modern colour with the neat hack.

For a well-documented example of the build, visit the project page. And for more, we're on facebook, Google+, and twitter - so follow us for news and product updates as well.
If you're creating portable electronic projects and work with Lithium-Polymer or Lithium-Ion batteries, it can be difficult to build a safe and simple charger. Instead save time and risk by using our USB LiPo charger module:
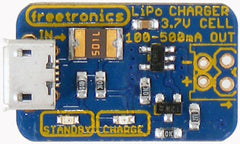
It's the convenient smart charger for 3.7V cells: just plug in your cell and a USB power source such as a mobile phone charger or computer, and you're done. And it includes a smart LiPo management chip that regulates the charge rate and detects when the cell is charged. Maximum charge rate current limit can be set using solder jumpers to suit your particular LiPo cell. For more details and to order, visit the module home page.


