


If you've been hankering for a laser engraver, but can't justify the cost of a commercial unit and don't want to play online store lotto, then the other option is to make your own. Doing so may sound difficult, however by following the process documented by Instructables user "getburnt" you can have a reasonable device working in a weekend or two. All of the parts can be obtained by typical retail hardware outlets, and with the Arduino as the brain of the engraver - command and control is simple as well.
Controlling the engraver is via a series of text character commands, and with the included code you can convert bitmap images to these files to engrave the images, and also create your own PC-interface software for your own customised control. The engraver is demonstrating its "Hello, world" moment in the following video:
For complete details and inspiration, check out the project Instructable page. And for more, we're on twitter and Google+, so follow us for news and product updates as well.
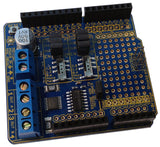
If you're looking into starting with Arduino and stepper motors (or DC motors) from your Arduino or compatible, check out our new HBRIDGE: DC/stepper motor shield. Based around the powerful Allegro A4954 H-bridge driver IC you can control two DC motors with complete ease, or one bipolar stepper motor. With connections for external power management, a complete beginners' guide and documentation - motor control couldn't be any easier. For more information and to order, visit the HBRIDGE: page.


